
Nandroid backup is the process of backing up every single thing inside your Android phone/tablet including
- Messages
- Call Settings
- Apps + App Data
- IMEI
Why is it important to have a Nandroid Backup?
1. When you brick your phone/tablet.
2. When you lose personal data.
3. When you lose your phone’s IMEI (especially Samsung phones).
How It Works?
To be able to have a Nandroid backup, you need the following:
1. A rooted phone.
2. Custom recovery (CWM,TWRP,Philz).
METHODS
– There are Two methods to do the nandroid backup
1. From recovery mode.
2. Using specific apps.
Method 1 – From Recovery Mode:
Steps:
1. Root your phone.
2. Flash a custom recovery (CWM,TWRP,PHILZ).
3. Boot into recovery mode.
4. Go to ‘Backup and Restore’ or ‘Backup’.
5. Choose either ‘Backup to SD Card’ or ‘Backup to External SD Card’.
6. Wait until the process is done.
7. When done reboot your phone.
8. Your backup file should be in your external storage or internal storage under CWM or TWRP folder.
Example Of Making Nandroid Backup On Galaxy Note 4:
Steps:
1. We first root the phone (Galaxy Note 4 – SM-N910H).
2. Then we flash a custom recovery (TWRP).
3. Then we power off the phone.
4. Hold down (power button + volume up button + home button) at the same time, wait for the Galaxy Note 4 logo to appear and let go of (power button) but still keep holding down the other buttons.
5. You should now be in ‘Recovery Mode’, this can be CWM or TWRP.
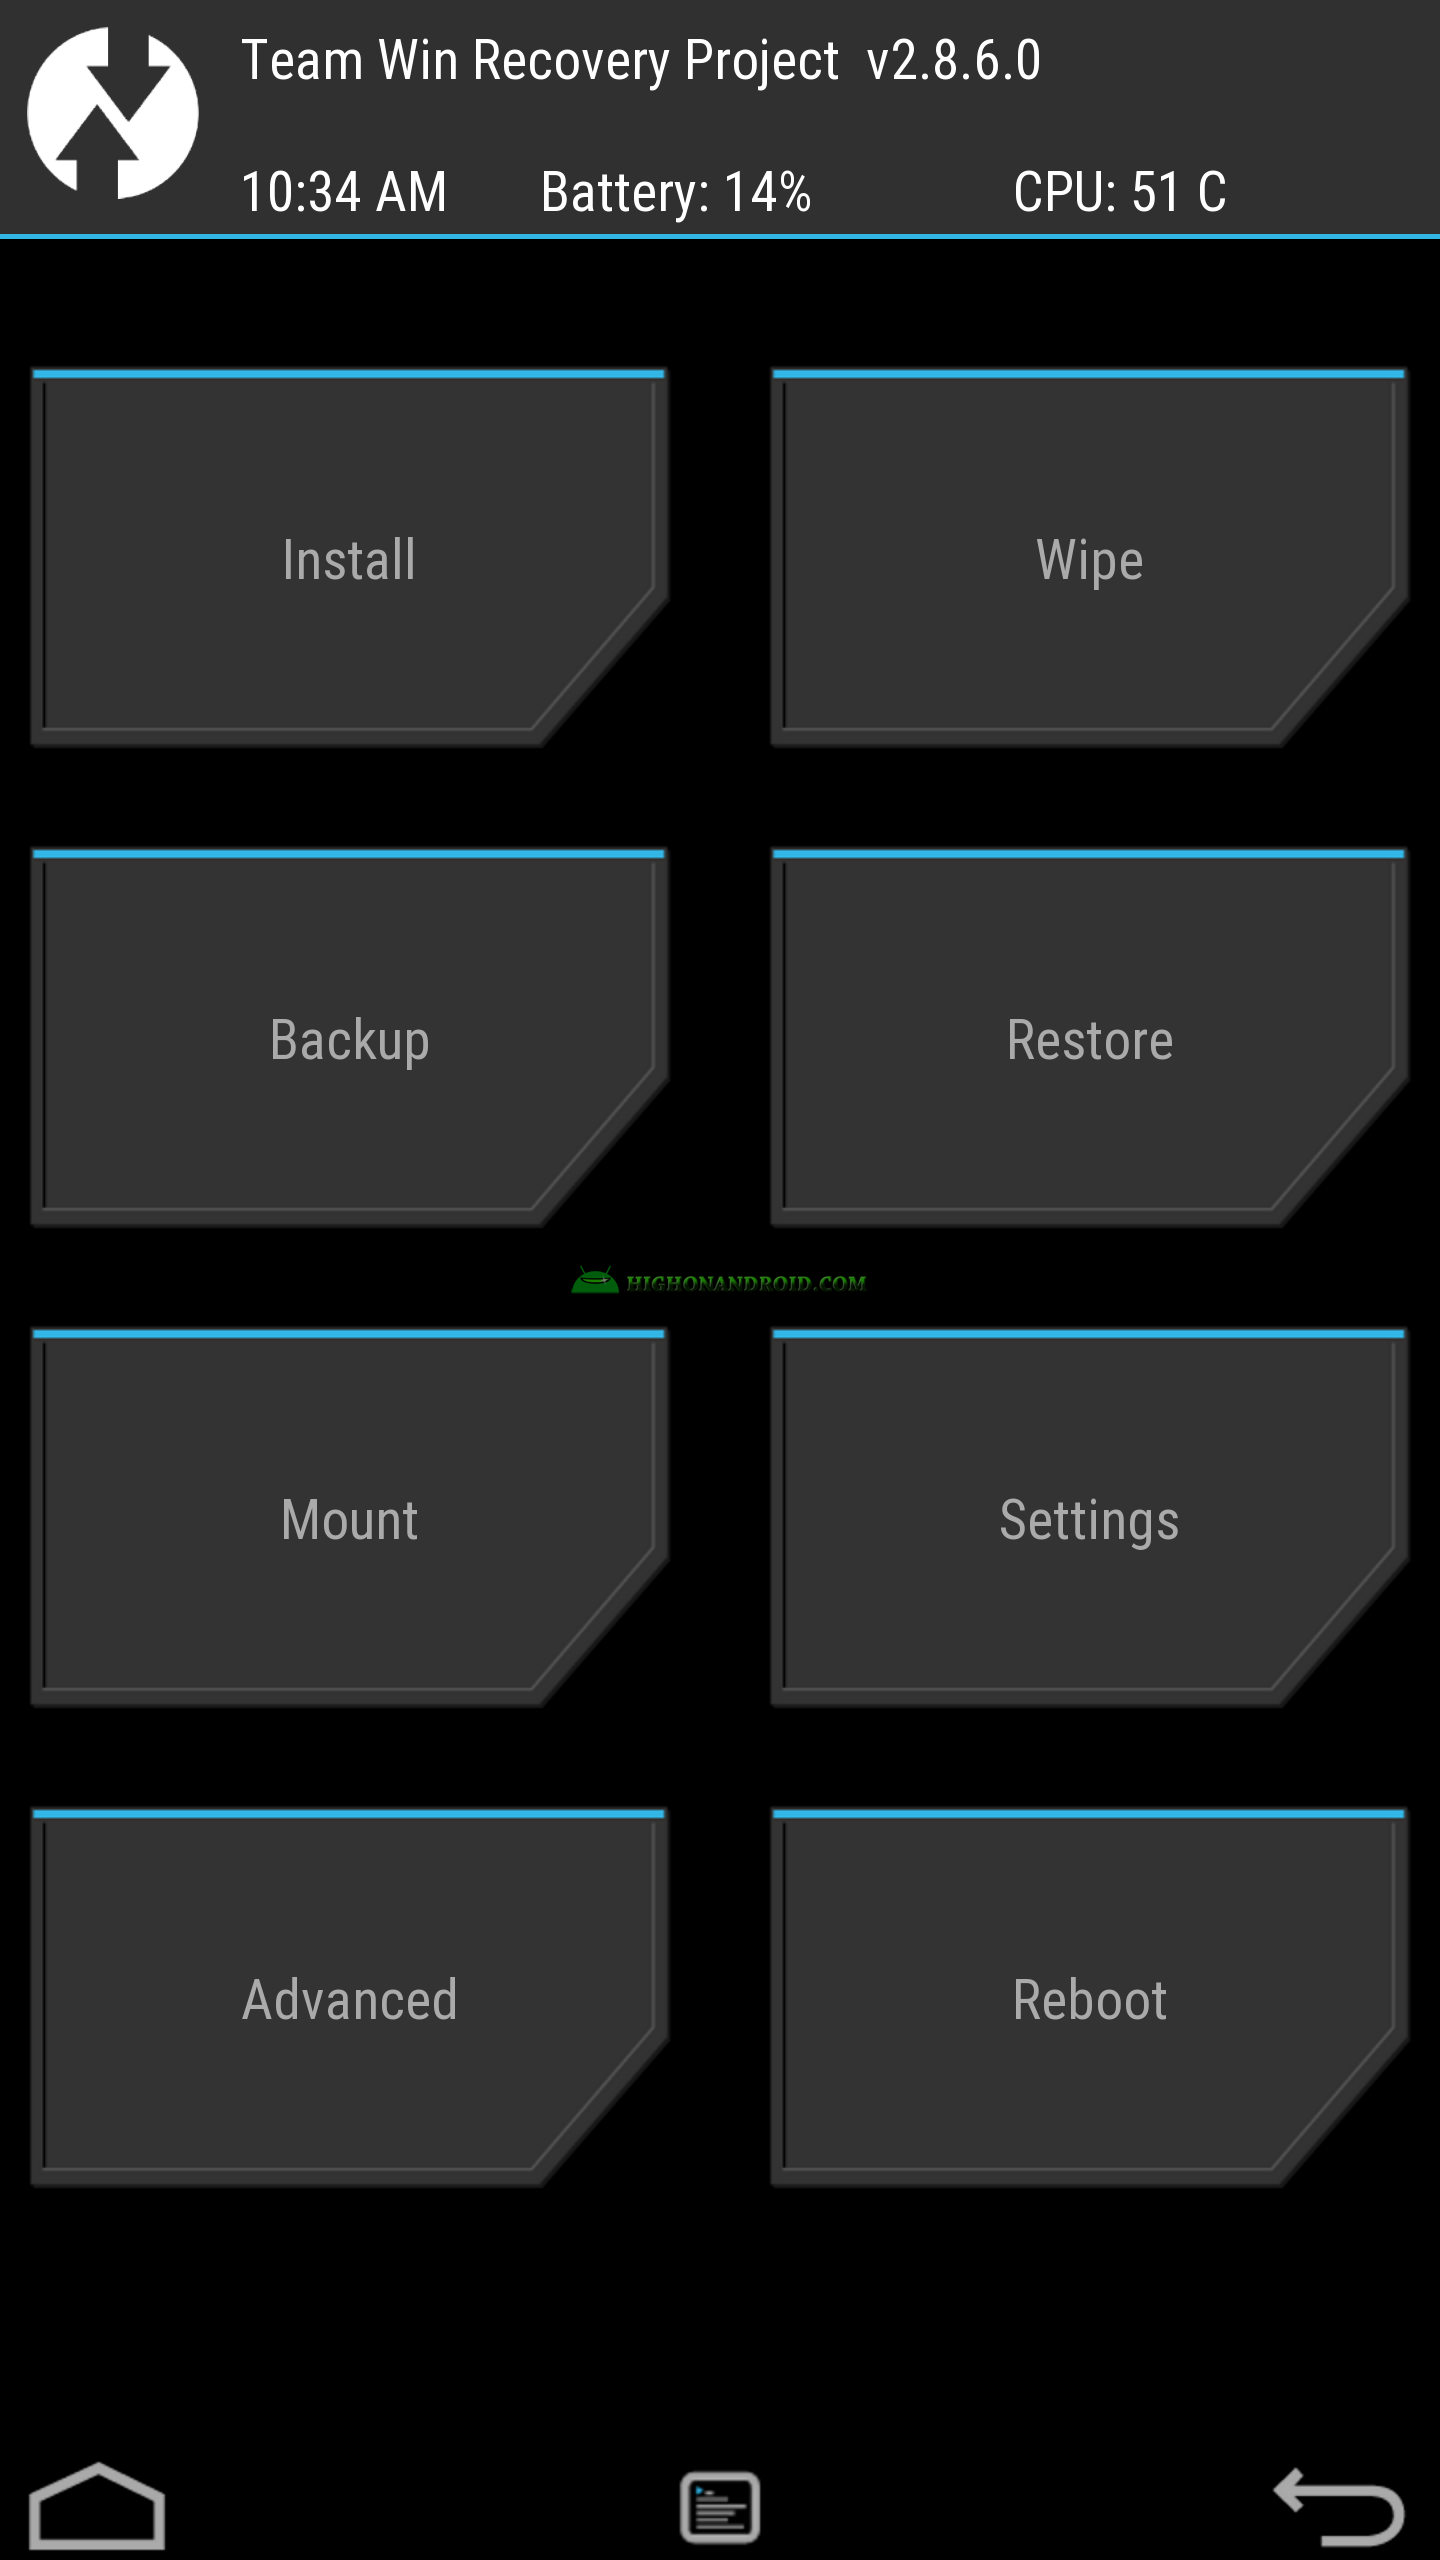
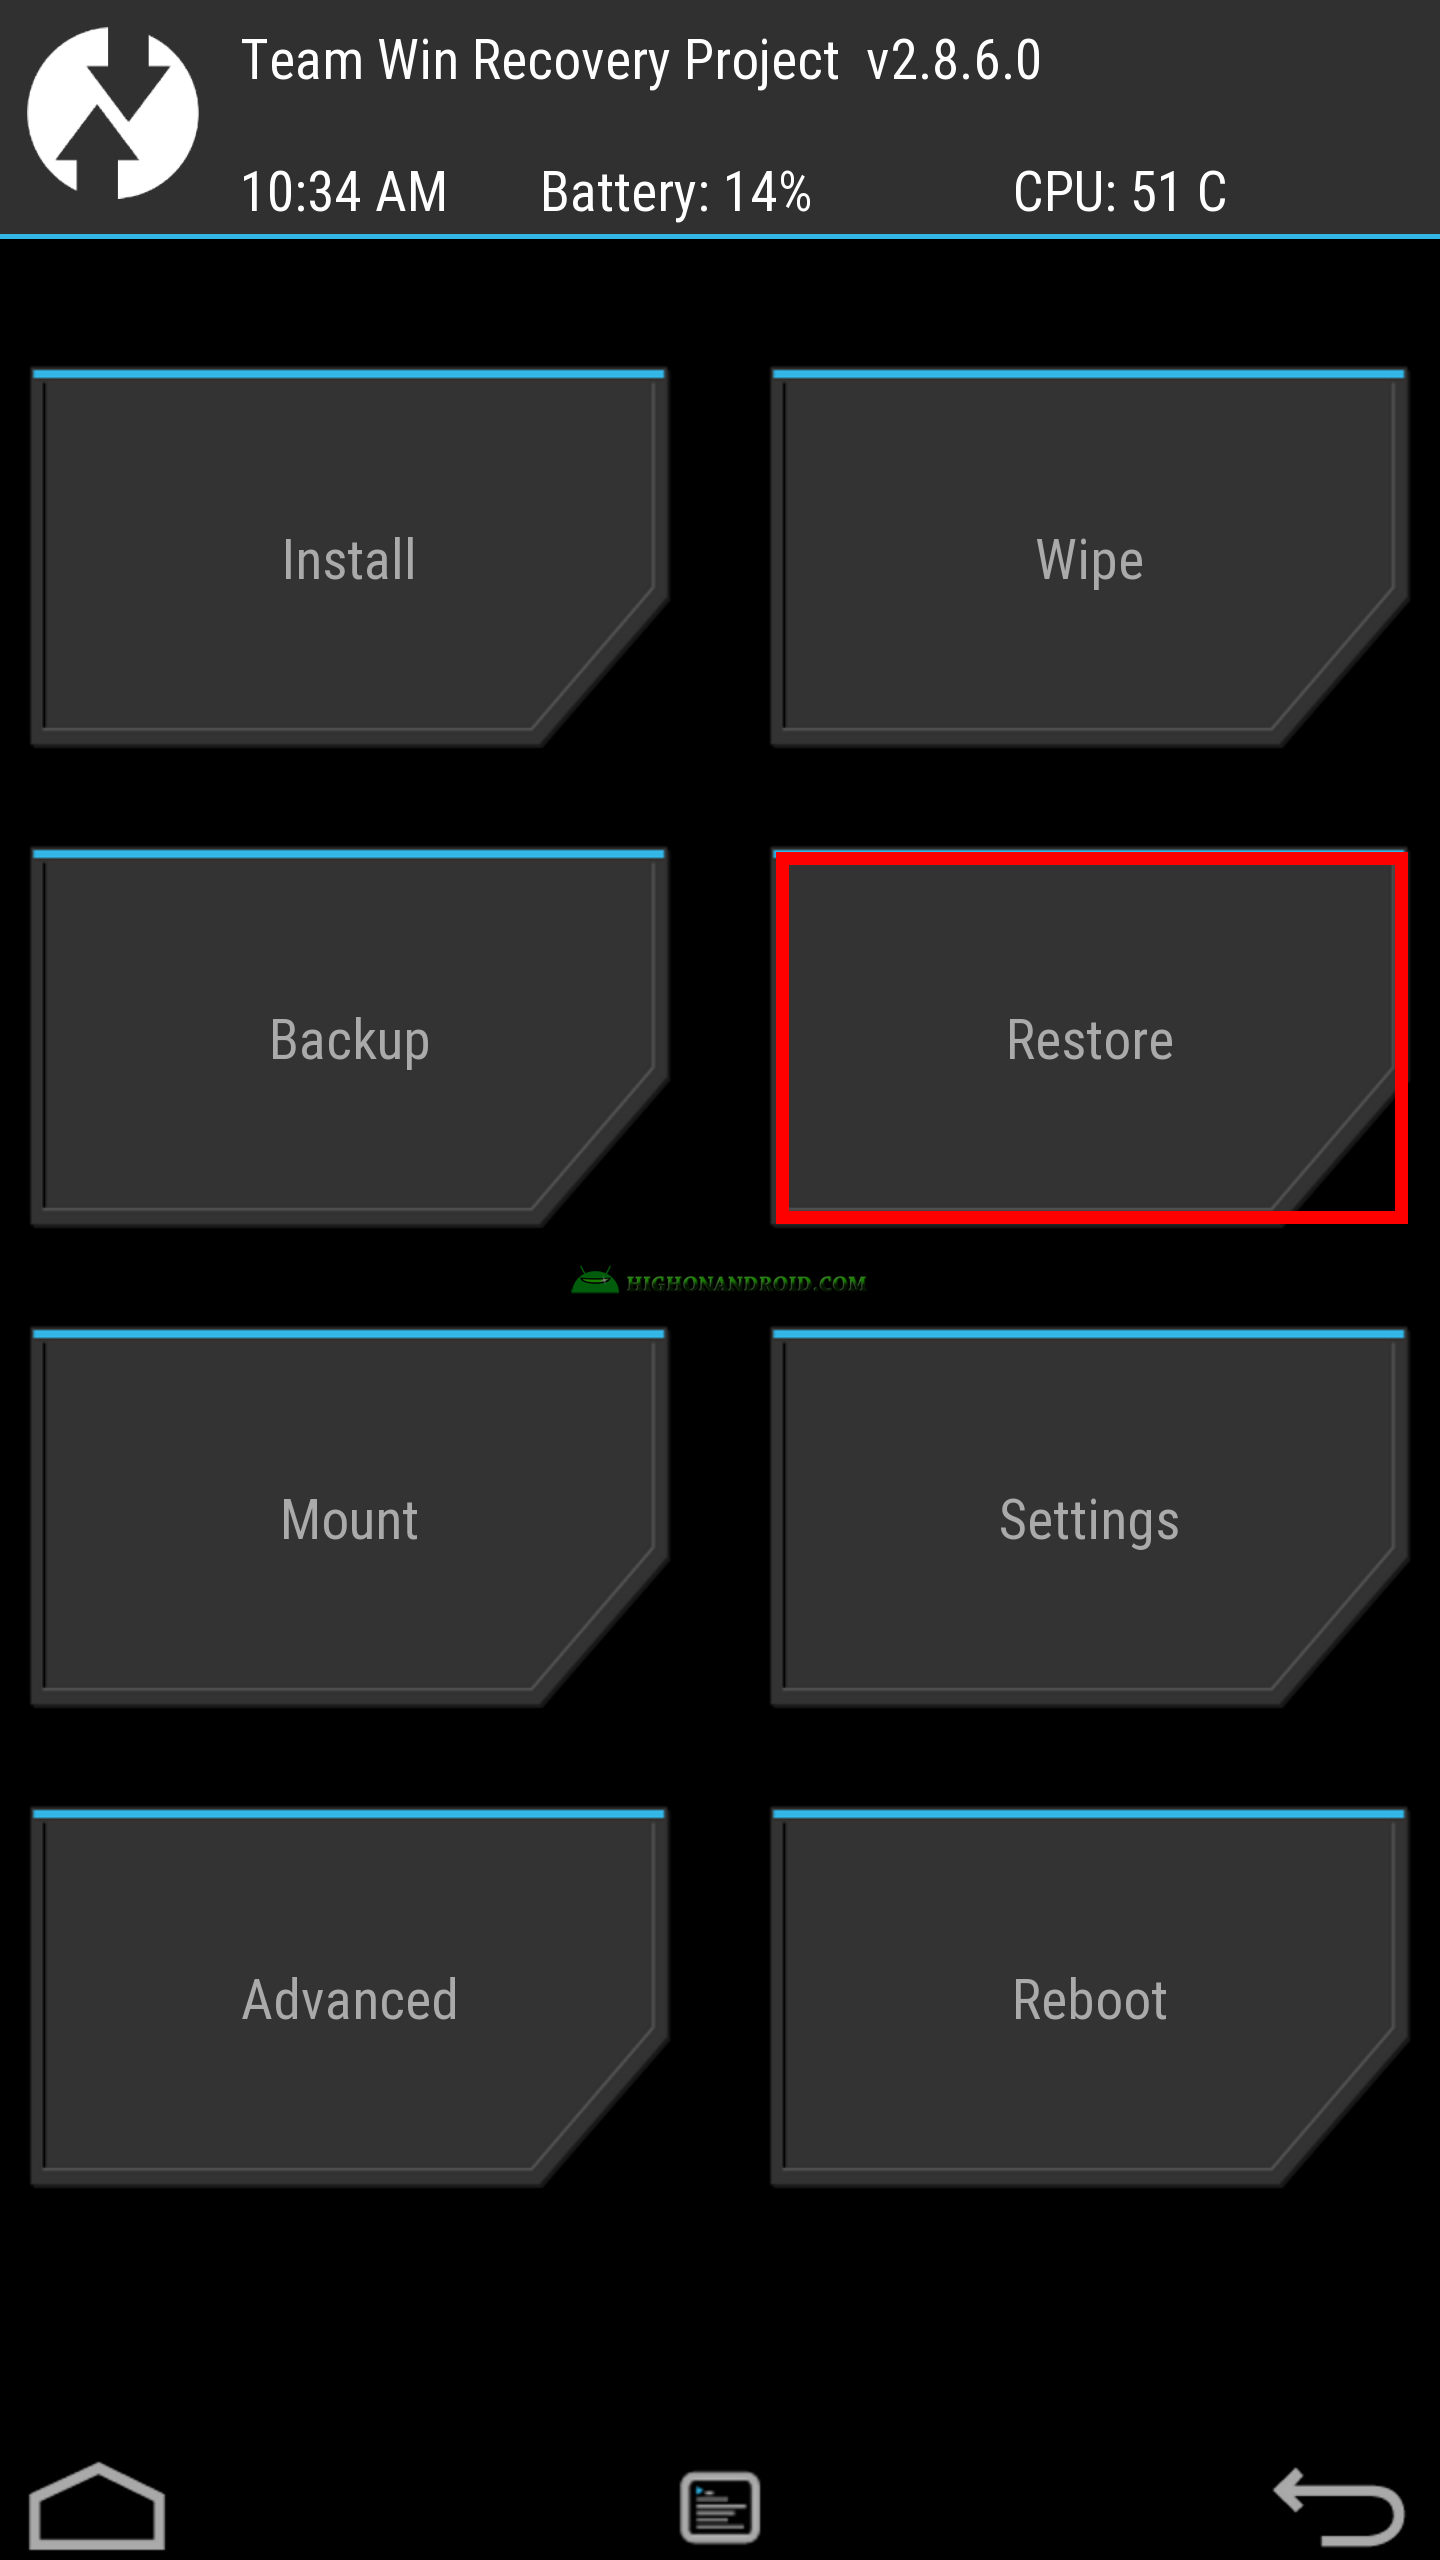
6. The following is the main screen of TWRP recovery mode:
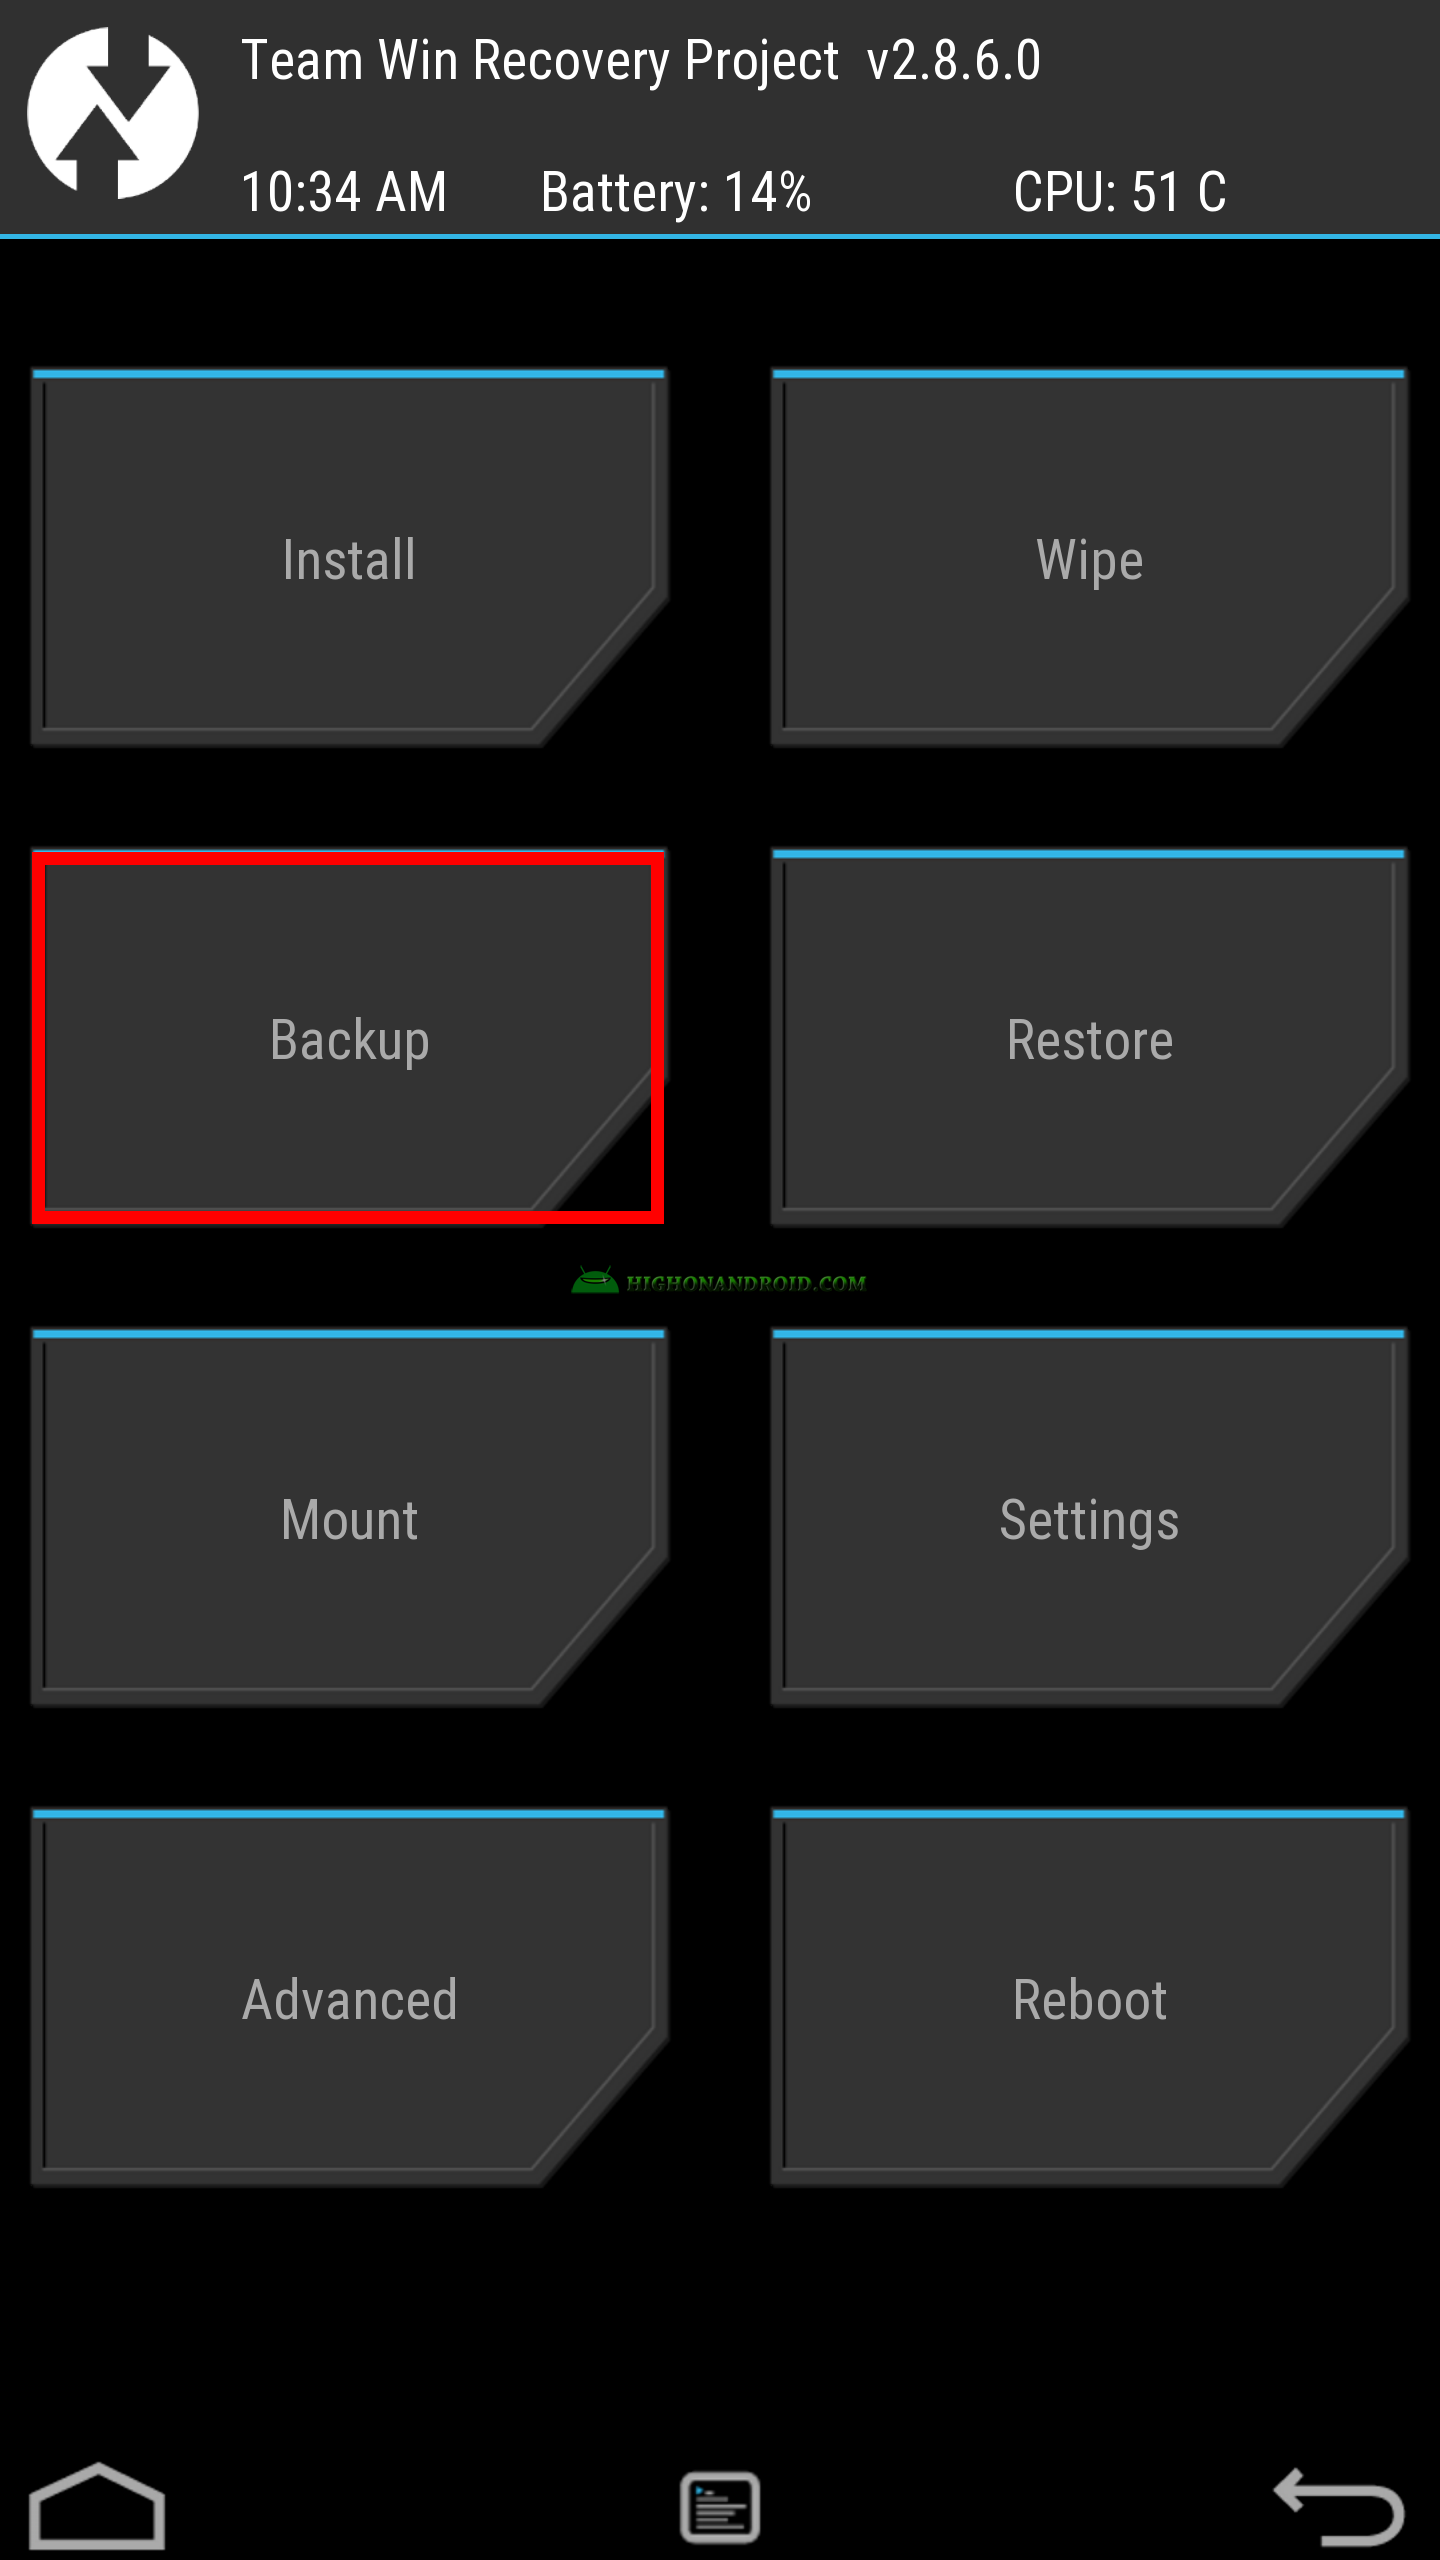
7. Tap on ‘Backup’ button.
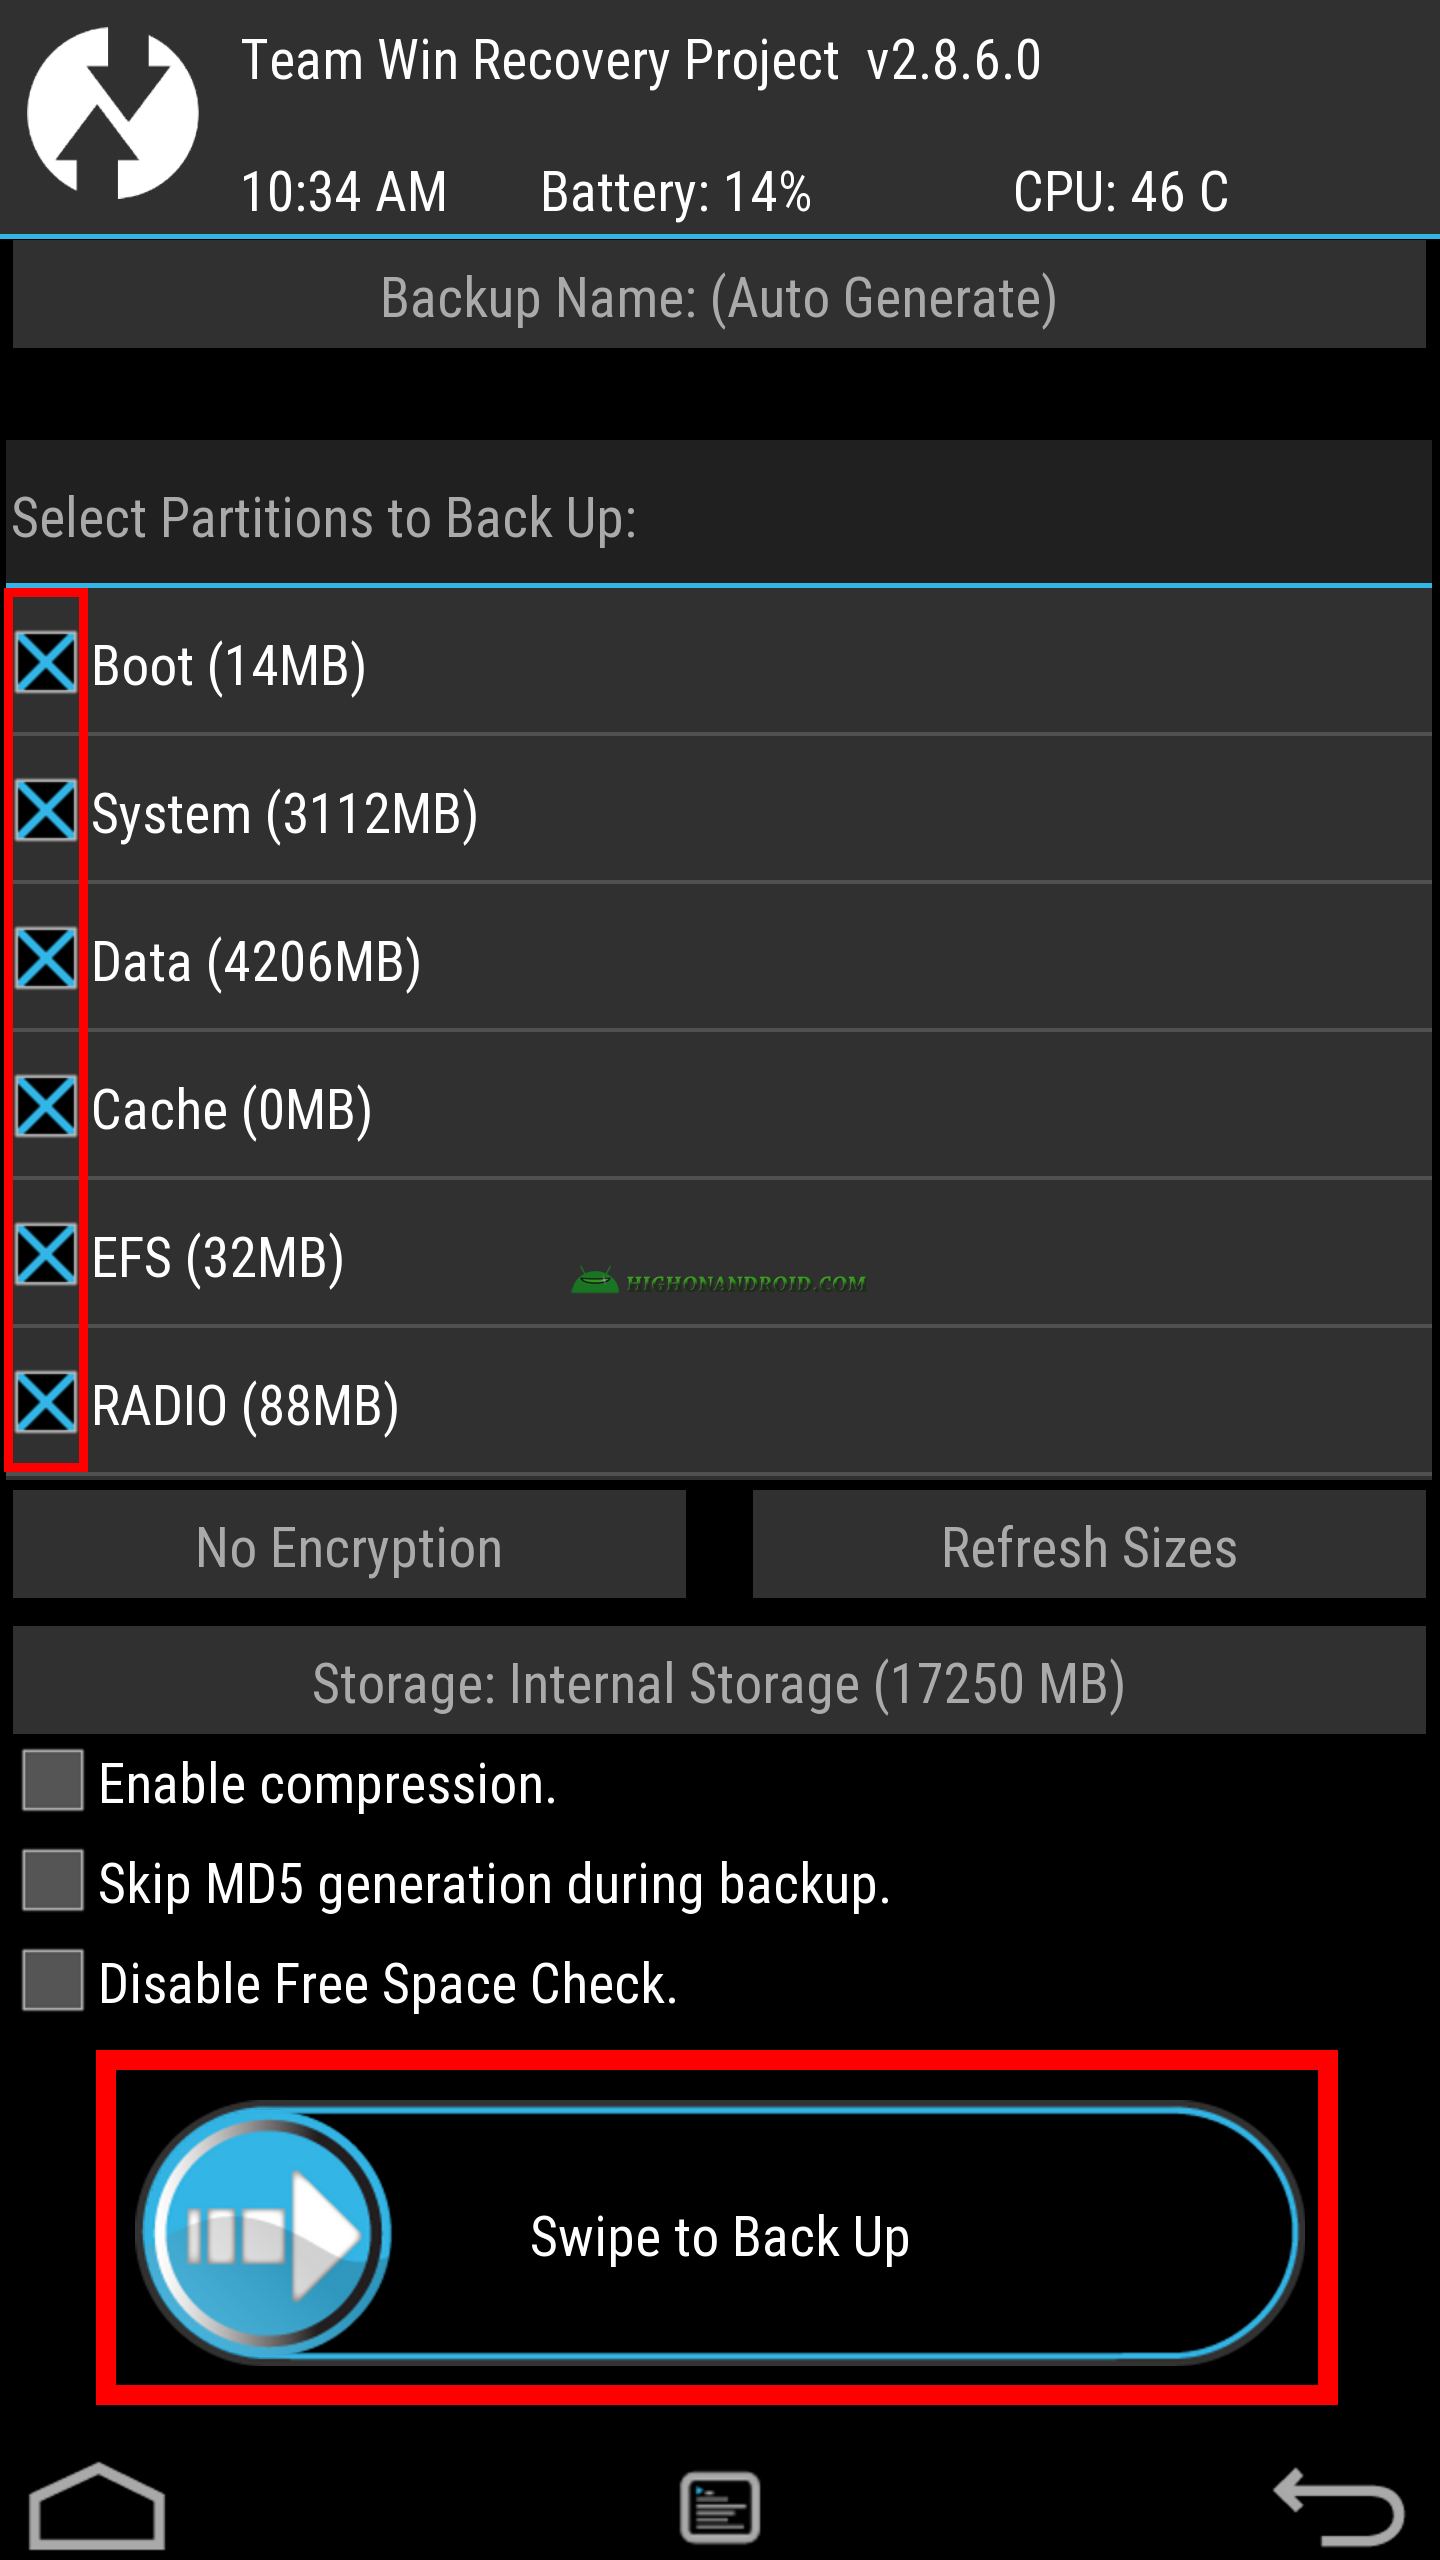
8.The following screen will show up giving us different partitions to backup.
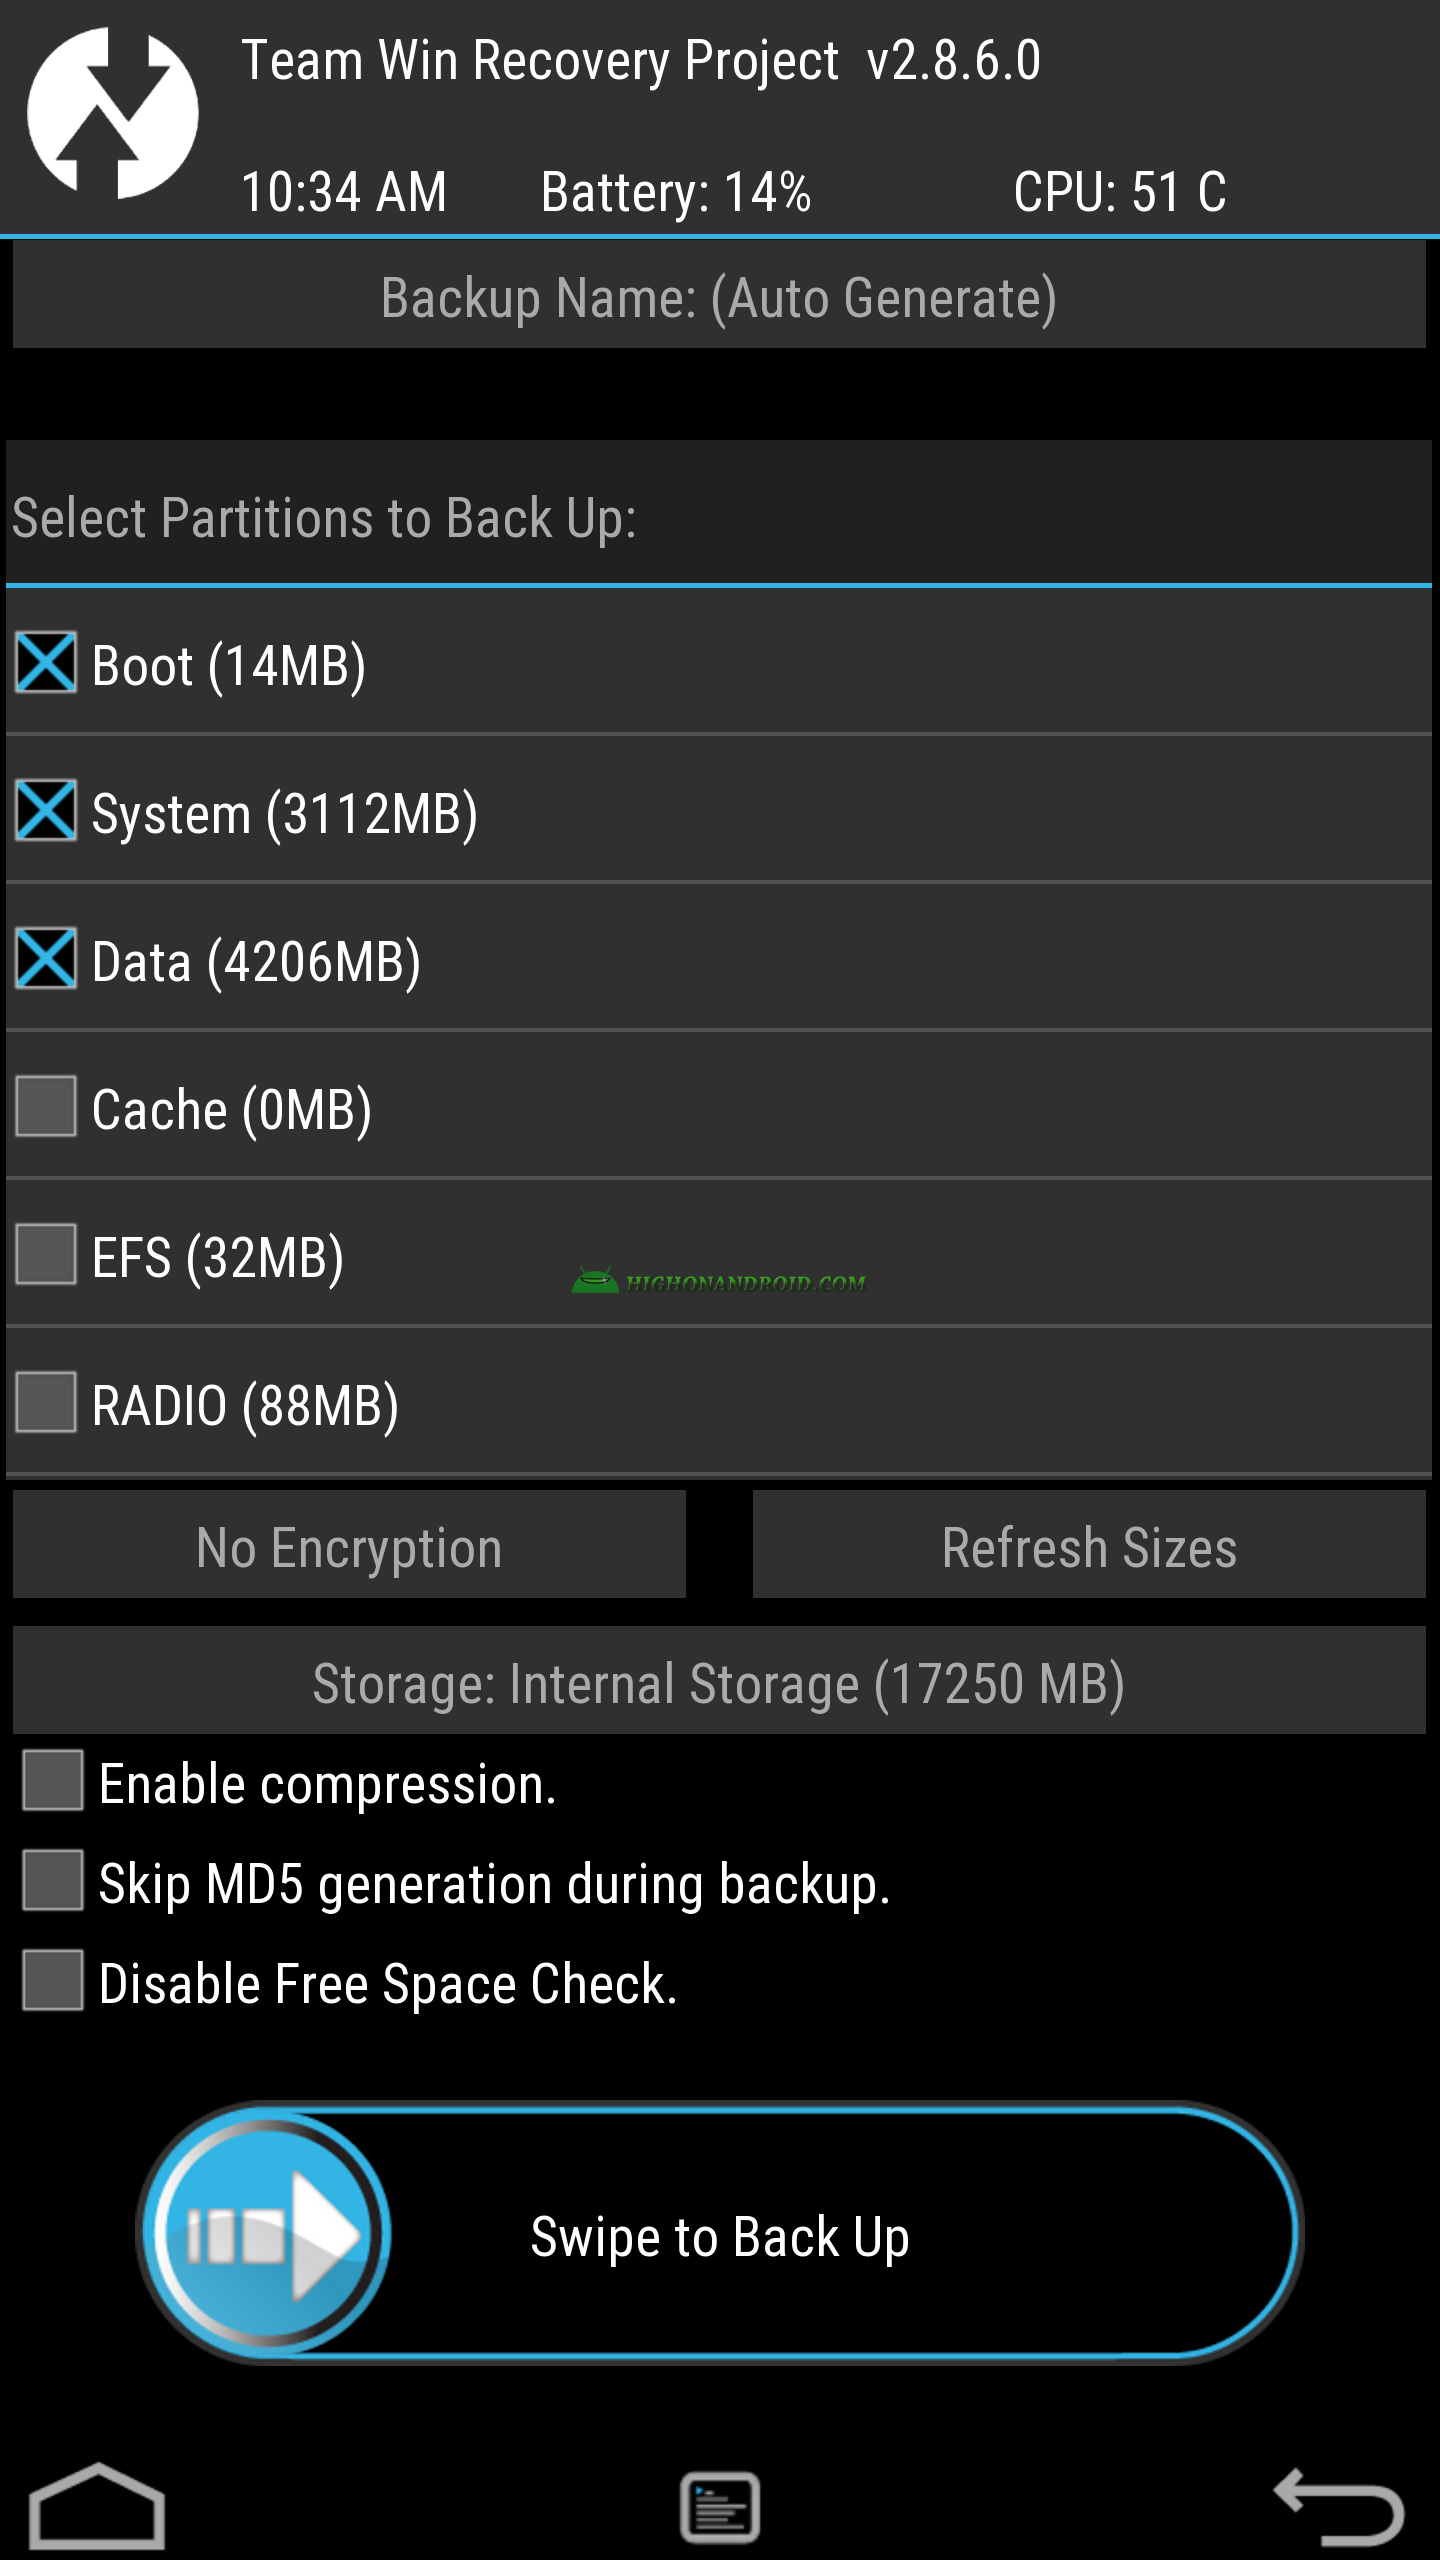
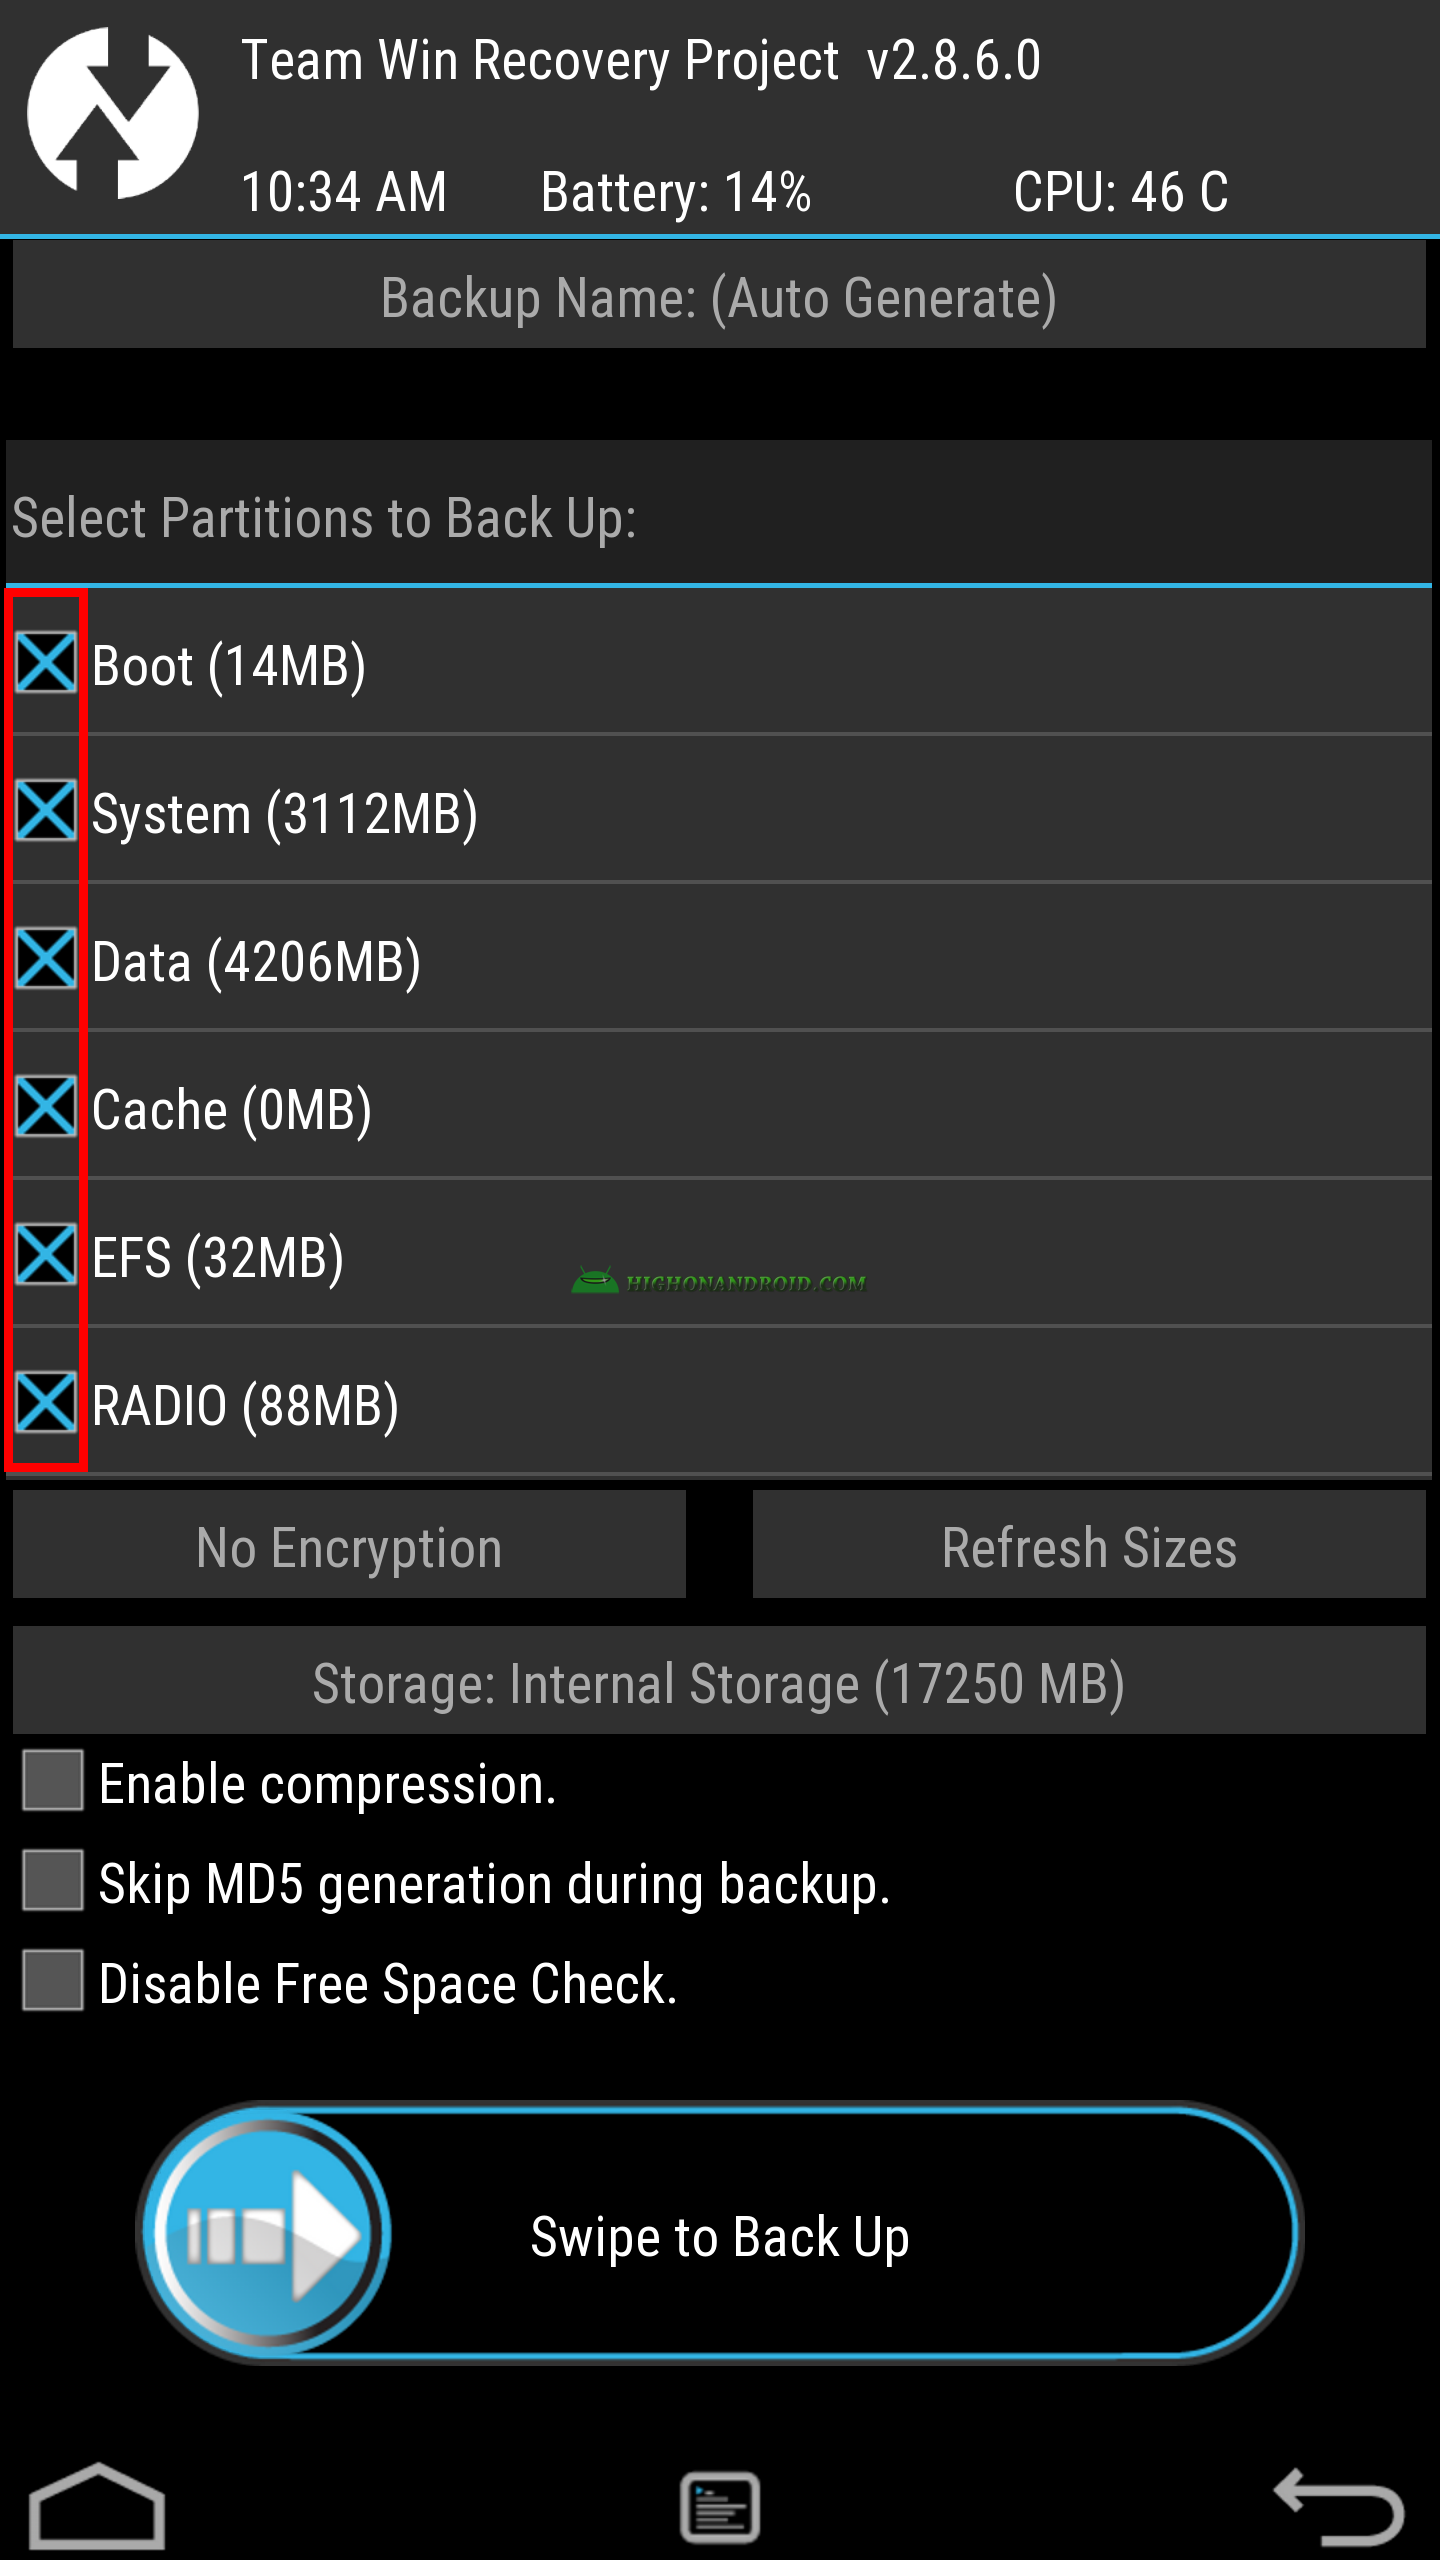
9. We’ll check all partitions.
10. Swipe to the right to start the ‘Back Up’ process.
11. The back up process will start and the below screen will show up.

Note:
– The backup screen provides us with some useful info
1. Battery Percentage: this may be useful especially when the battery percentage is low as it’s in our case.
2. Backup size and available space size (inside the phone).
3. Backup folder location which is inside internal phone storage TWRP/BACKUPS folder.
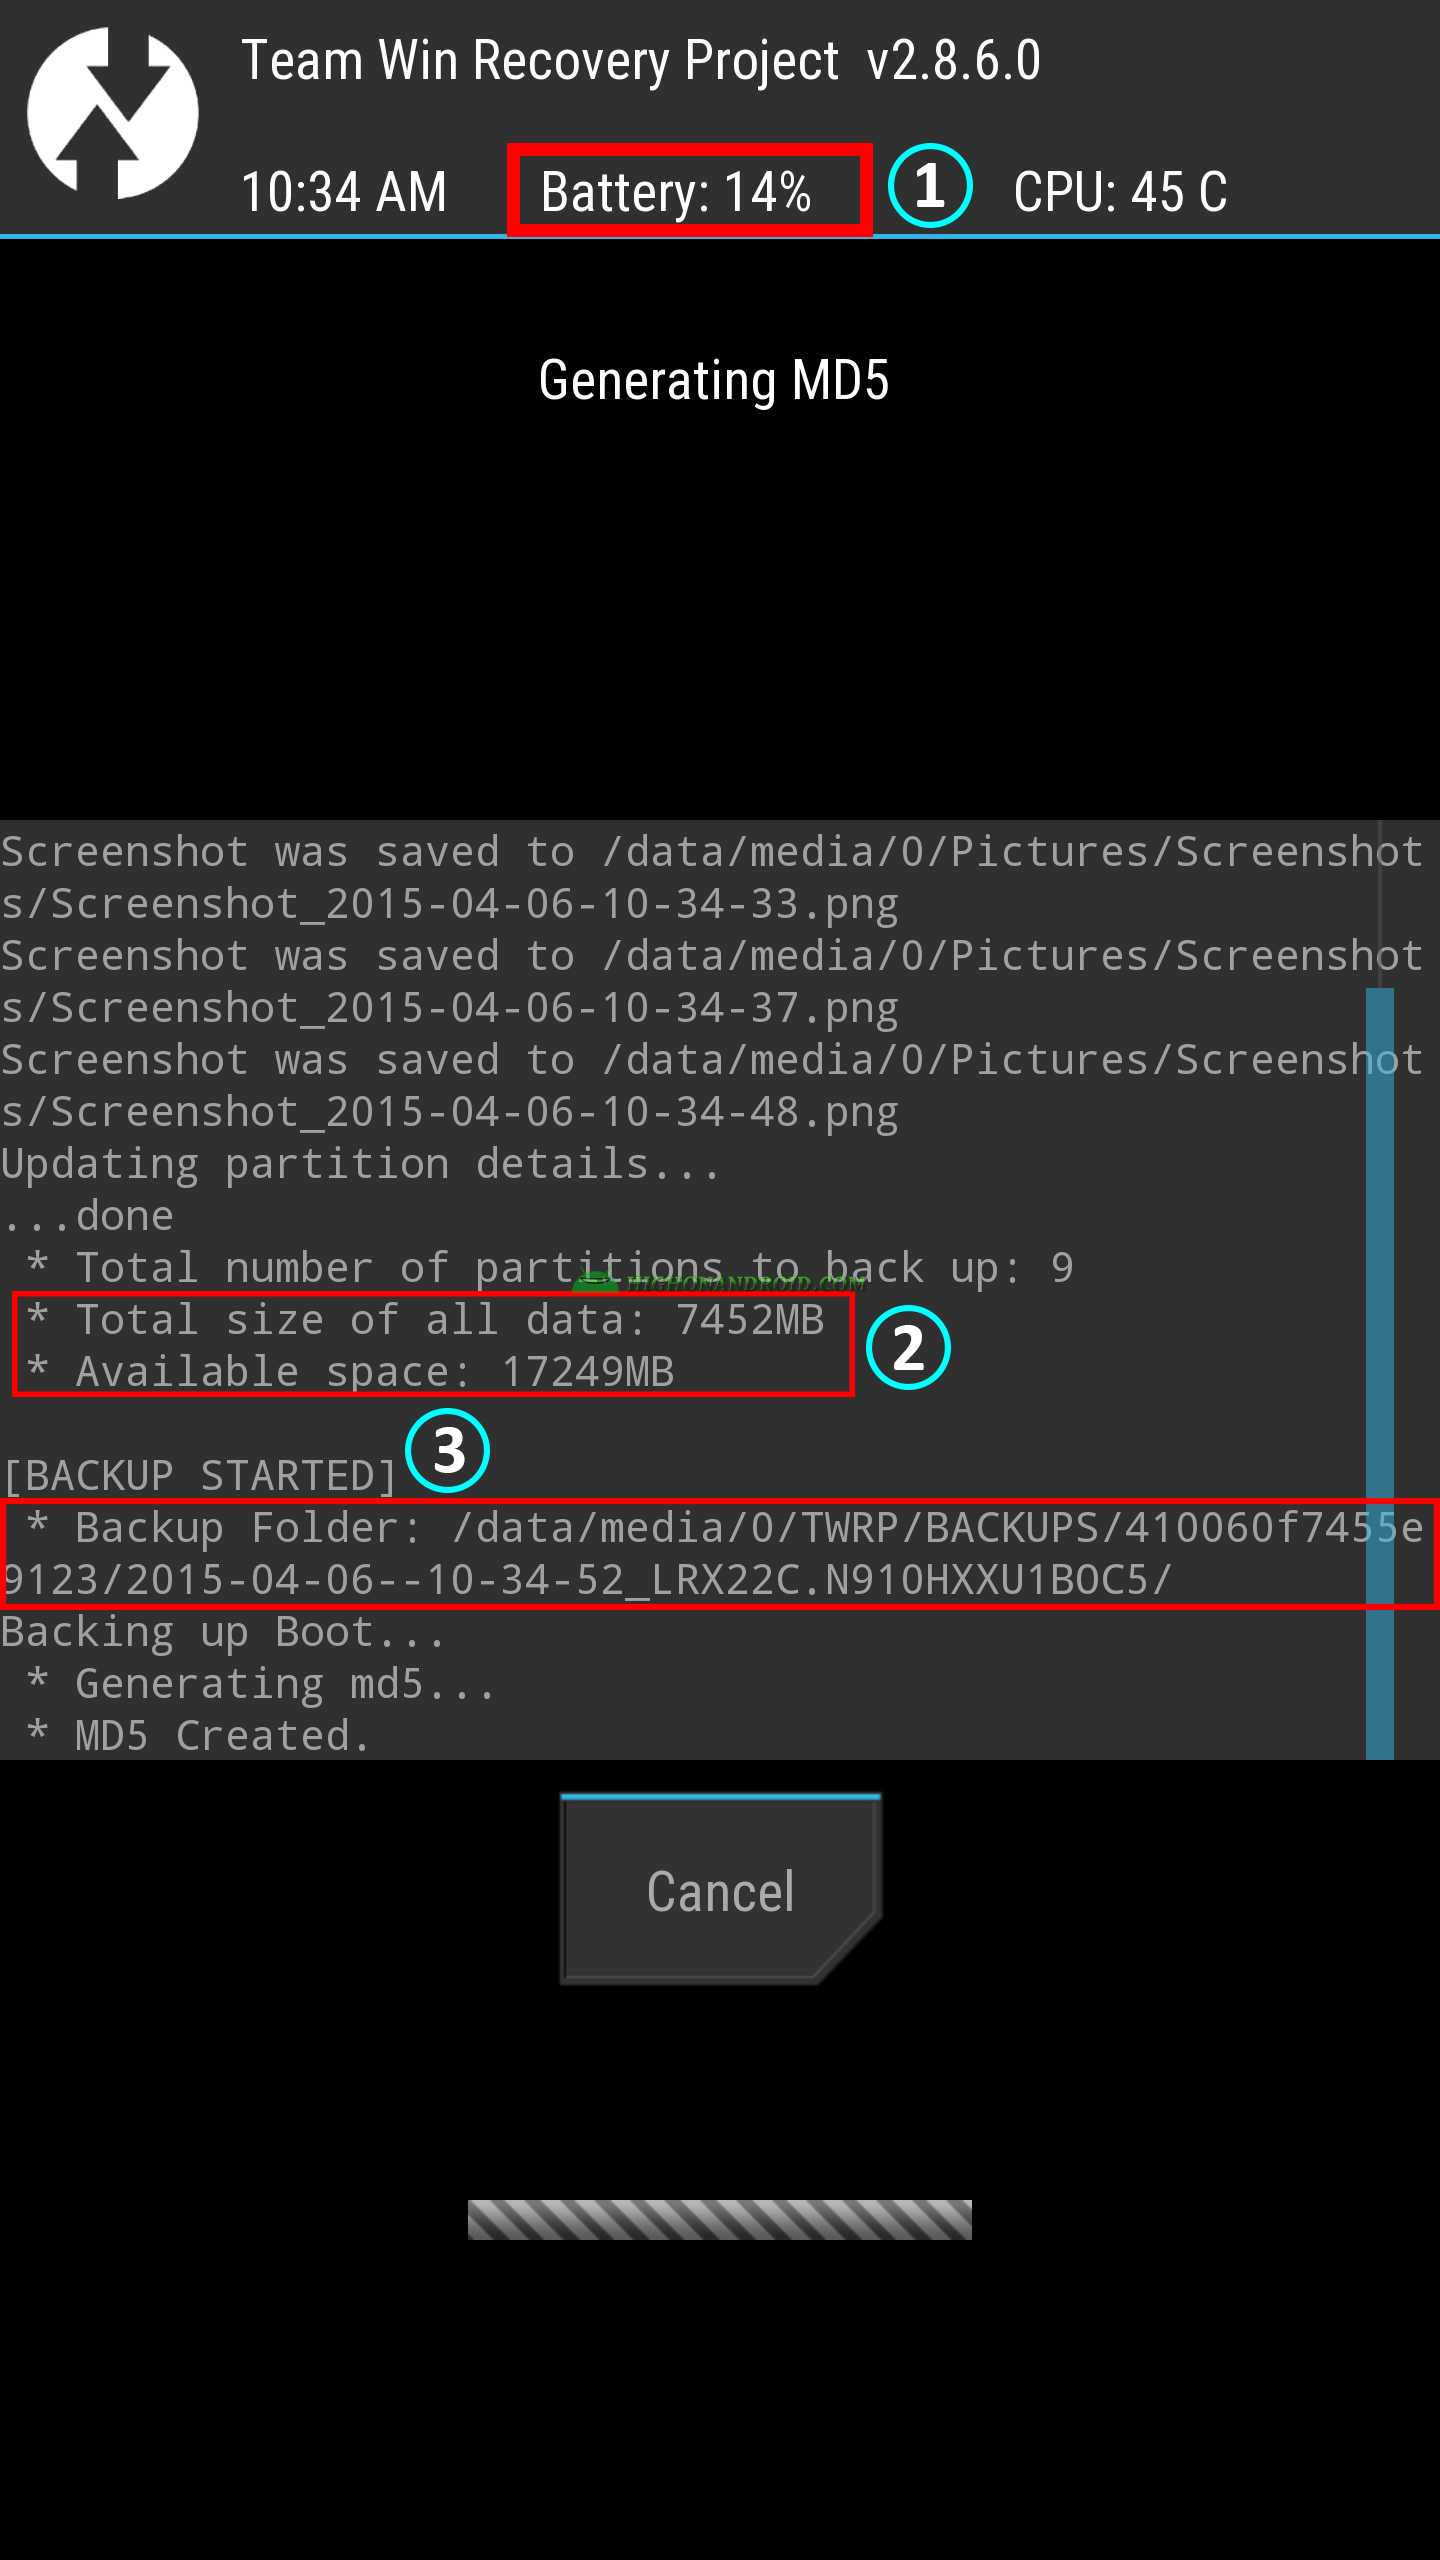
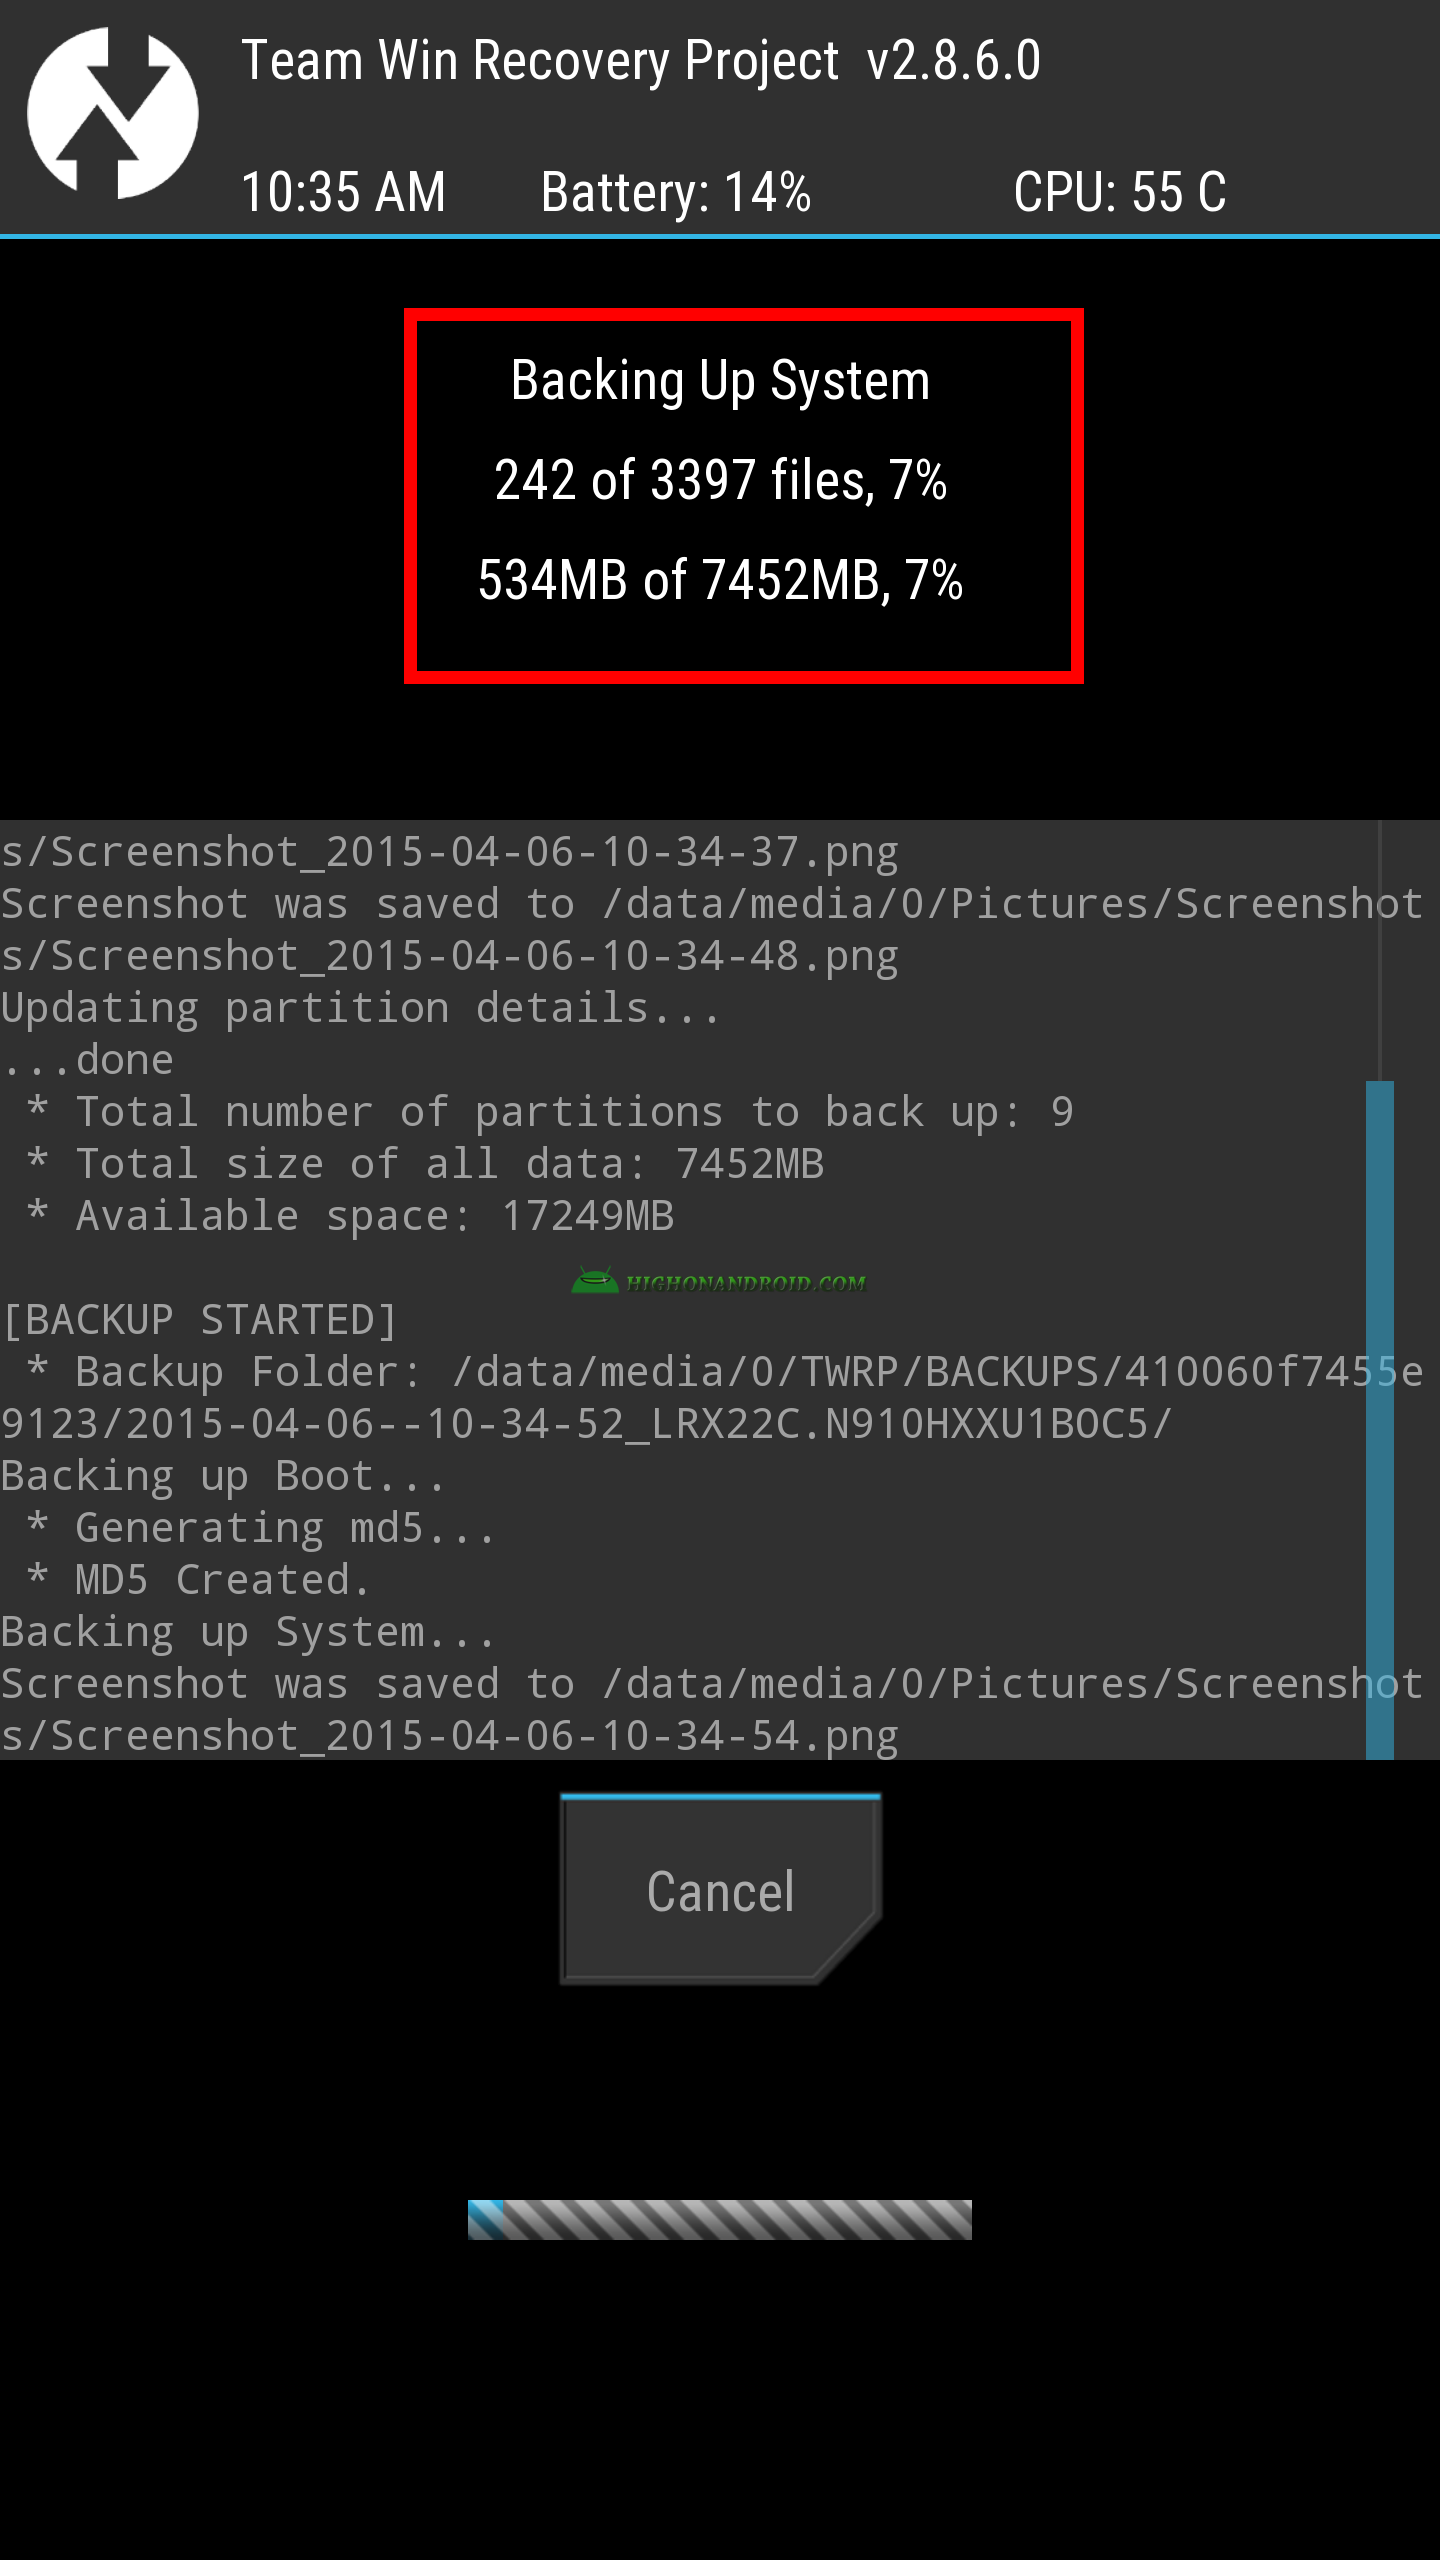
12. At the top of the screen, it gives us info about the backup process.
13. When the process is successfully done, it should show up this message

14. We then reboot system.
15. As mentioned above, the backup folder location is inside the phone’s internal storage, which is (TWRP/BACKUPS) in our case but it may differ based on the custom recovery that you use.
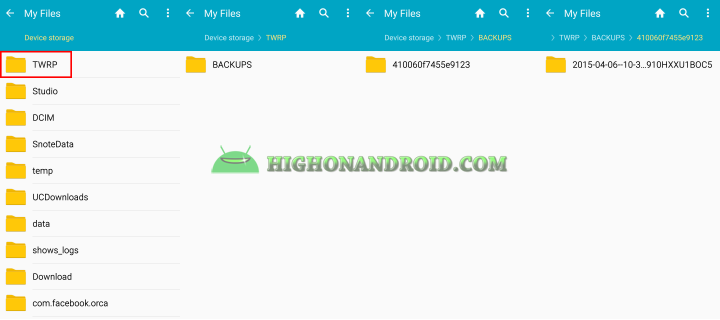
– And here’s what’s inside the backup folder
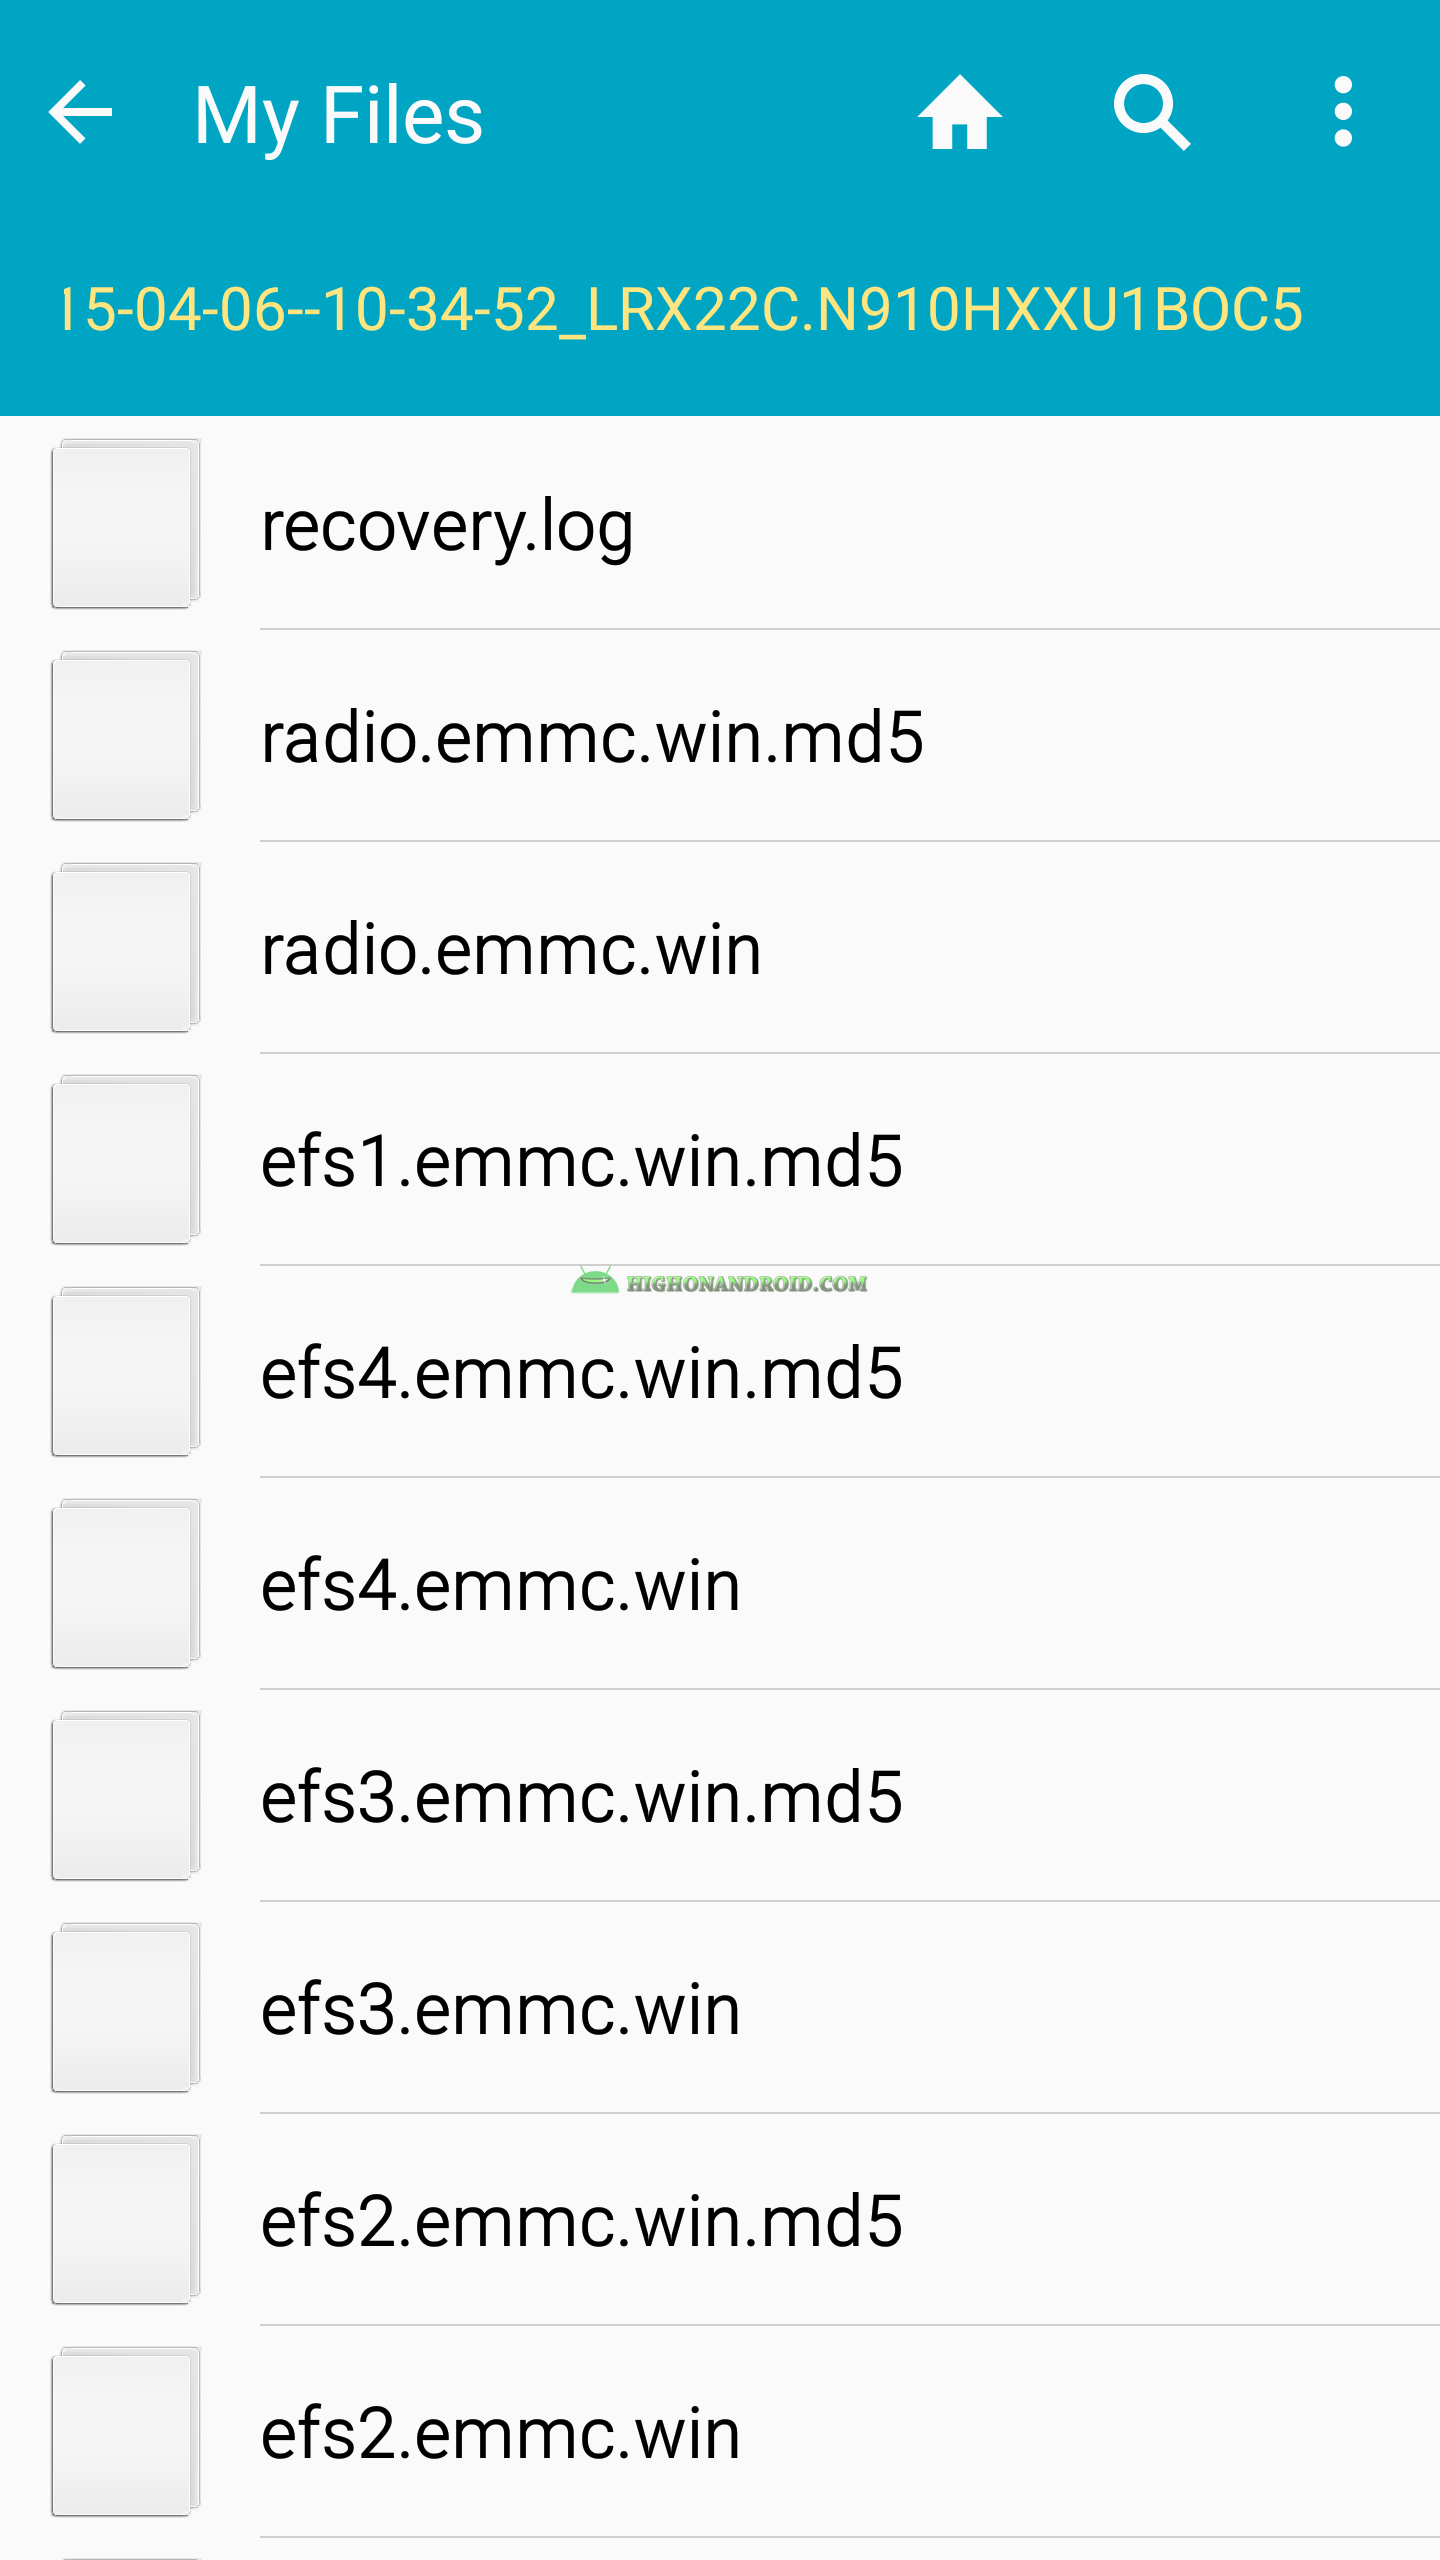
16. COPY ‘TWRP’/(CWM) folder to a safe location either on your PC or cloud services so that you can use it when needed for the restore process.

Restore:
– If you bricked your phone or lost personal data and you already have a nandroid backup, then you can restore it easily by following the below process.
Note:
– For the restore process , we have 2 cases:
1. We either have the backup package inside the phone’s internal storage (TWRP)/(CWM) Folder, which means it wasn’t deleted.
2. Or the backup package is deleted and is not inside the phone’s internal storage. In that case, we simply copy the backup folder (STEP 16) to the phone’s internal storage before doing the restore process.
Steps:
1. Power off the phone
2. Boot into recovery mode.
3. Go to ‘Backup and restore’ or ‘Restore’.
5. Choose the backup file and press either power button, or tap the selection to start the restore process.
6. Wait until the process is done.
7. When done, reboot the phone, your phone will boot into system and you’ll get everything back including apps, settings, call logs, messages, etc.
Example Of Restoring From Nandroid Backup On Galaxy Note 4:
Note:
– As I mentioned at the beginning of the guide for this process (backup or restore) we need to have both (root access) and (custom recovery) which may be CWM,TWRP,PHILZ.
Steps:
1. Root your phone (again) if you lost root access for any reason.
2. Flash the SAME custom recovery that you used before, it’s TWRP recovery in our case.
3. Boot into recovery mode by holding down (power button + volume up button + home button) at the same time, wait for the Galaxy Note 4 logo to appear and let go of (power button) and keep holding the other buttons.
4. You should now be in ‘Recovery Mode’.
5. This is the main screen of recovery mode which is the SAME previous one.
6. Tap on ‘restore’ button.
7. Choose the backup file.
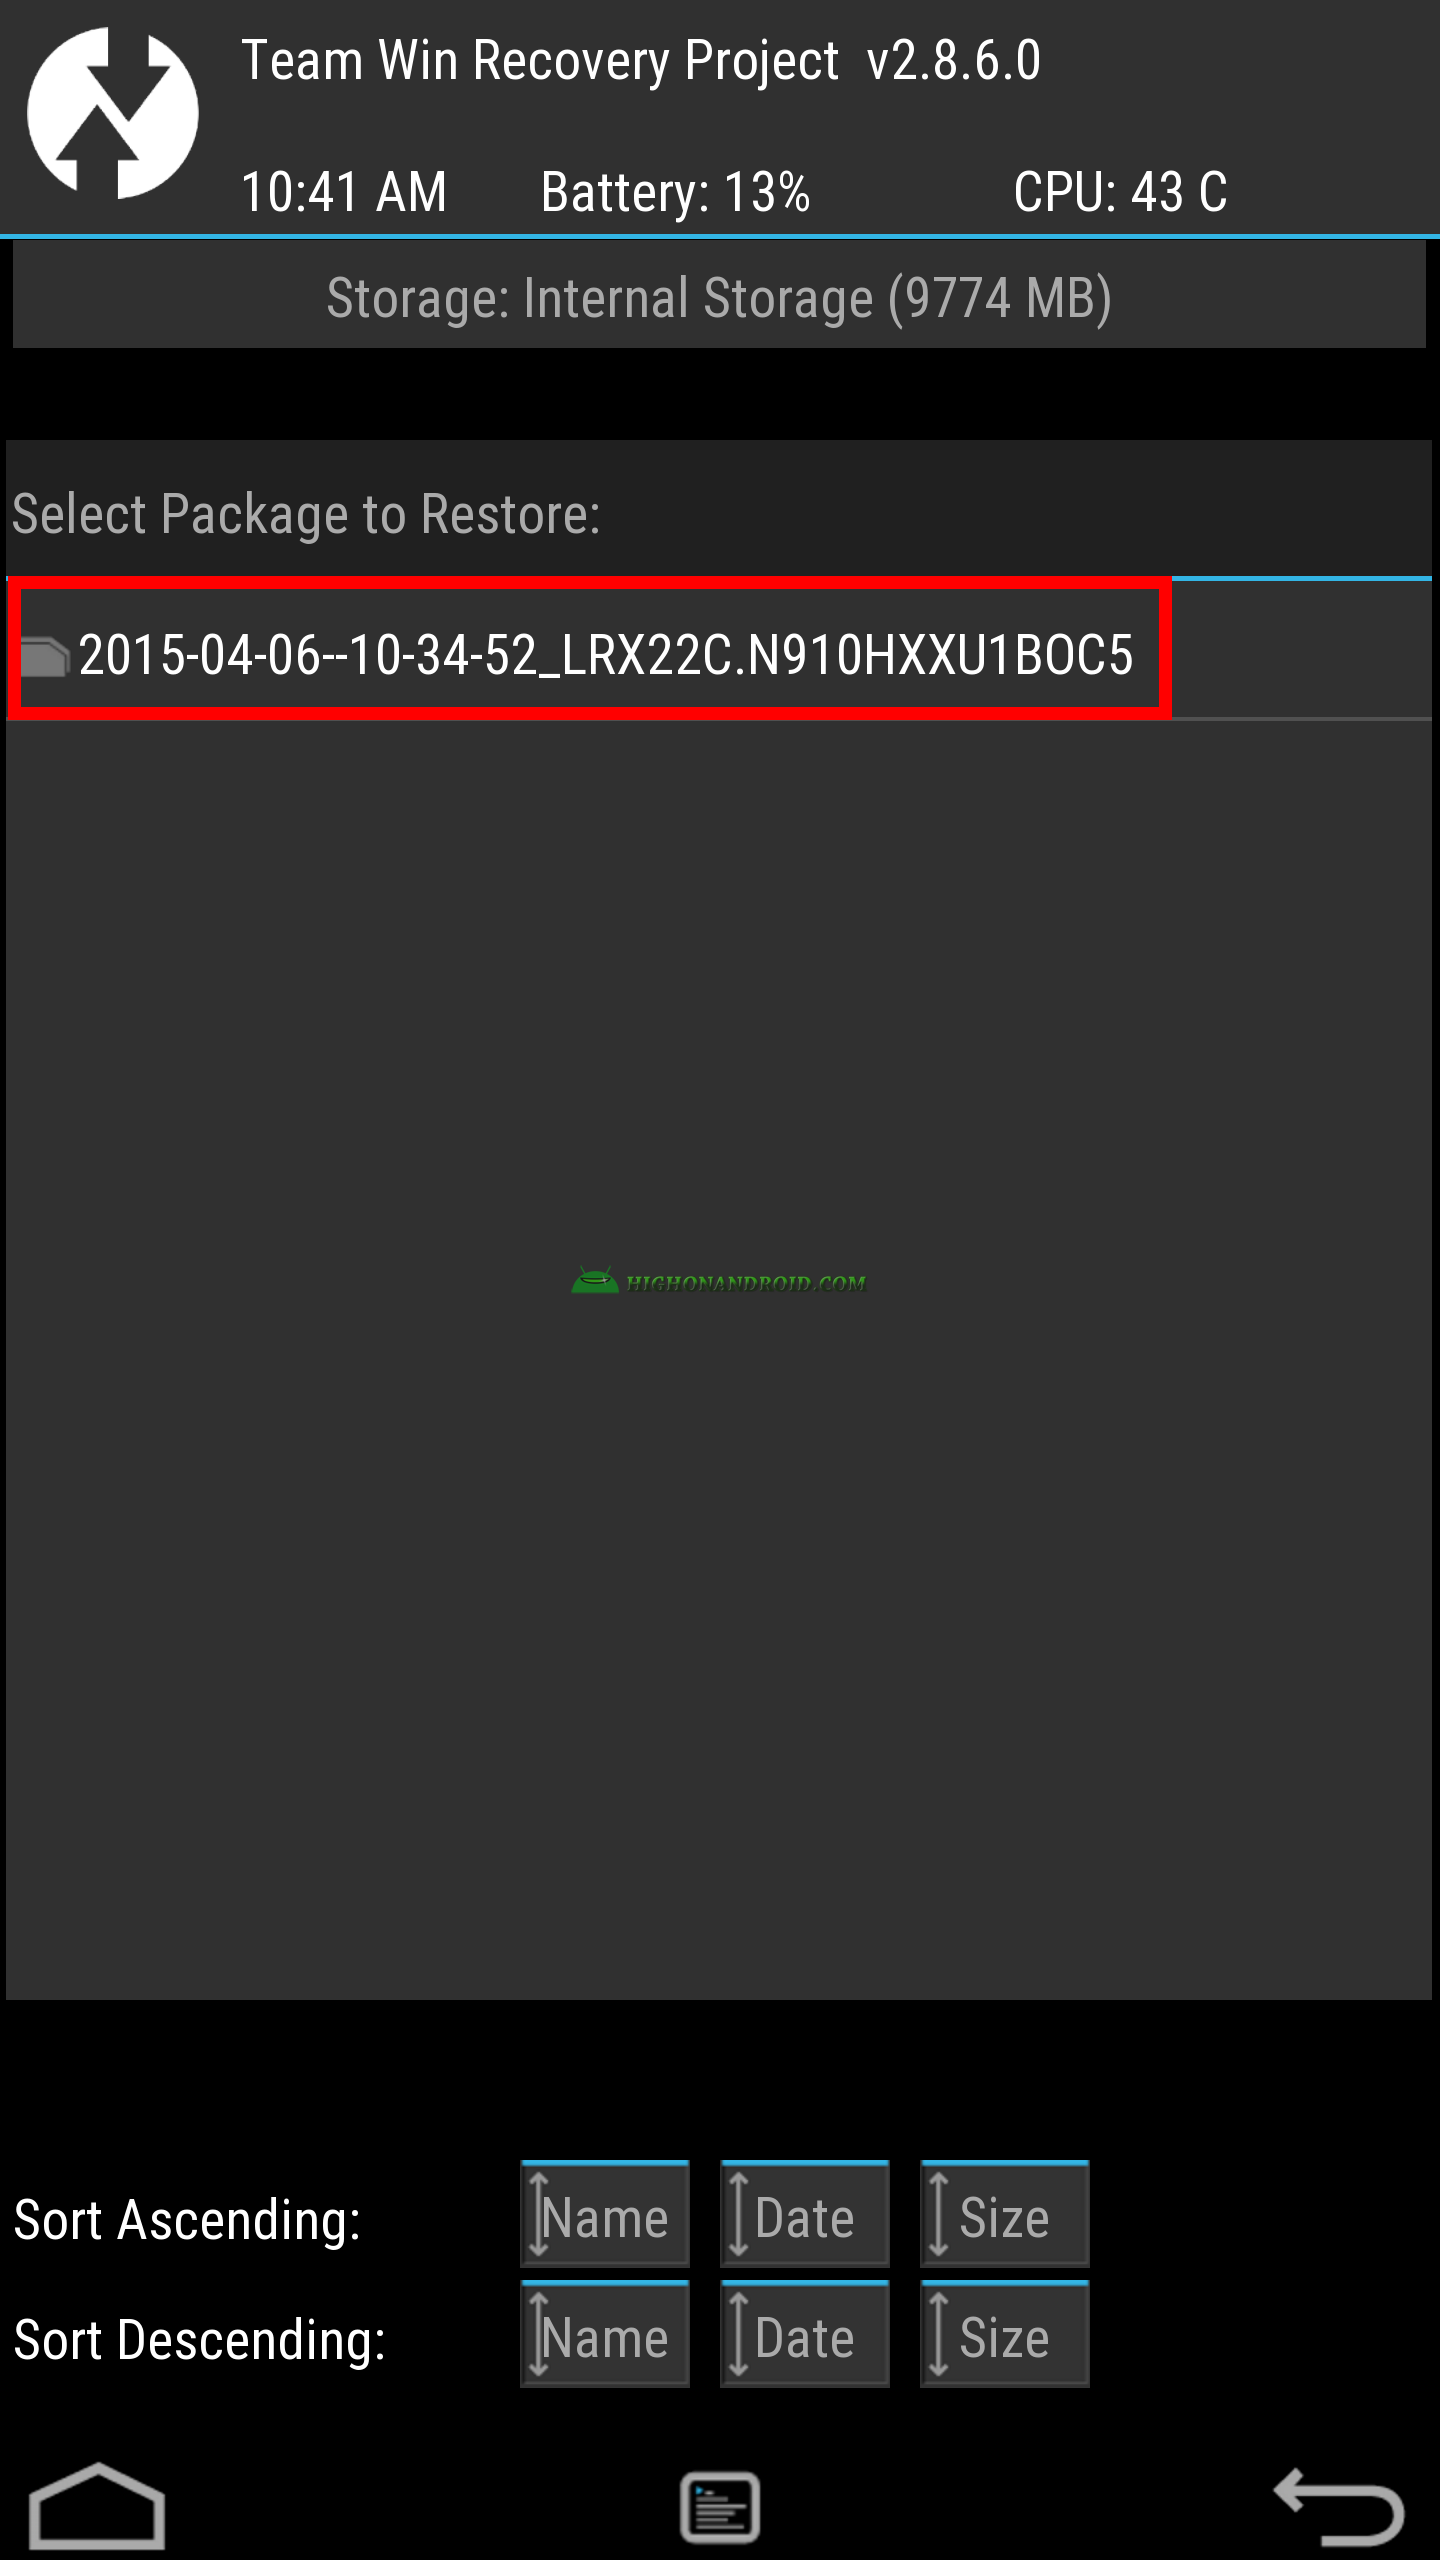
8. The below screen will show up giving us different partition to restore from.
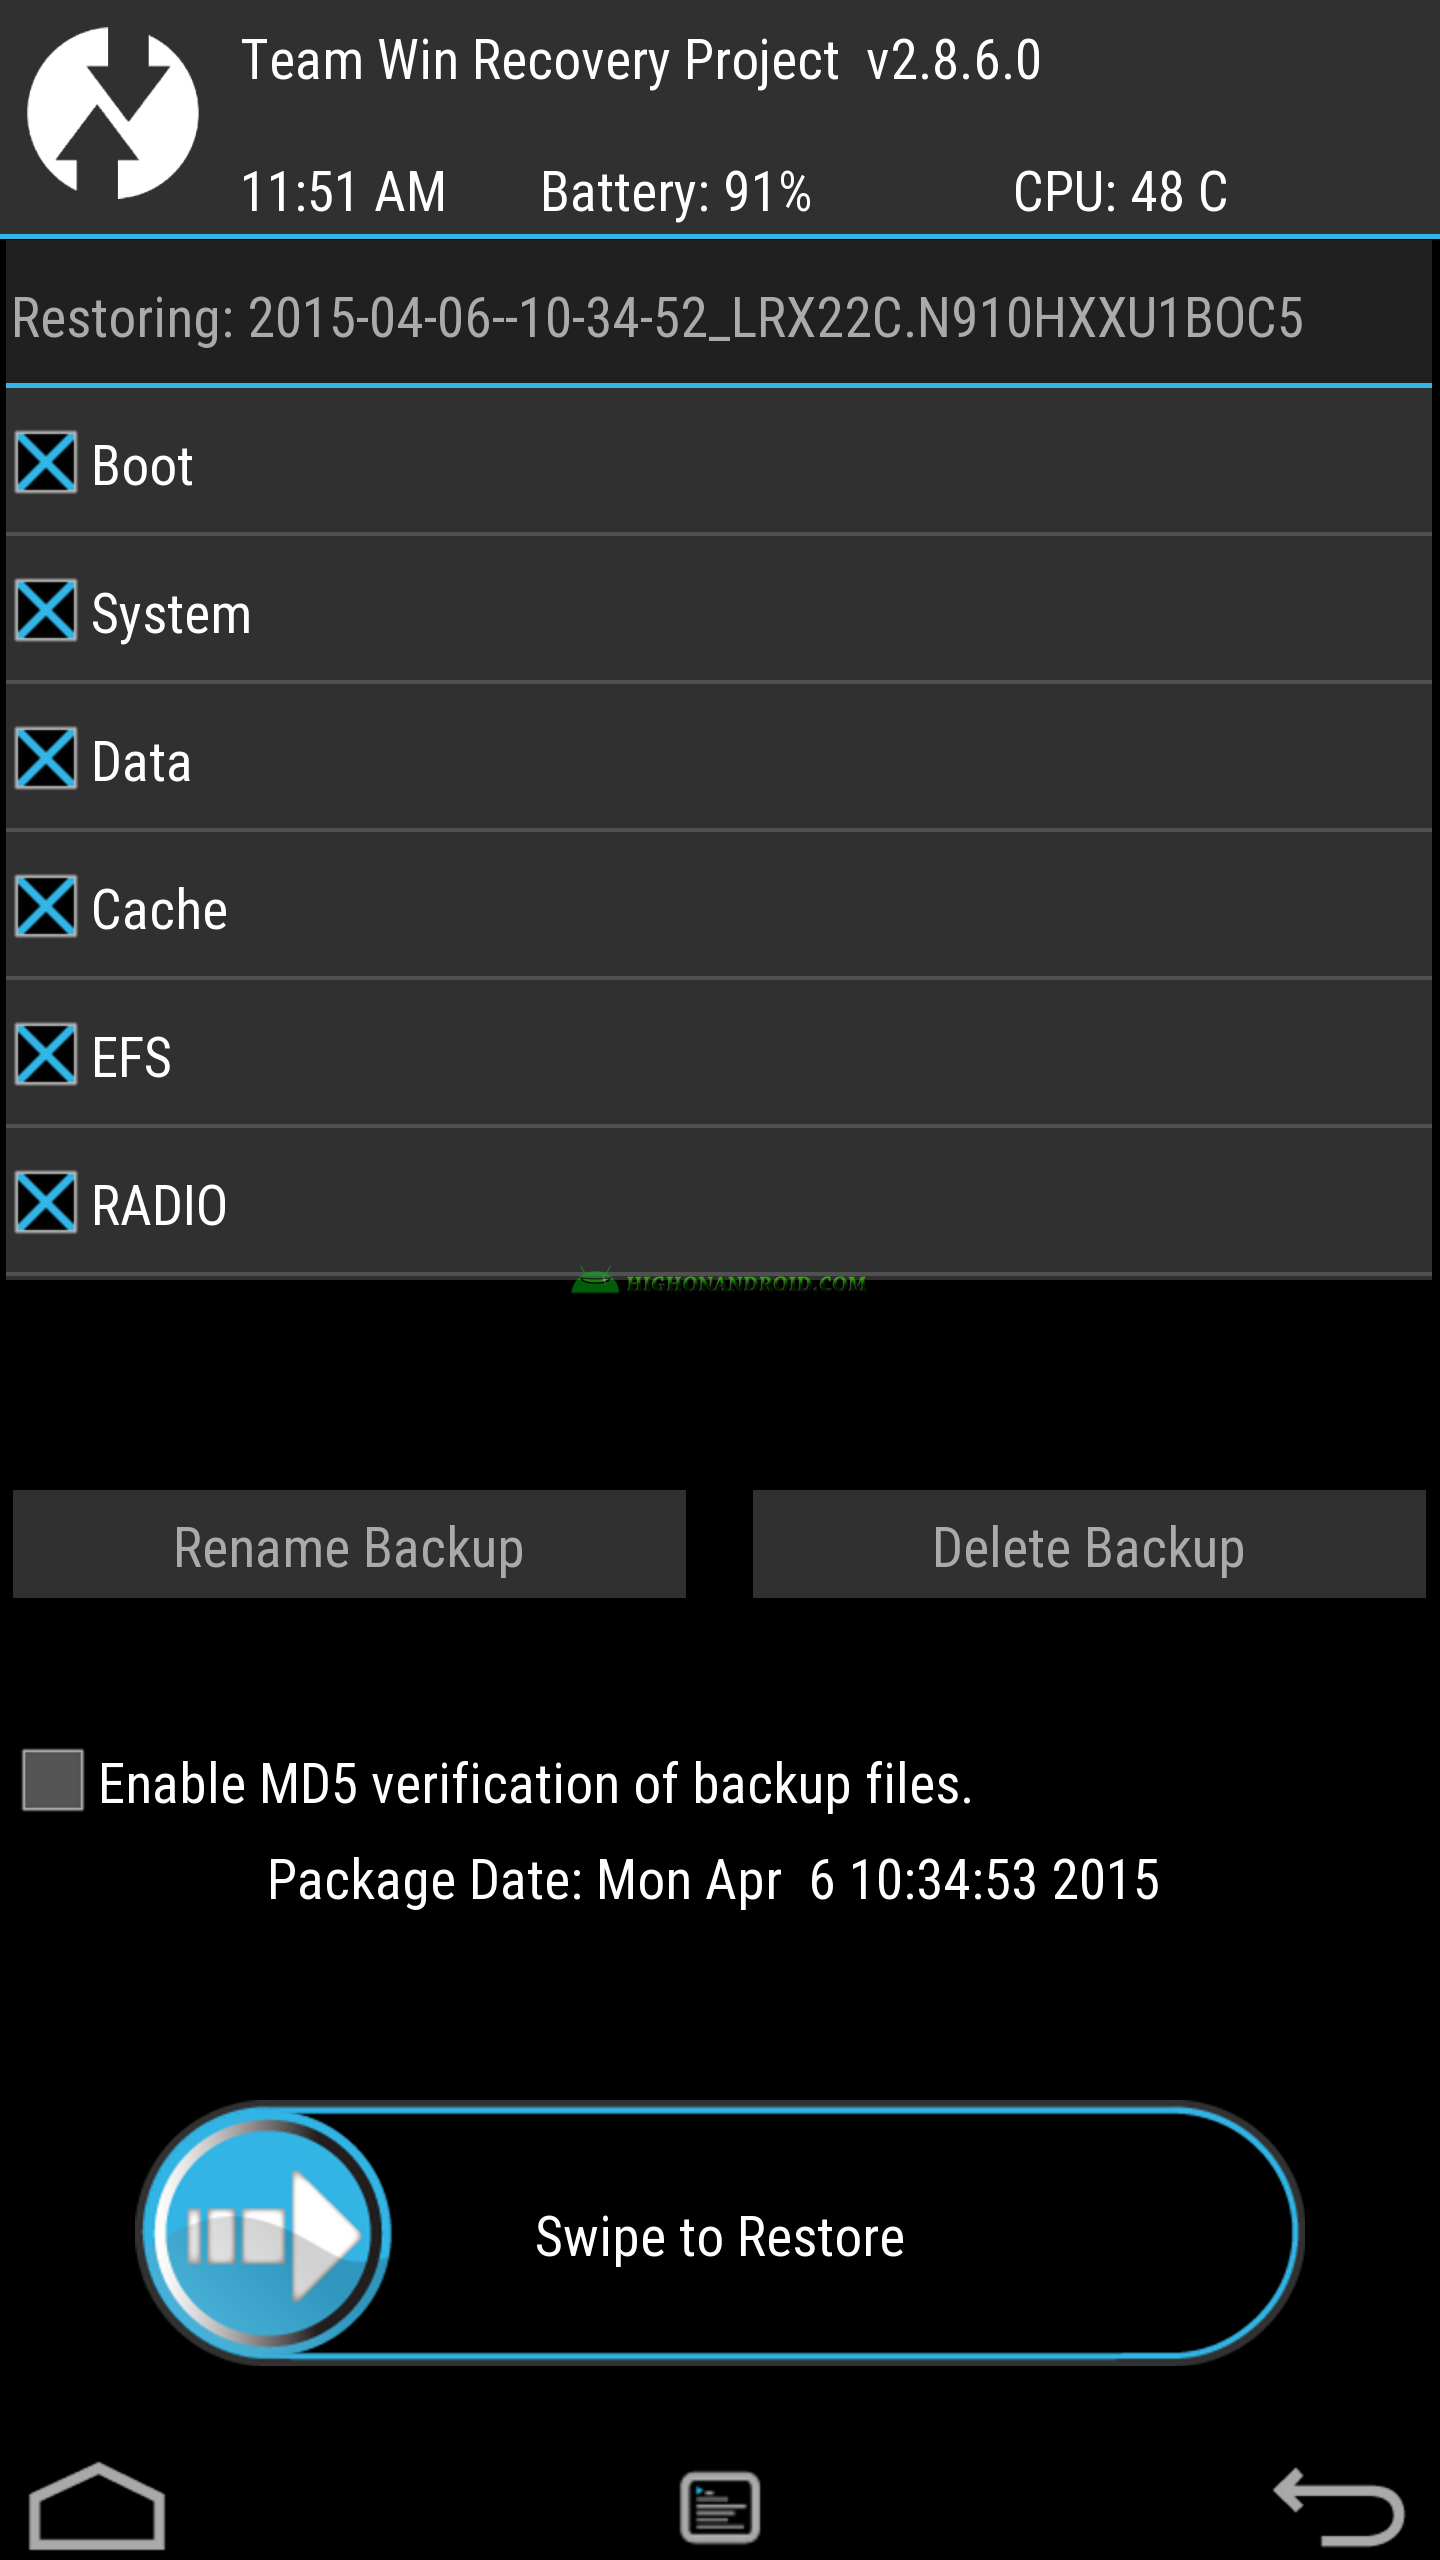
9. Swipe to the right to start the restore process.
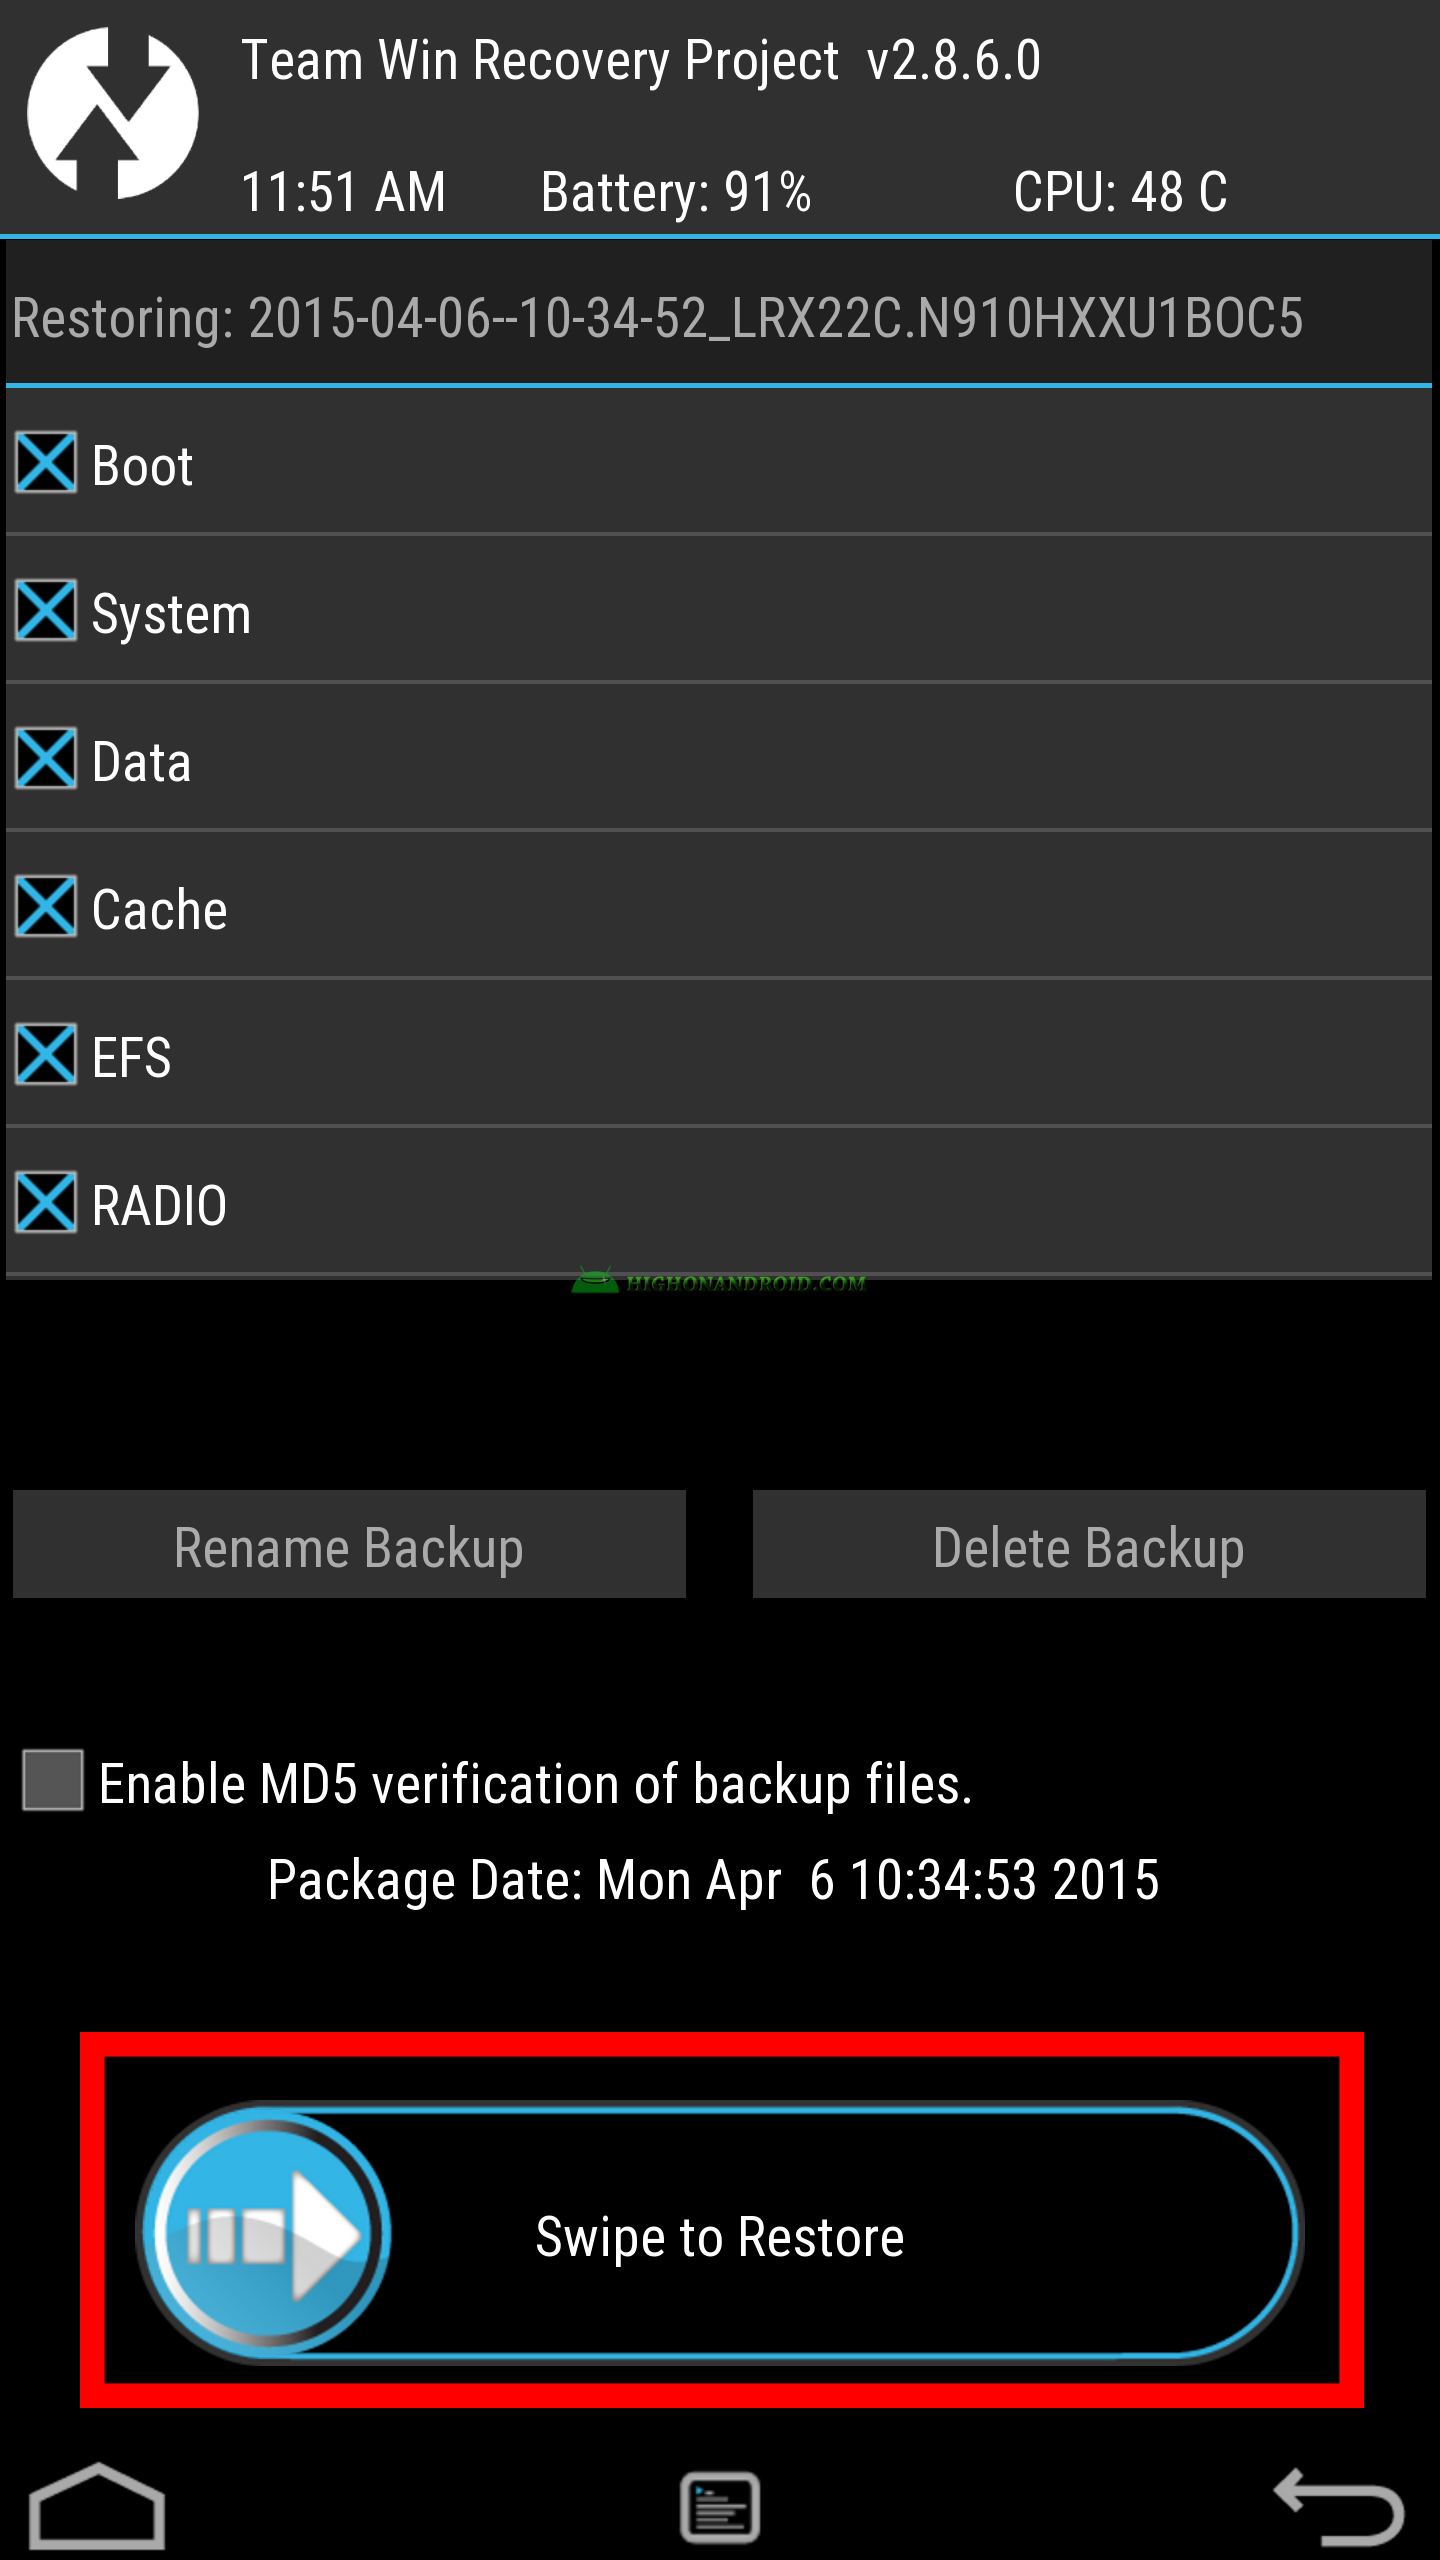
10. Wait till the restore process is done.
11. When done, reboot the phone into system.
12. Congratulations, you now know how to restore your phone without losing any data,pics, videos etc.
Have a question?
Please post all your questions at the new Android Rehab Center at HighOnAndroid Forum, thank you for understanding!Join the HighOnAndroid VIP Fans List for free help from Max and discounts on Android accessories.