
Contacts are one of the most important things inside our phone as you probably have contacts of your family, friends, co-workers, etc…etc…
In this tutorial, I will explain all the methods of backing up and restoring your contacts.
BACKUP:
Method 1 – Exporting ( Backing up ) contacts from ” Contacts ” App
How it works?
This Method is done without using any 3rd-party apps, it can be done from your “Contacts” app.
Steps:
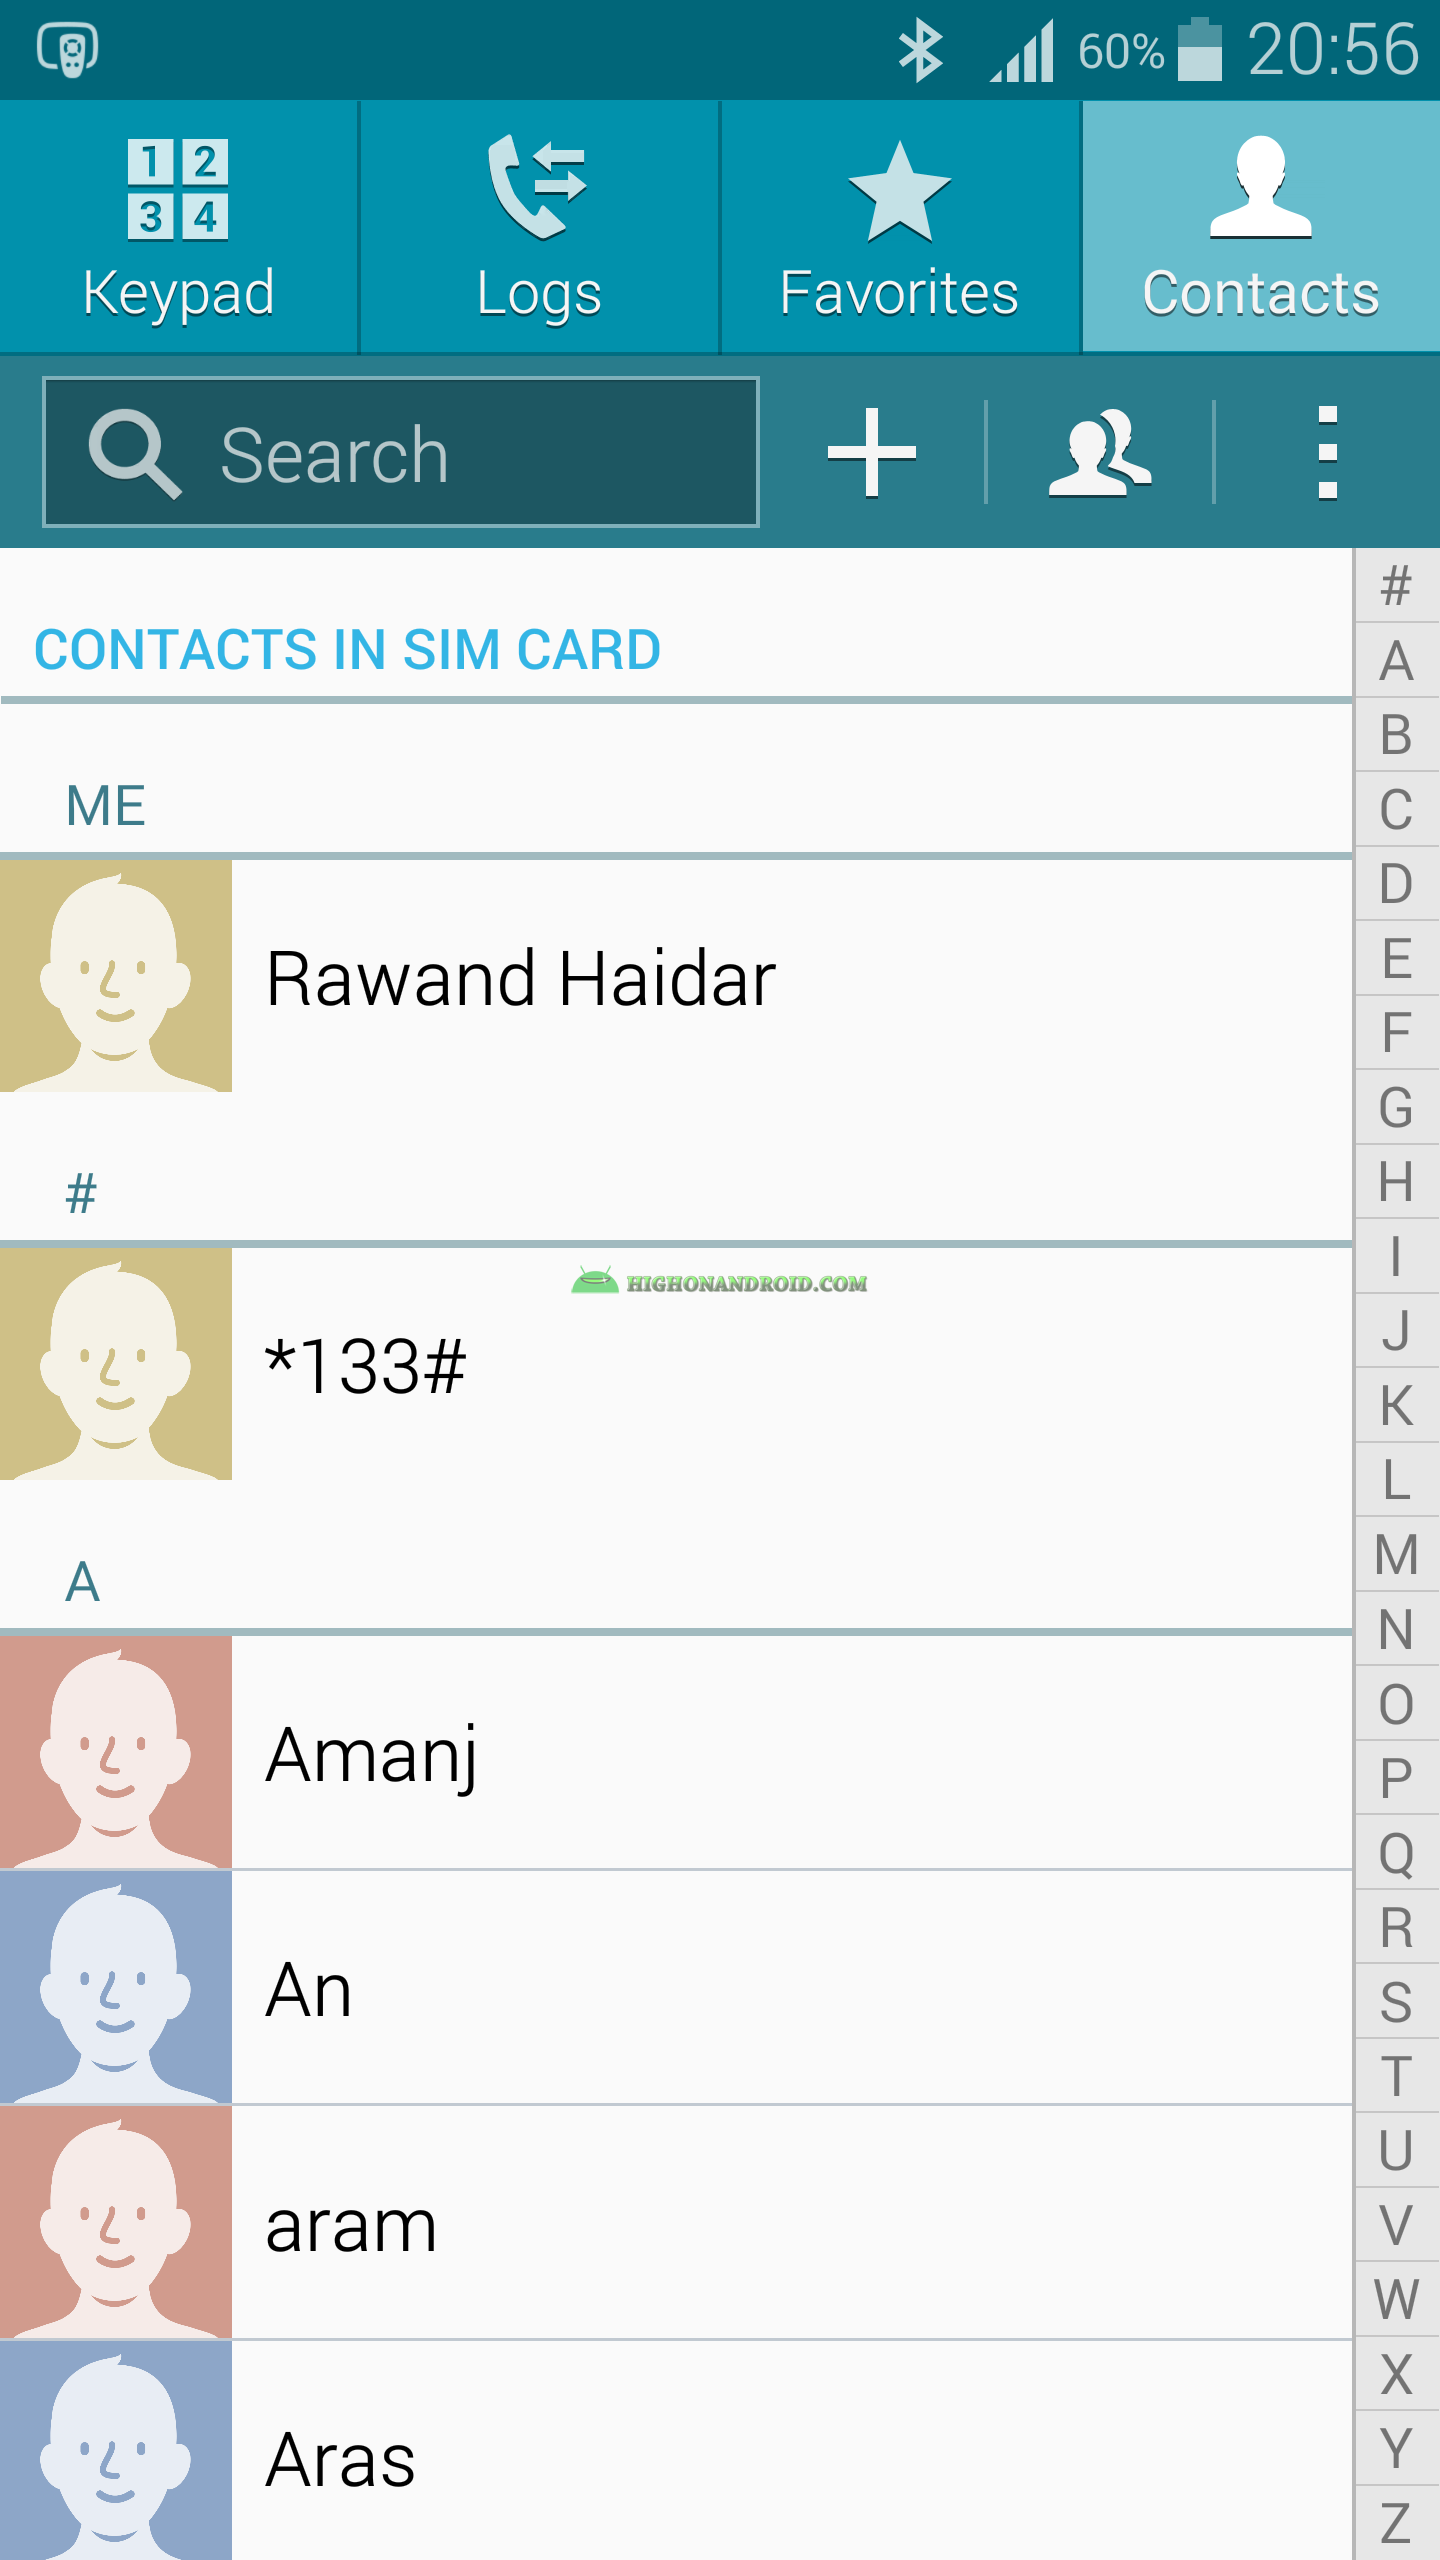
1. Open Contacts app.
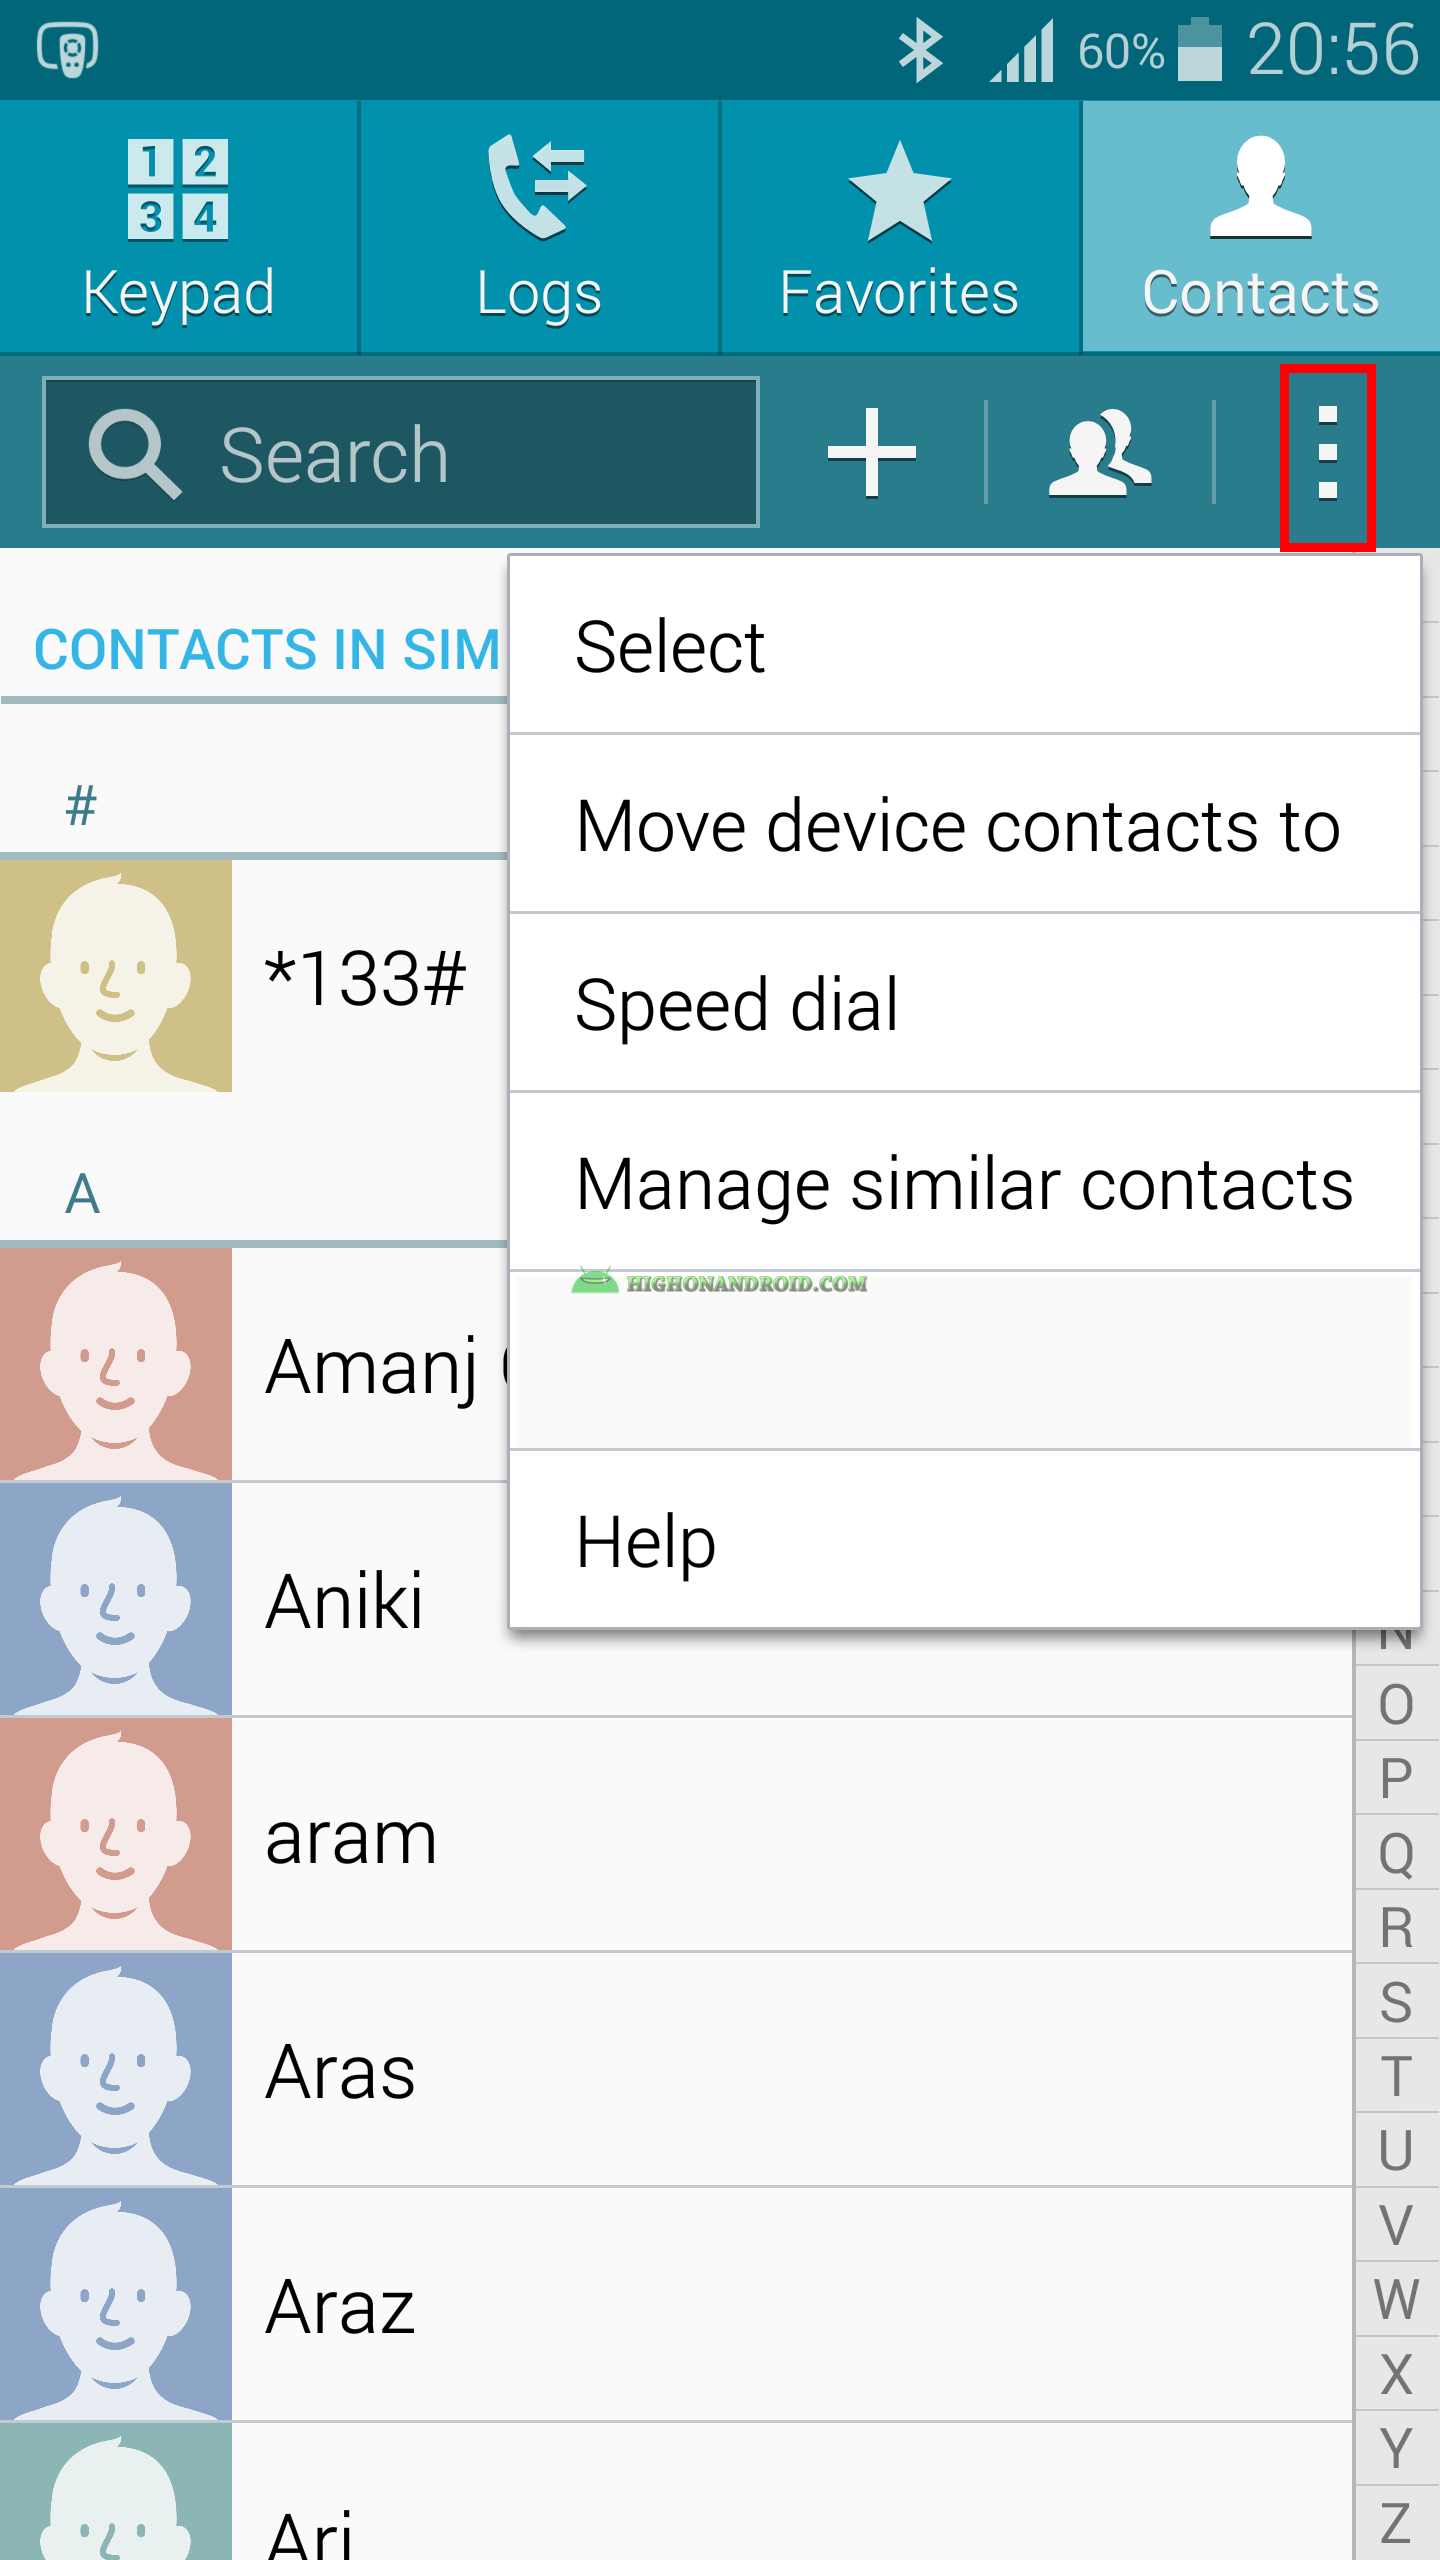
2. Tap on Menu button of your phone (that’s Left button on most of Samsung smartphones).
3. For Galaxy S5 (and most Samsung devices), tap on 3 dots of the main screen of Contacts App, and choose “Settings”.
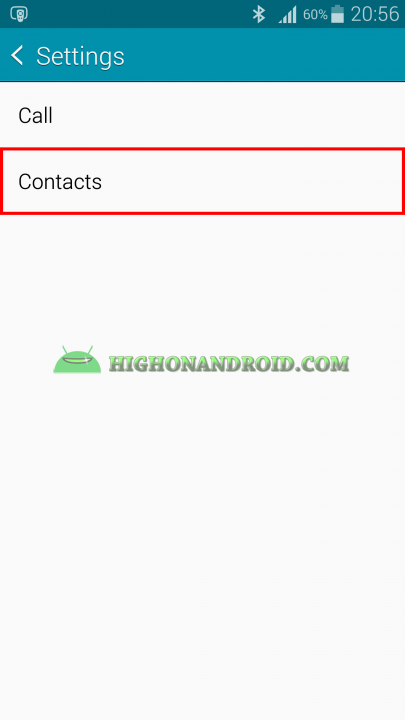
4. Choose Contacts.
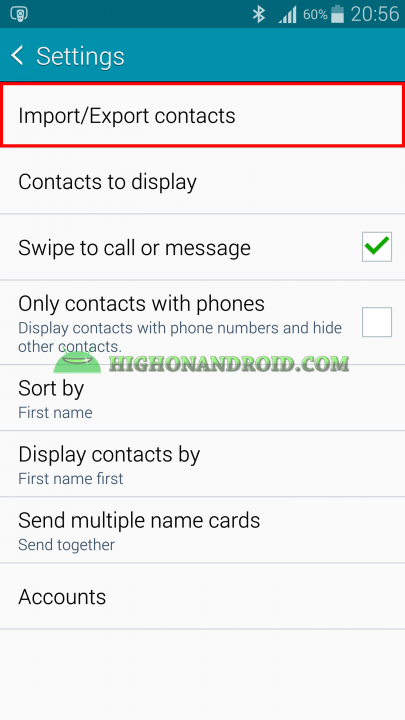
5. Then chose “Import & Export”.
6. The following window will show up with choice for import and export.
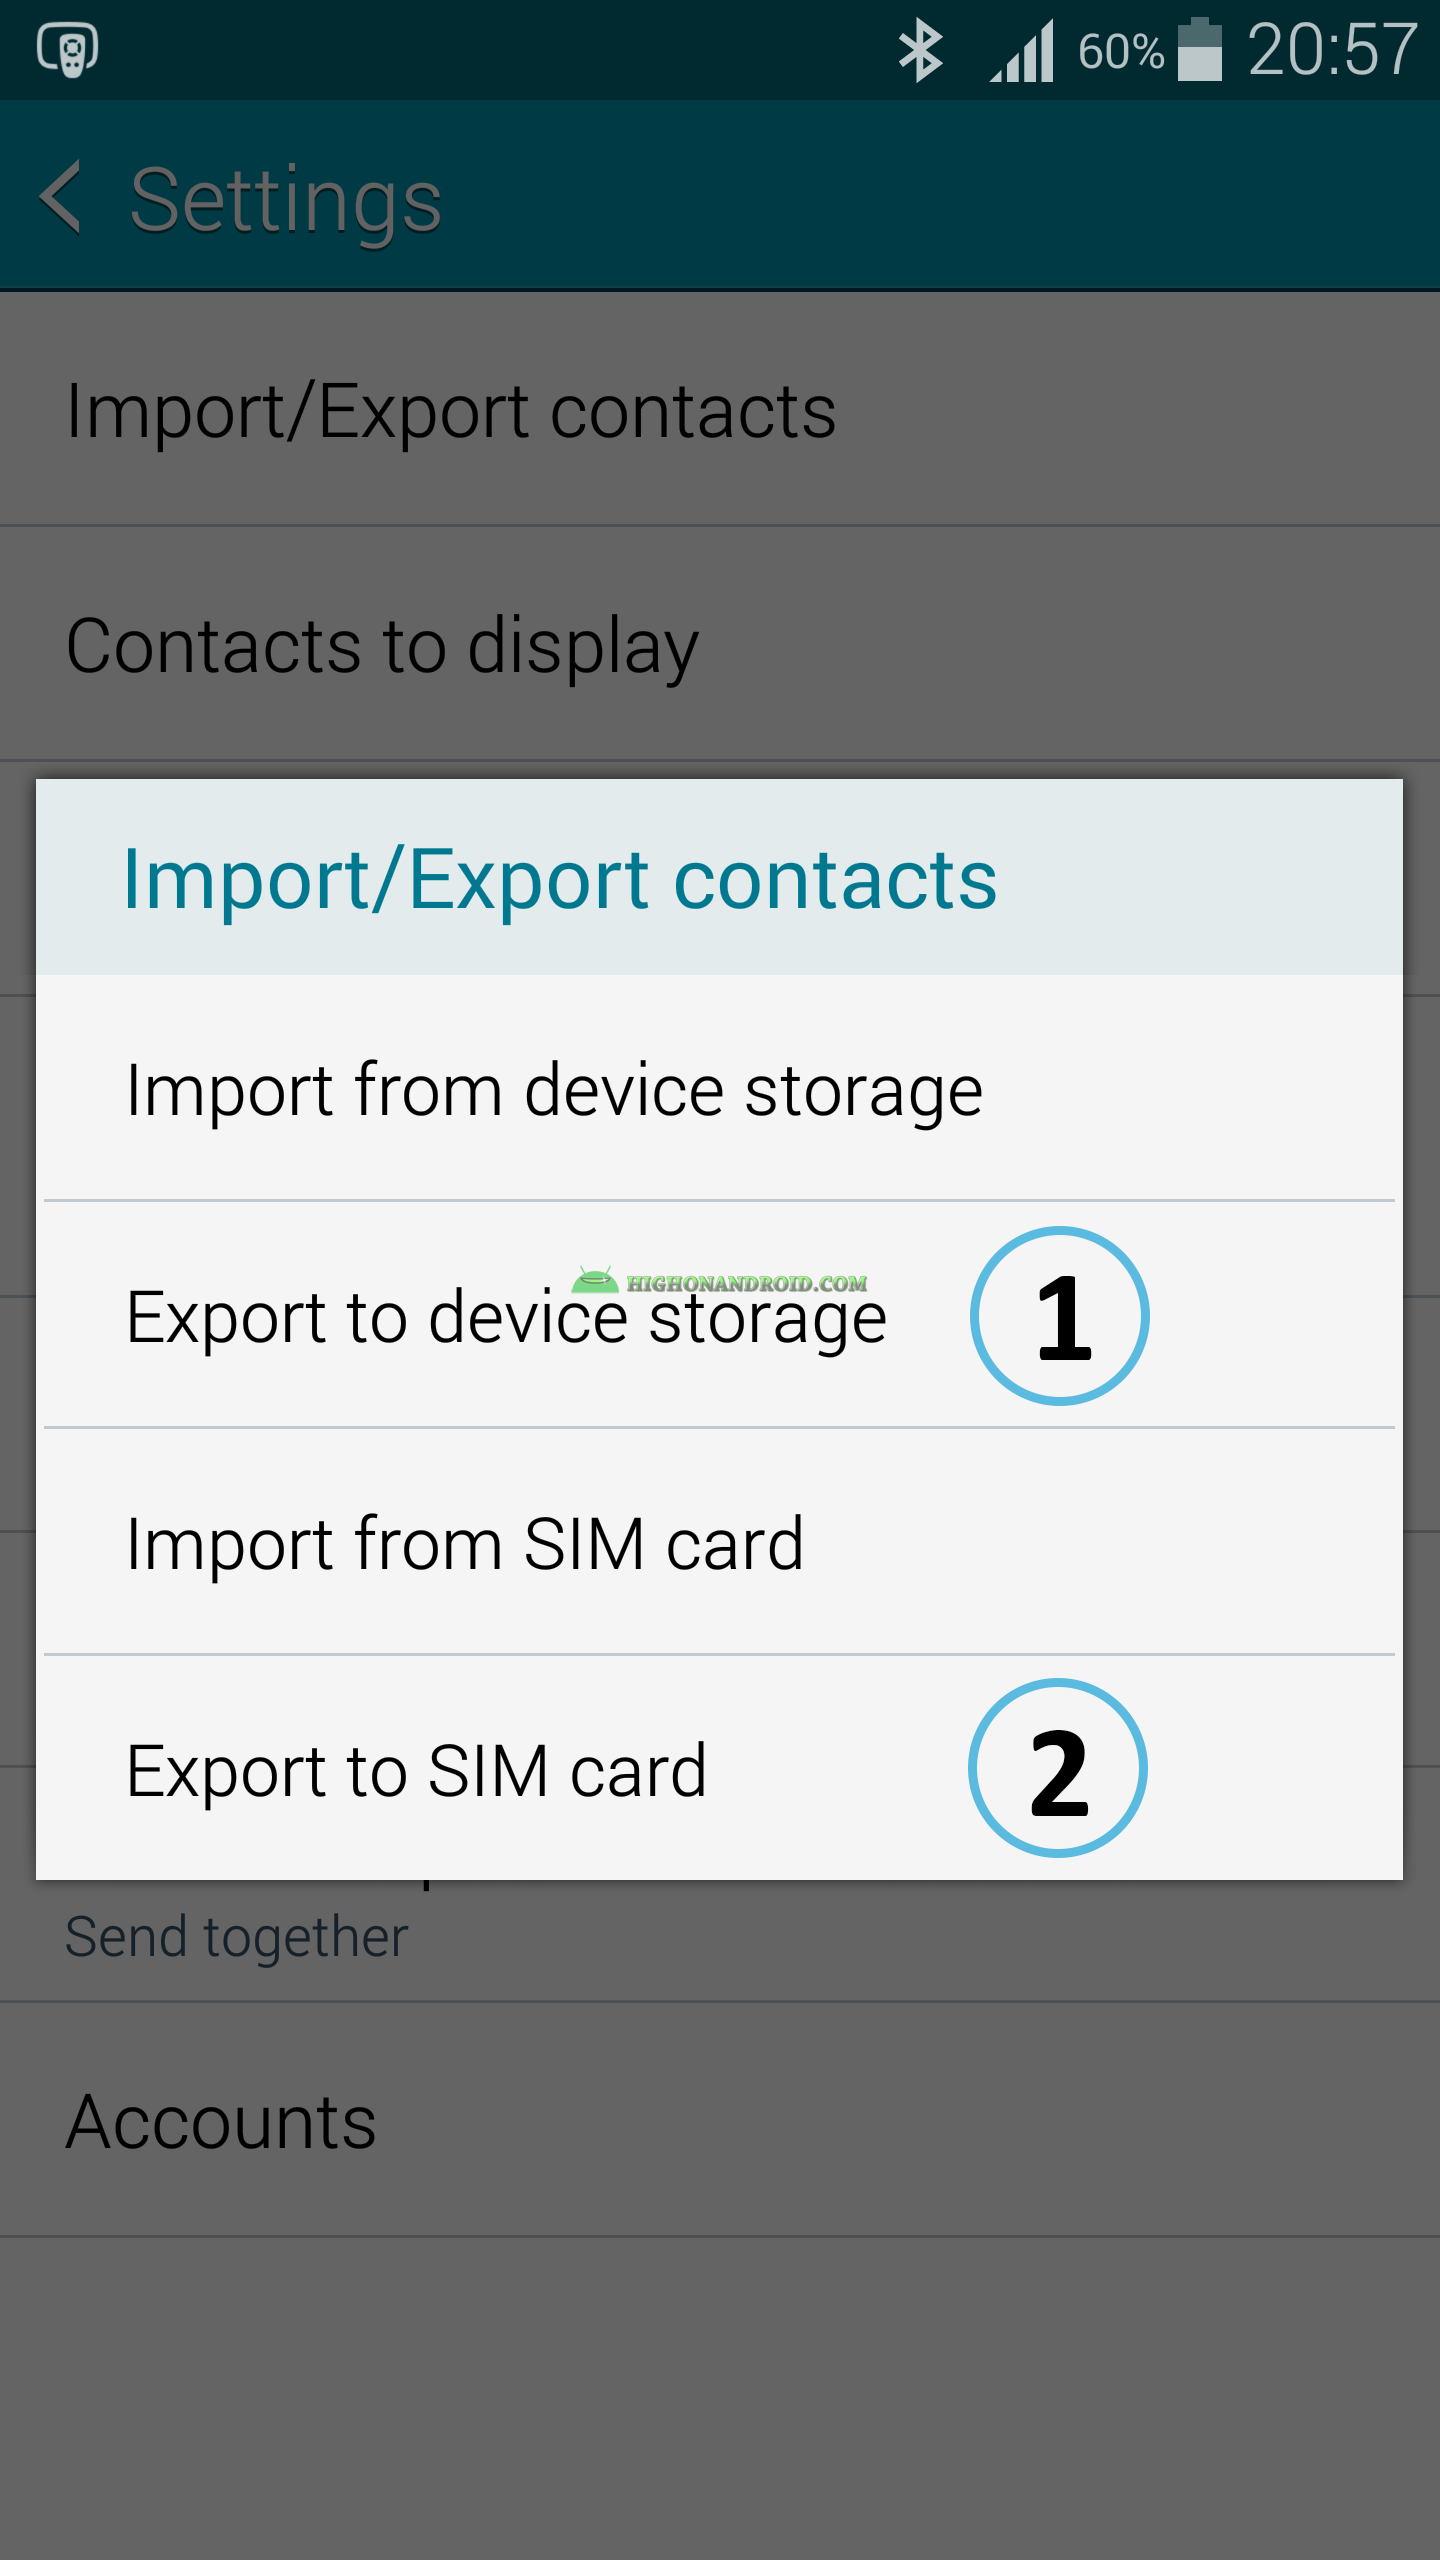
Since our aim is to backup contacts, choose choices 1 or 2.
Choice 1 will backup Contacts to Internal SD card.
Choice 2 will backup Contacts to SIM card (not recommended if you have too many contacts).
Choice 3 will backup Contacts to External SD card (if your smartphone supports it).
You can choose any of the three choices, but here I will choose Choice 1 to backup or export my contacts to internal SD card.
7. After selecting the right choice, this window will pop up and we tap “OK”.
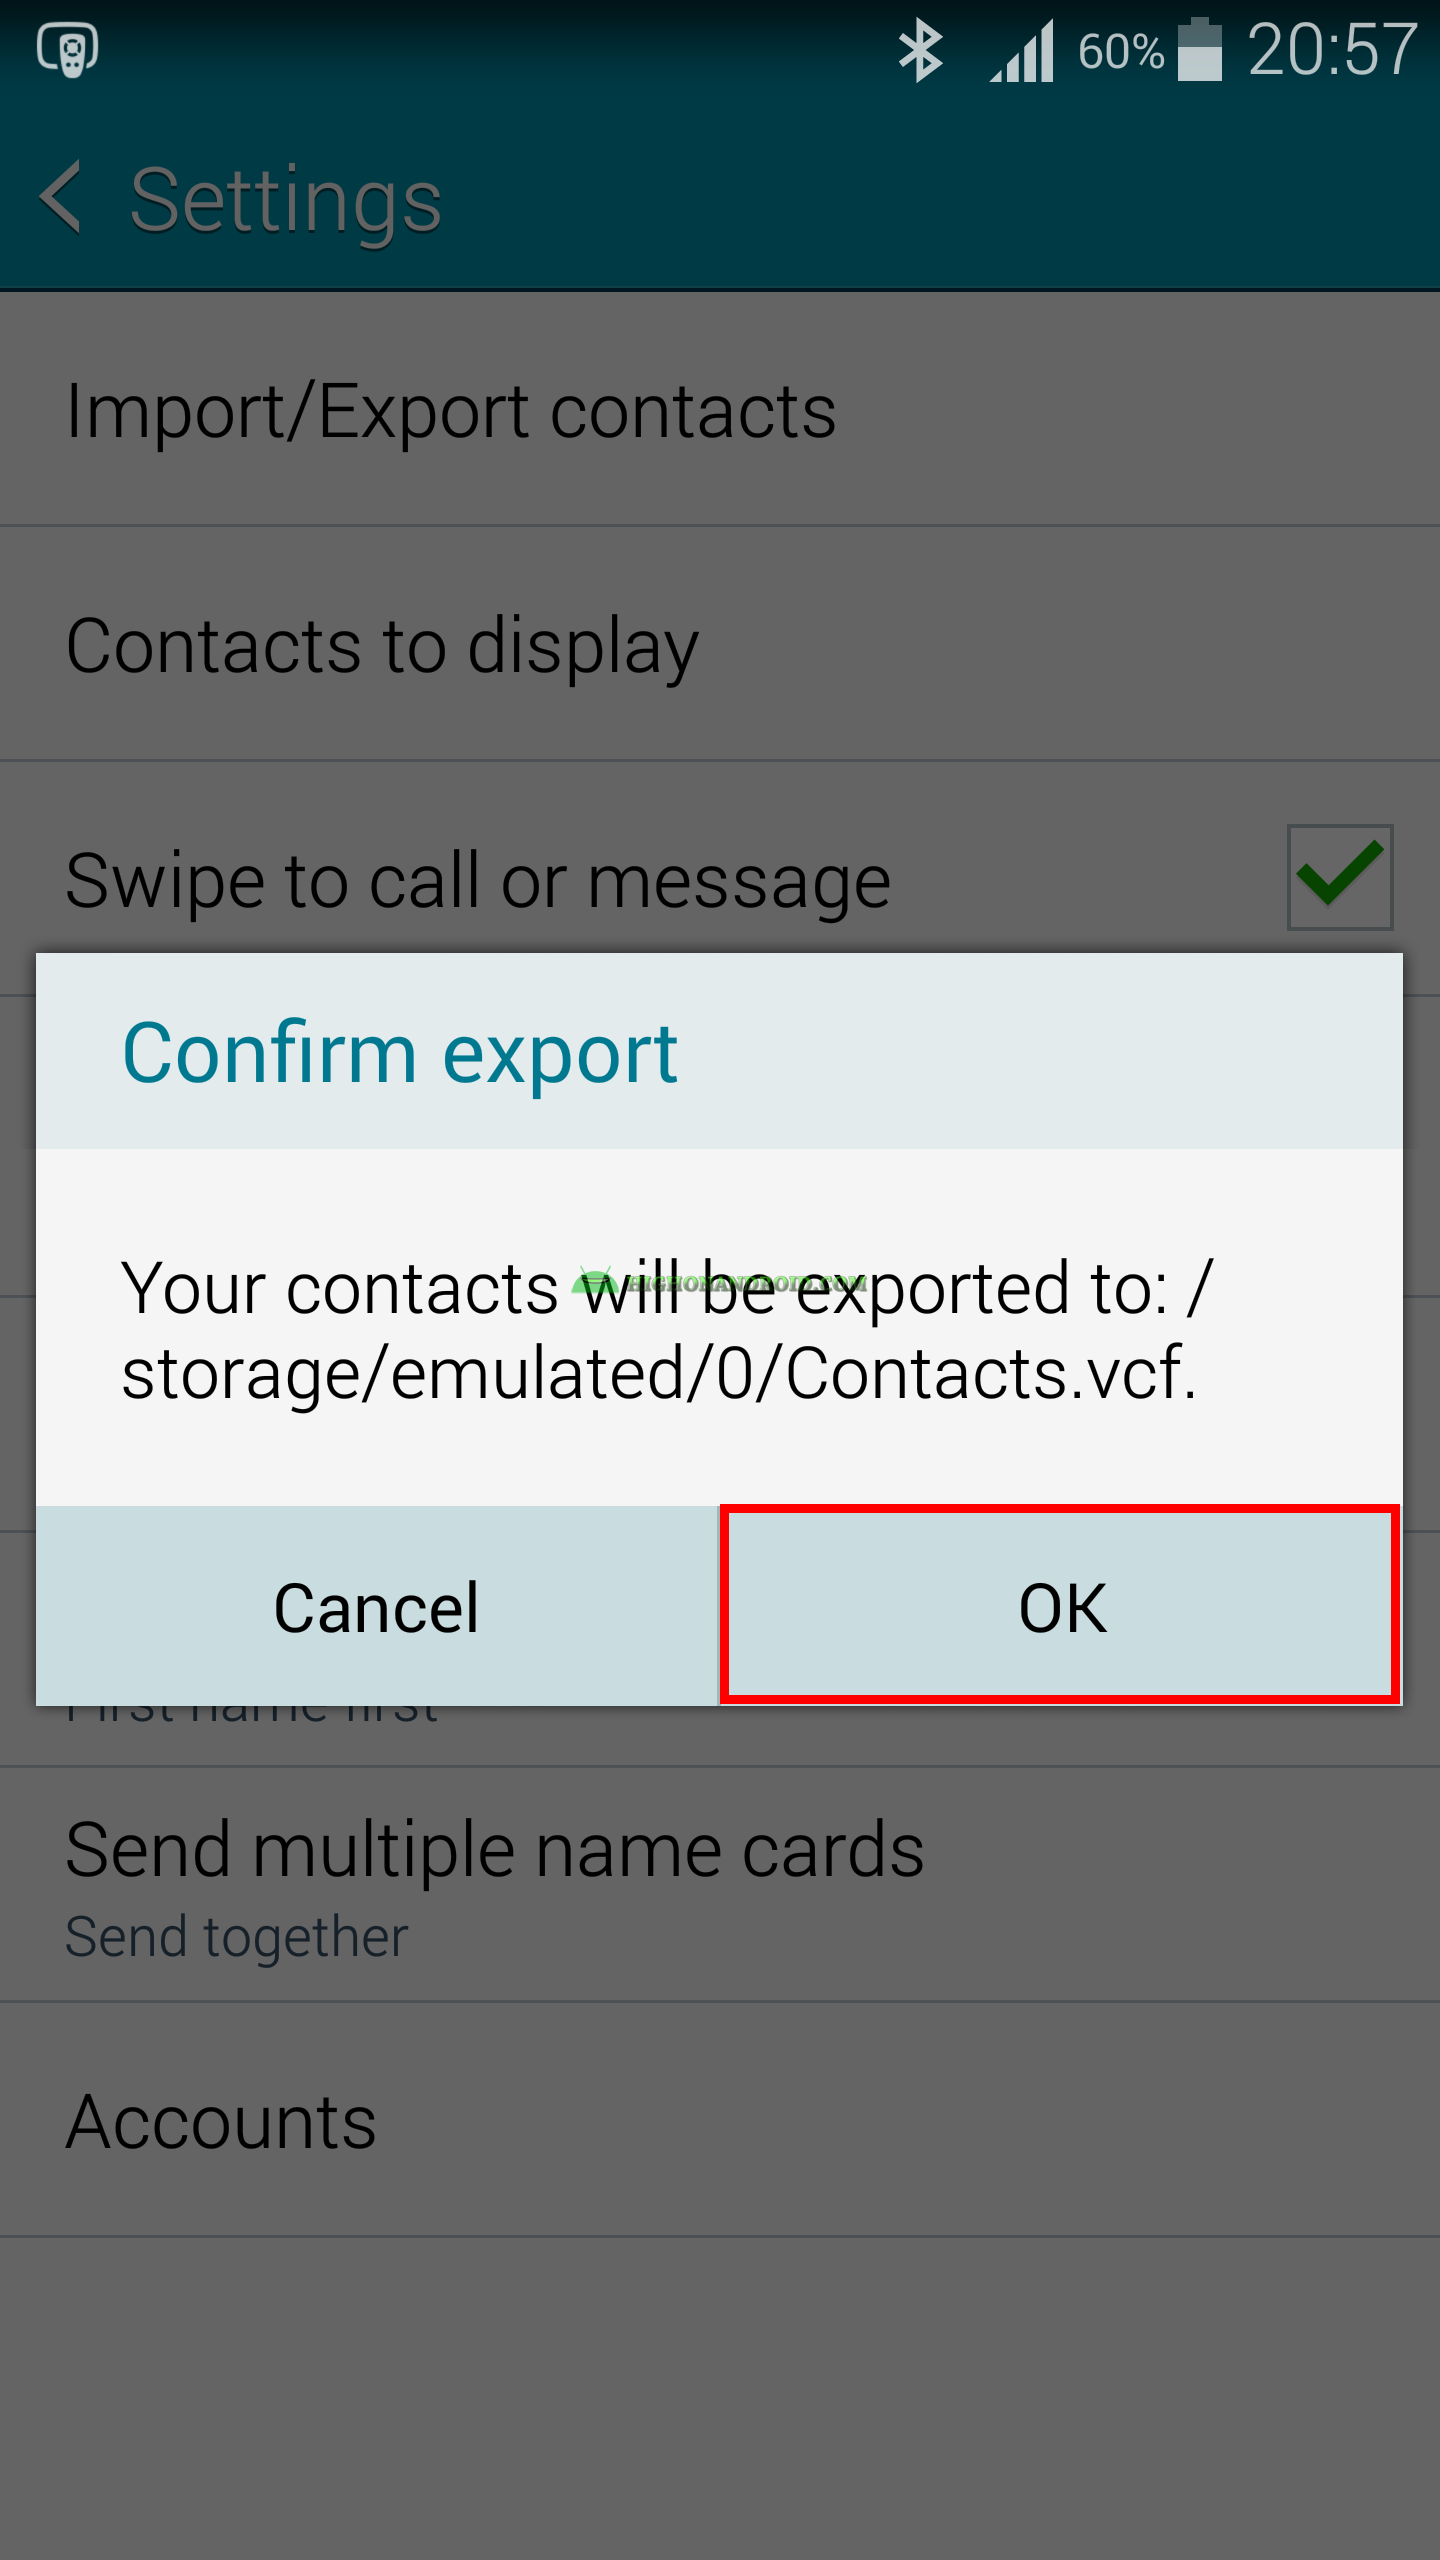
8. Exporting will start…

9. Based on how many contacts you have, the process could take longer time(several seconds to a few minutes).

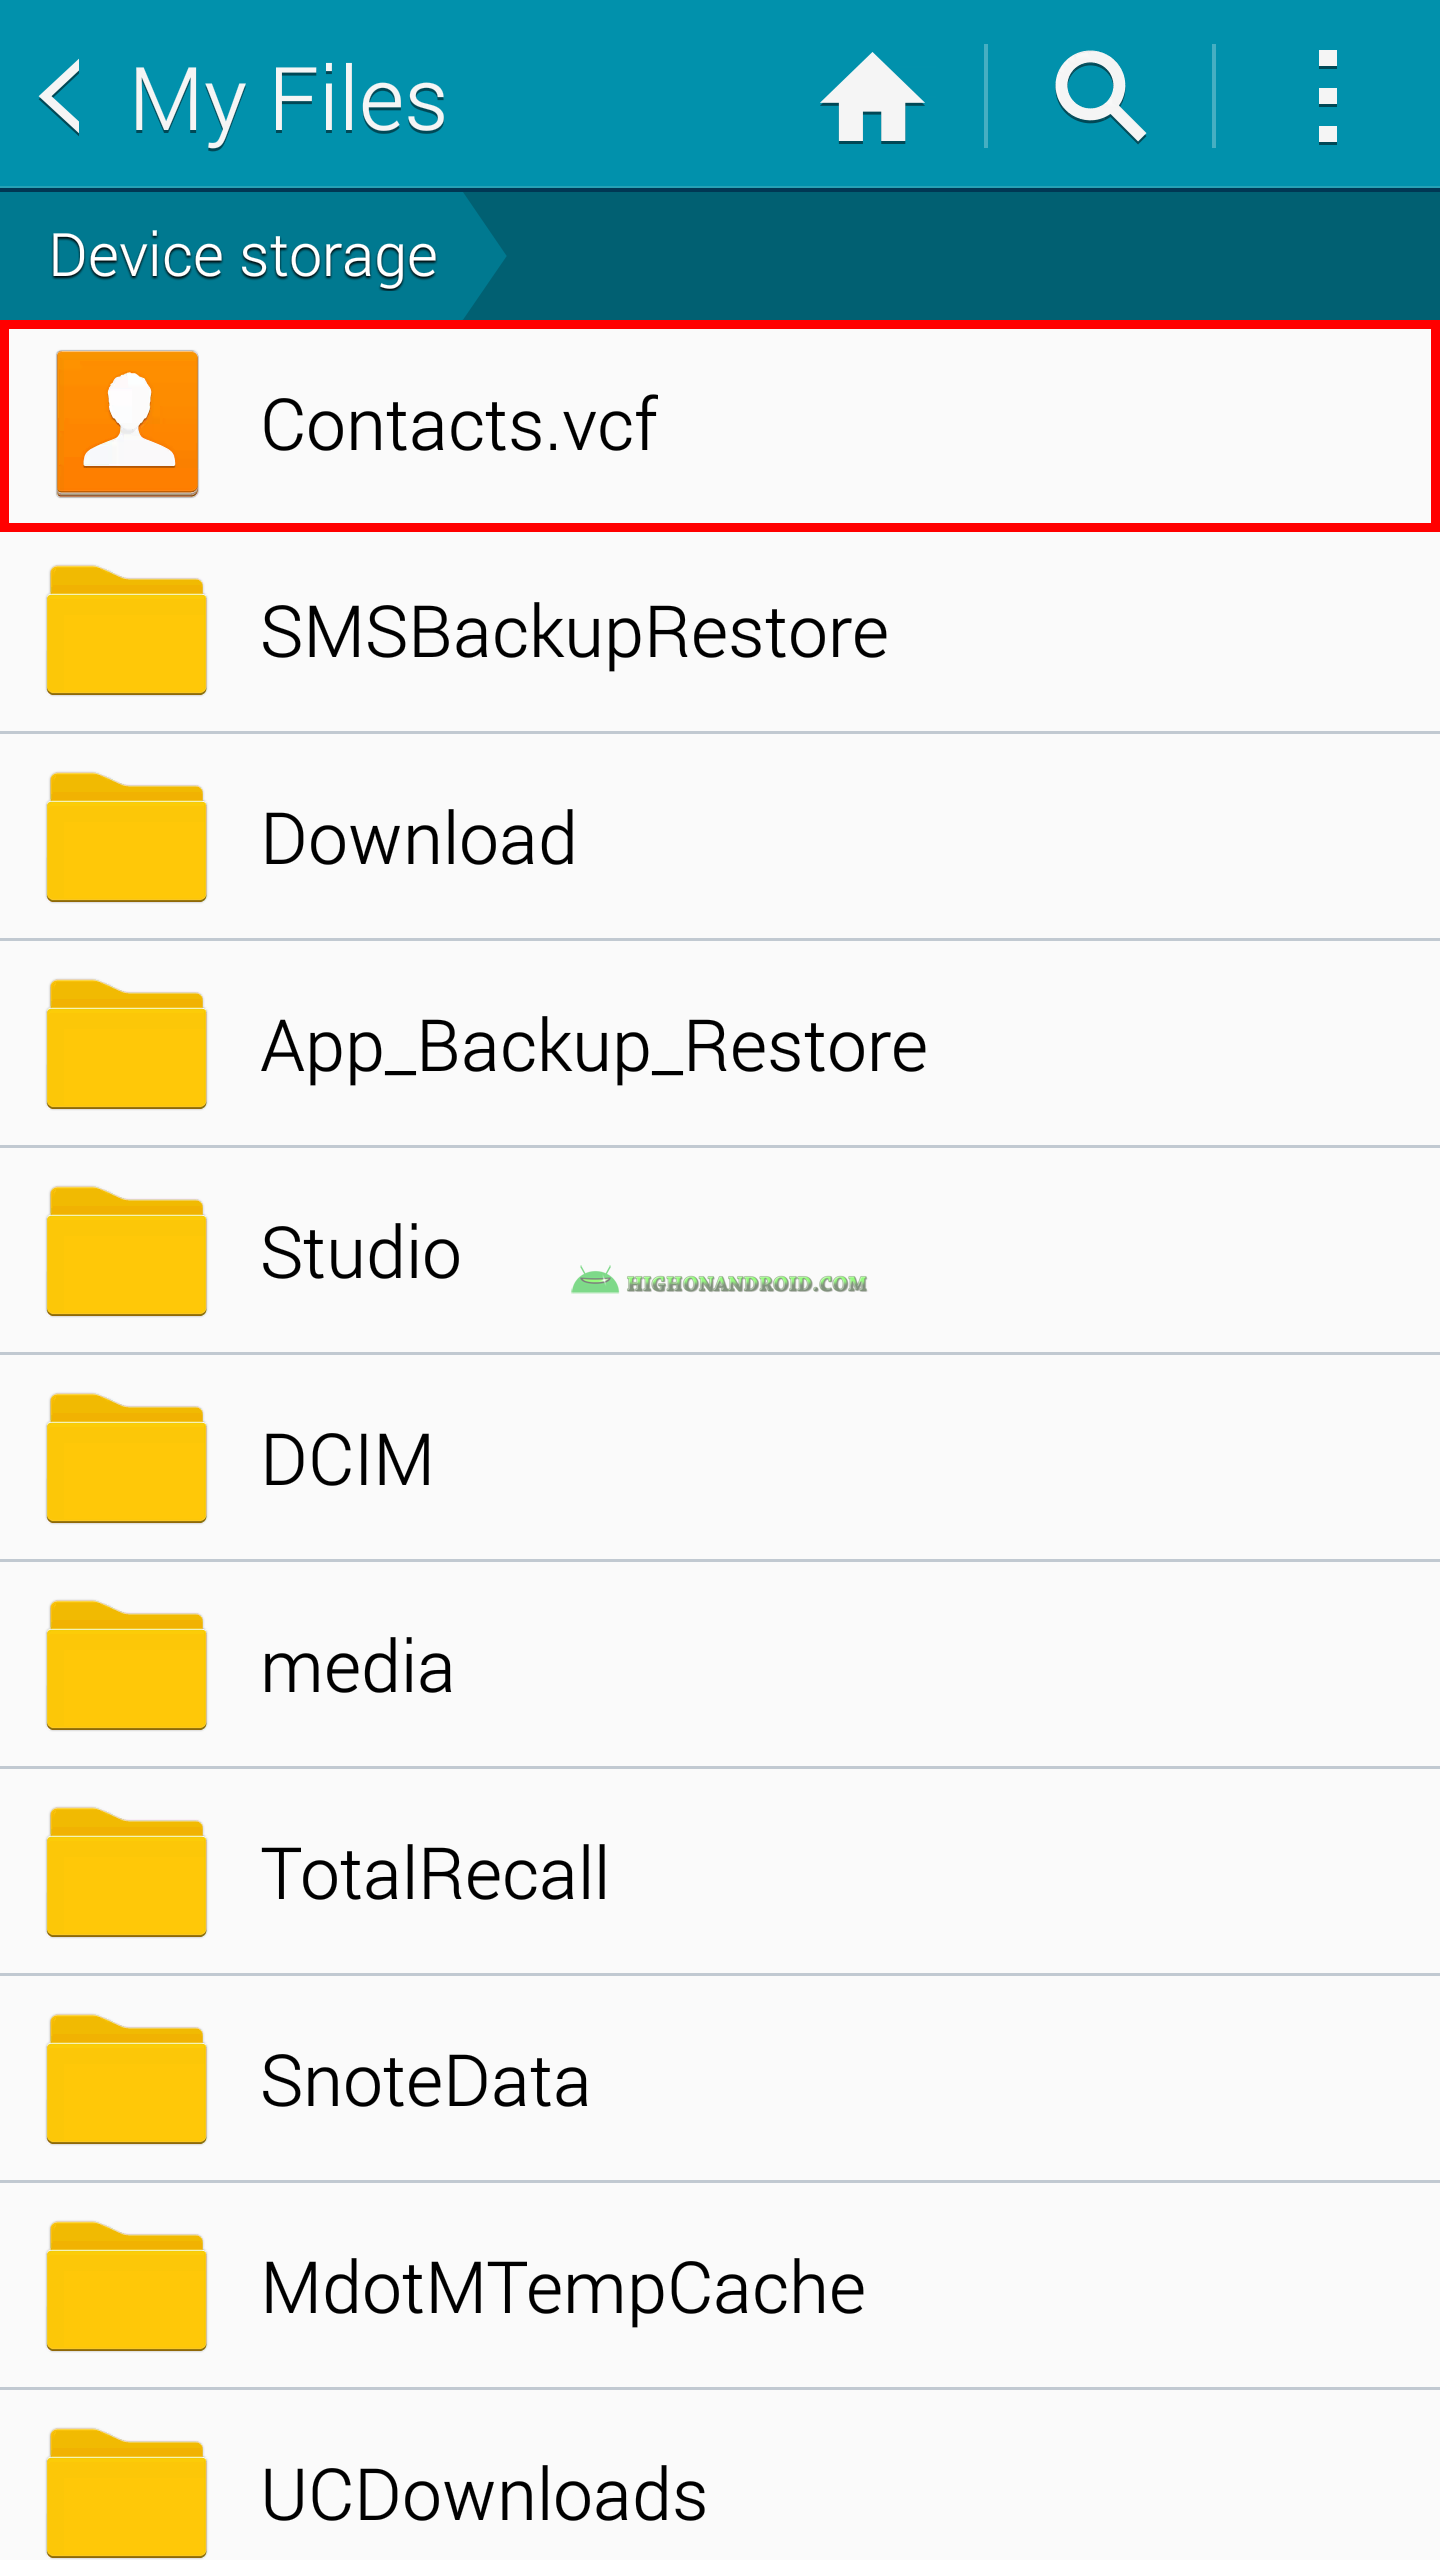
10. In our Internal SD card, a new file will be made by the name of “Contacts.VCF”, we must make sure to copy that file in a safe place so that we can use it again when we need it.
Method 2:
You can also sync contacts to your Gmail Account. This is the best method of backing up your contacts, by syncing them with your GMail account, you will have a backup copy of your contacts on Google’s free cloud storage.
Steps:
1. Go To Settings > Accounts or Open Contacts App.
2. Go to Settings= Accounts.
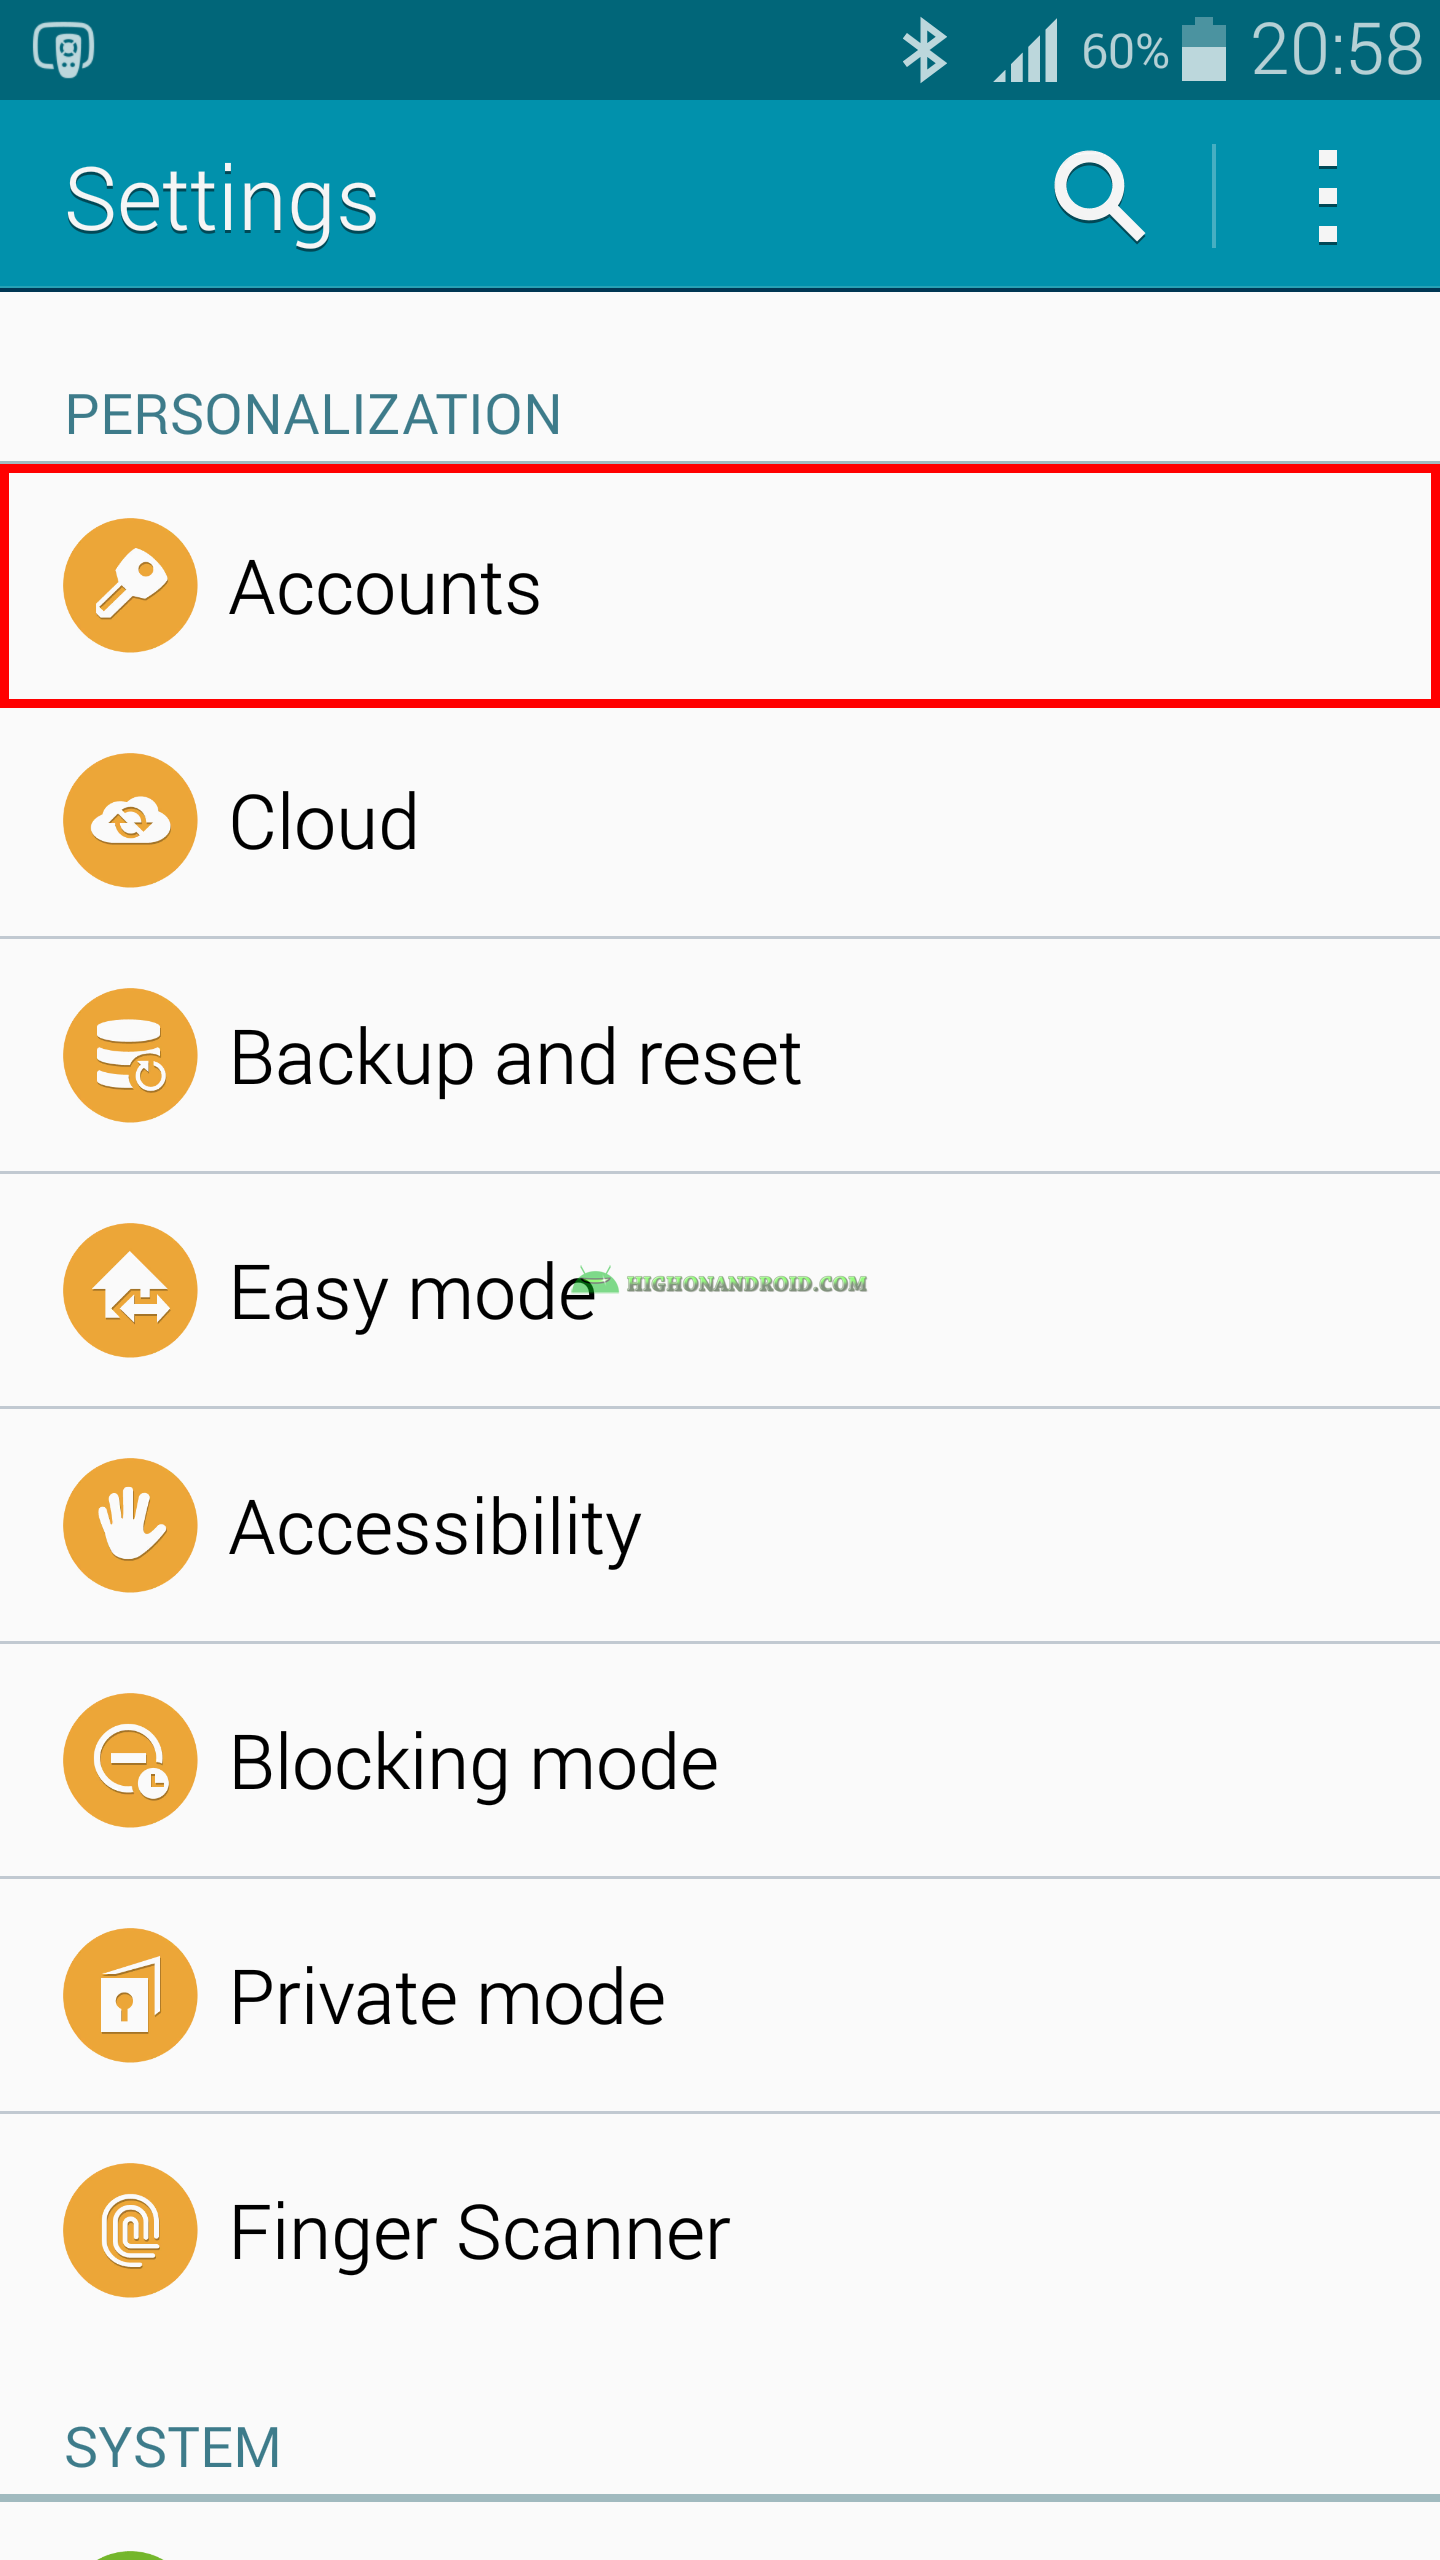
3. This screen will open up that contains the accounts of different apps that you are using on your phone.
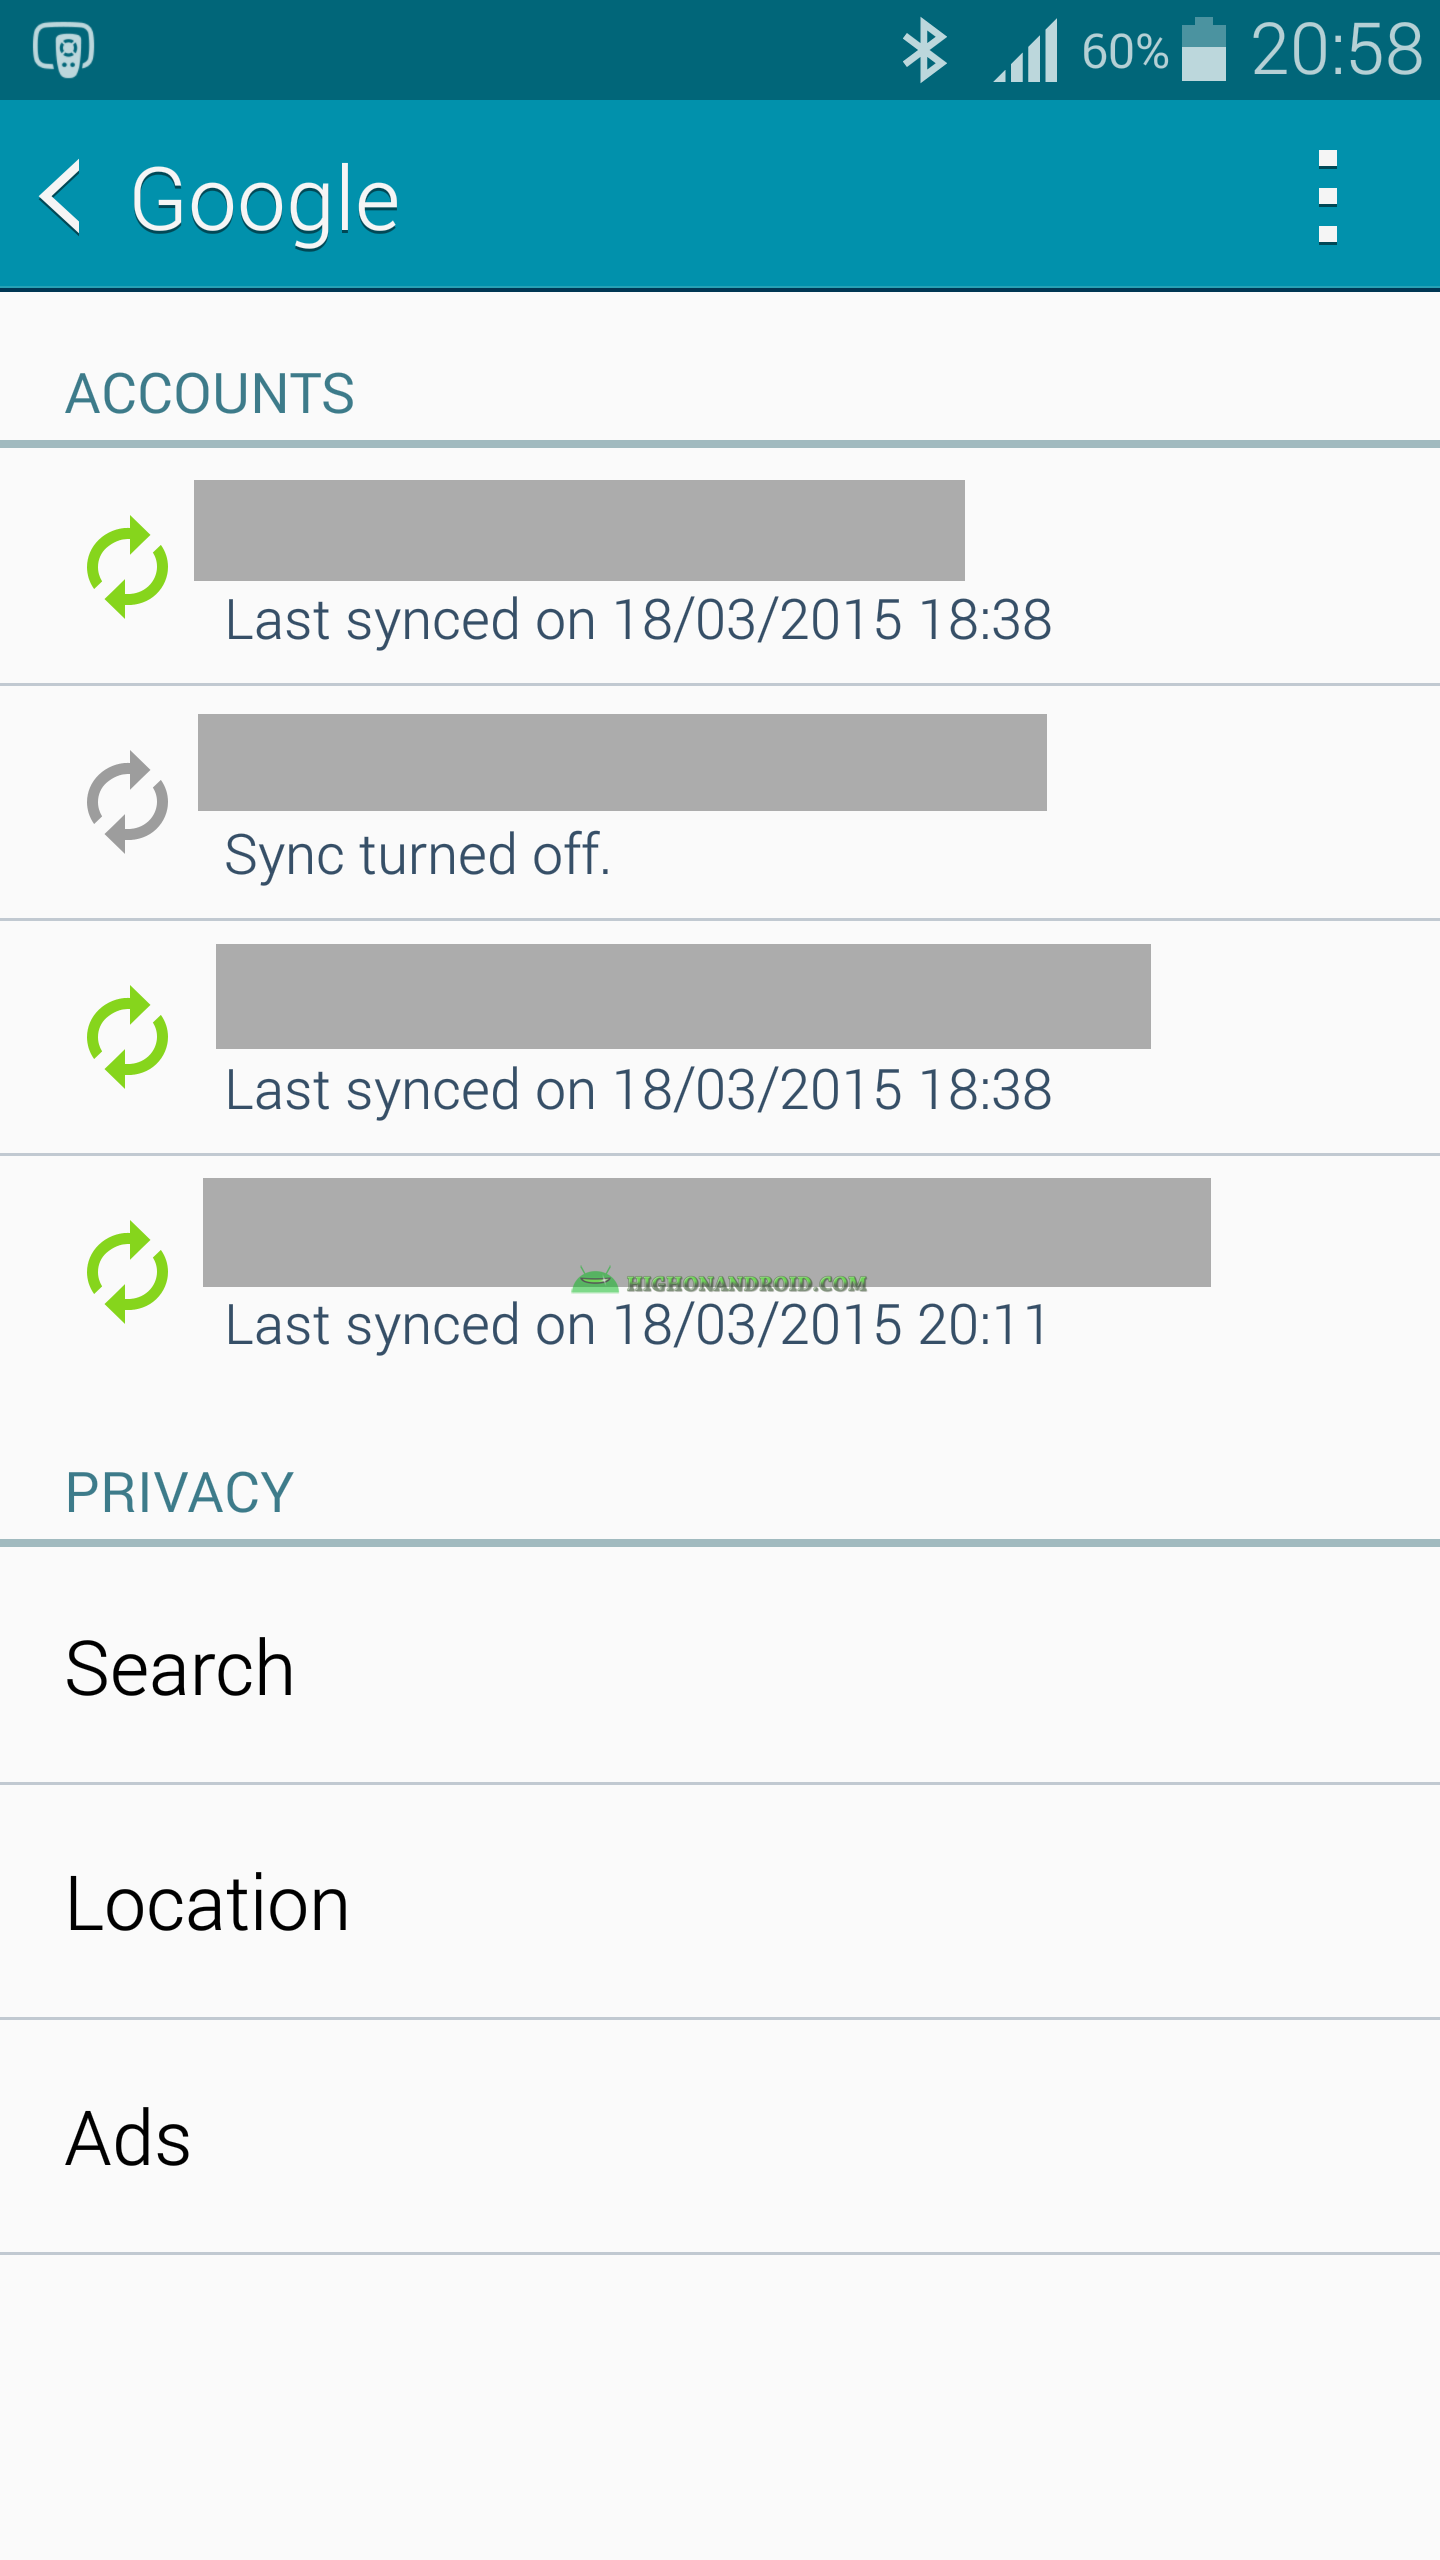
4. Then we tap on the Google Account.
5. The following screen will open up that contains the info about our account.
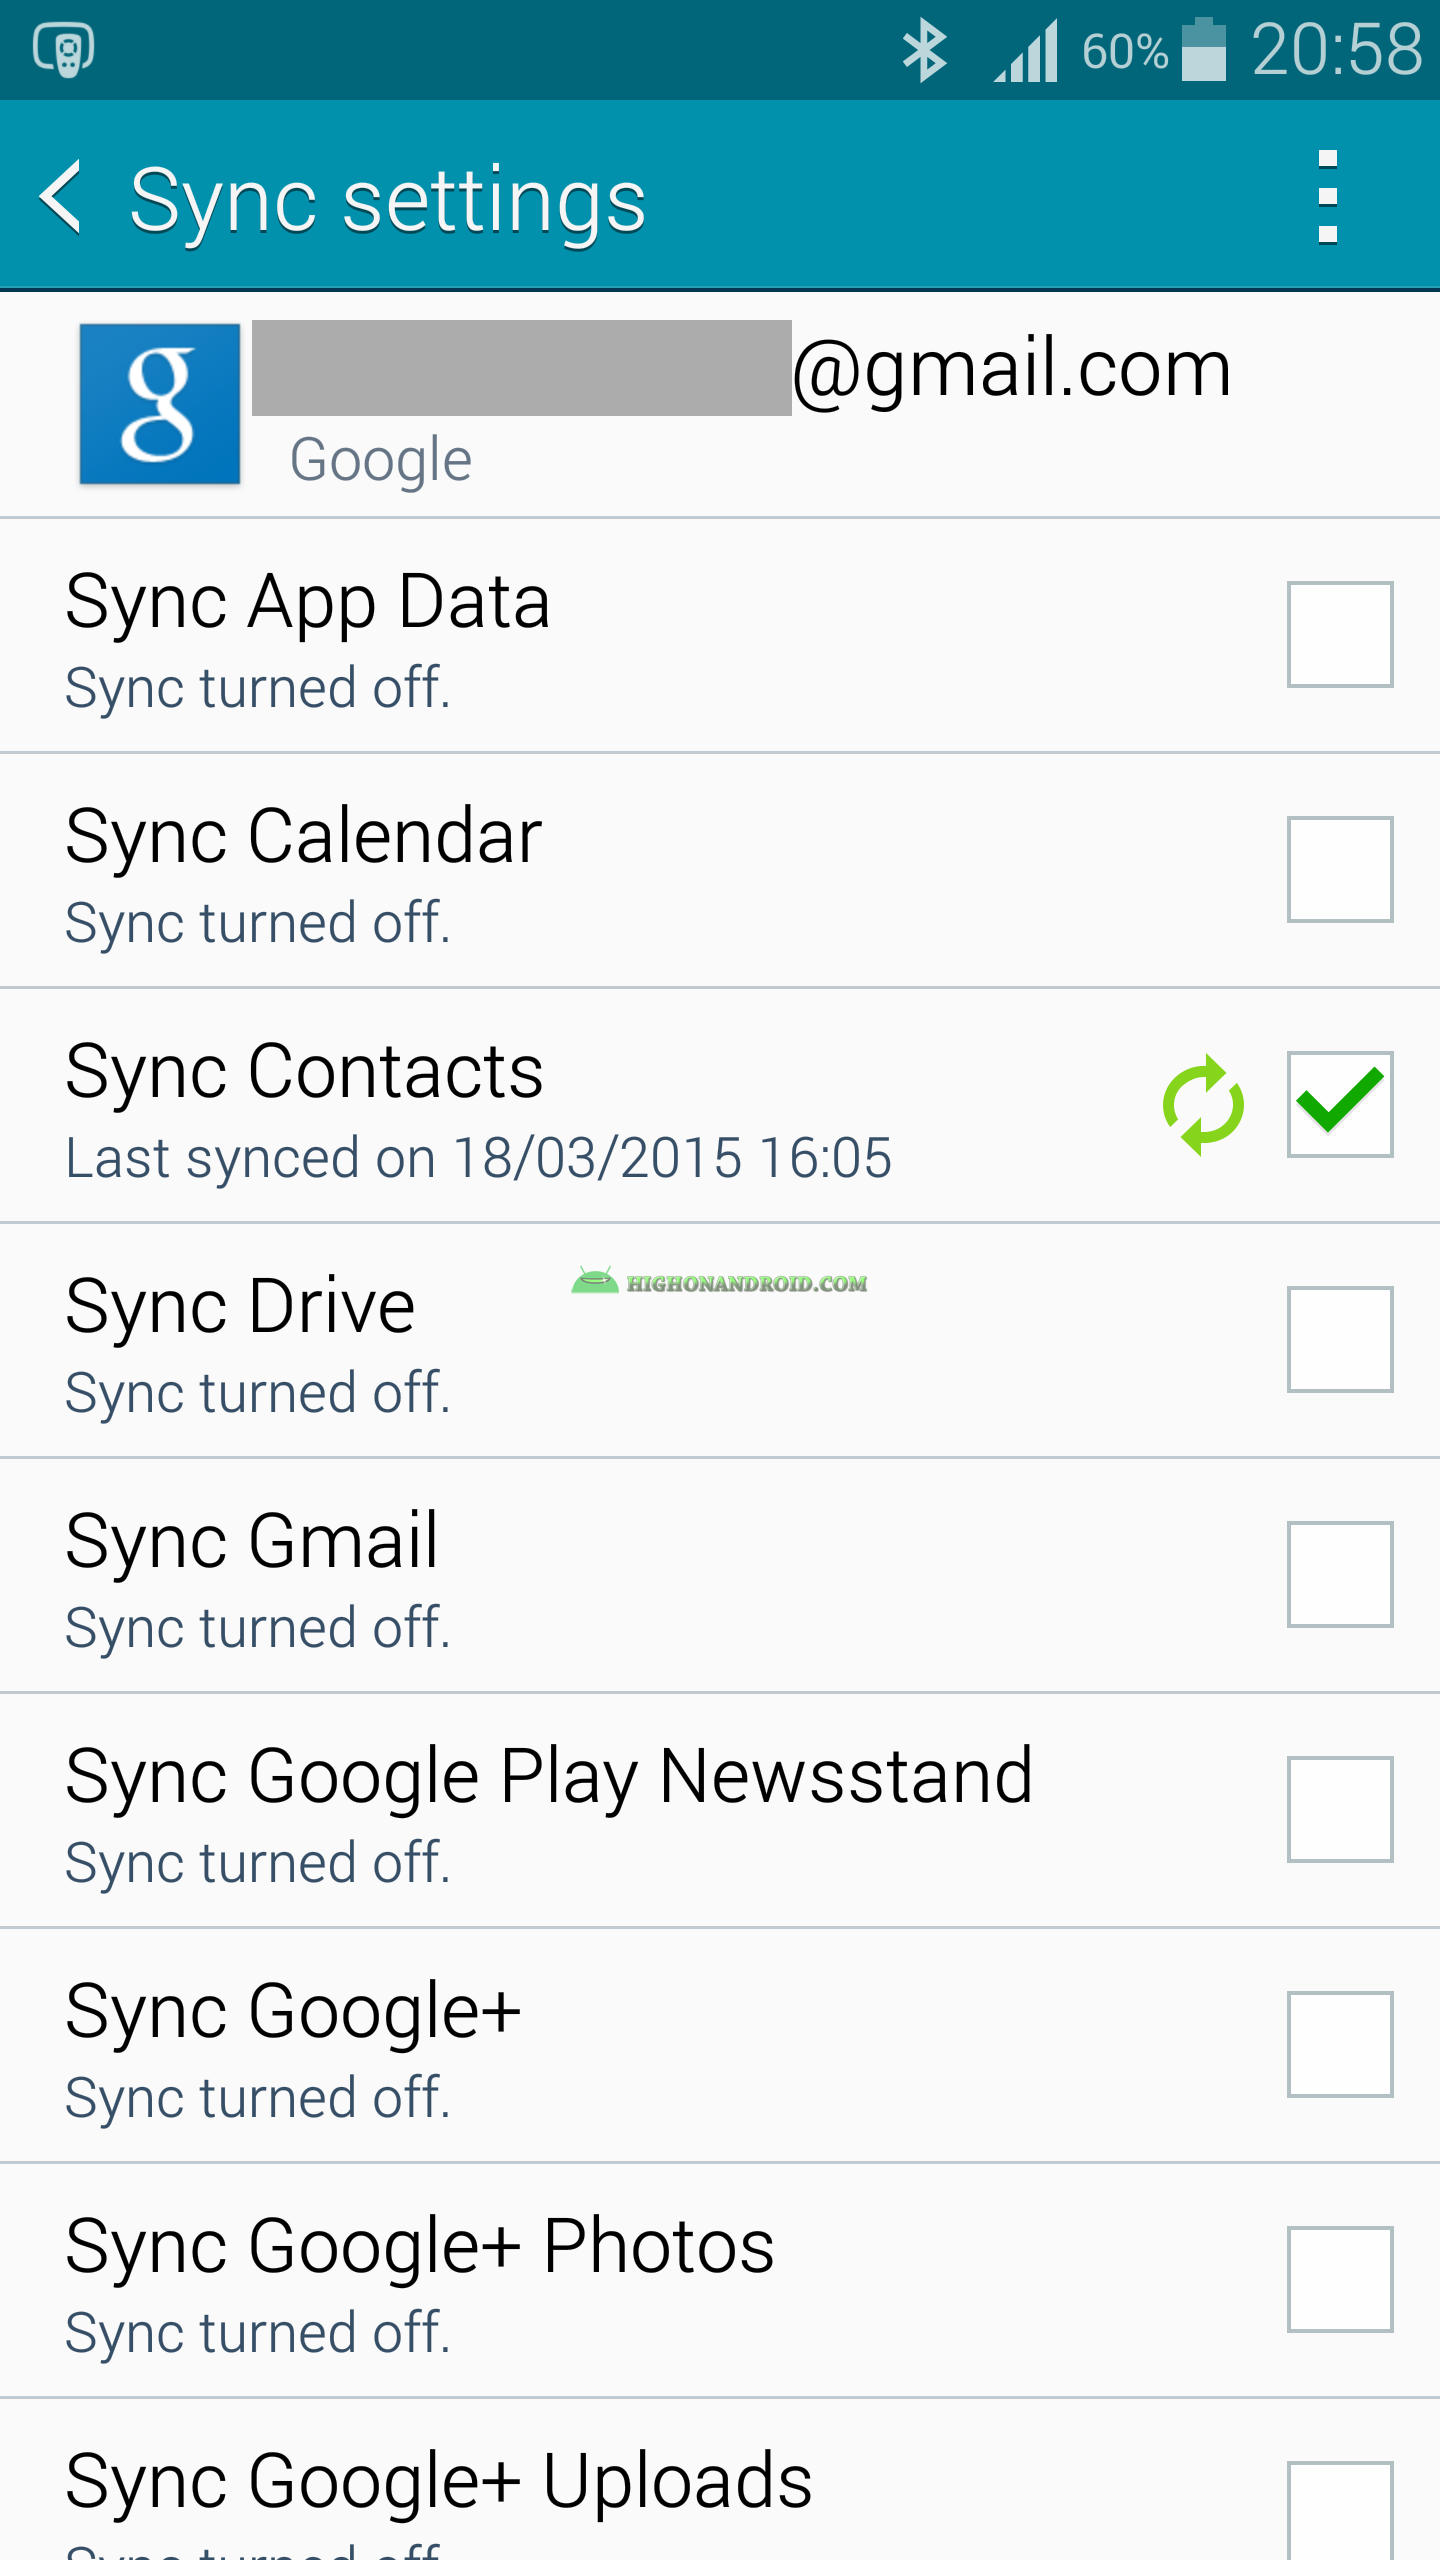
8. Tap on “Sync Contacts” and wait until the syncing is done.
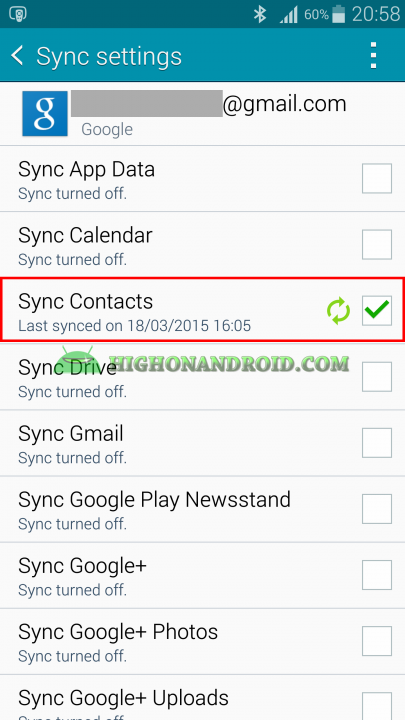
9. When syncing is finished, all of our contacts will be synced to our GMail Account. Also any new additional contacts will automatically synced to your GMail account.
GOOGLE CONTACTS:
All synced Contacts will be synced with our GMail account. Google Contacts can be accessed from this web address https://www.google.com/contacts/ ( you should be signed in the same Gmail account of that you’re using on your smartphone in order to see the contacts.)
Note:
At the time of this article, Google started updating the whole Google Contacts layout and design, and it’s still in preview. So not everything works in the preview version until we go back to the older version of it. I’ll explain them below.
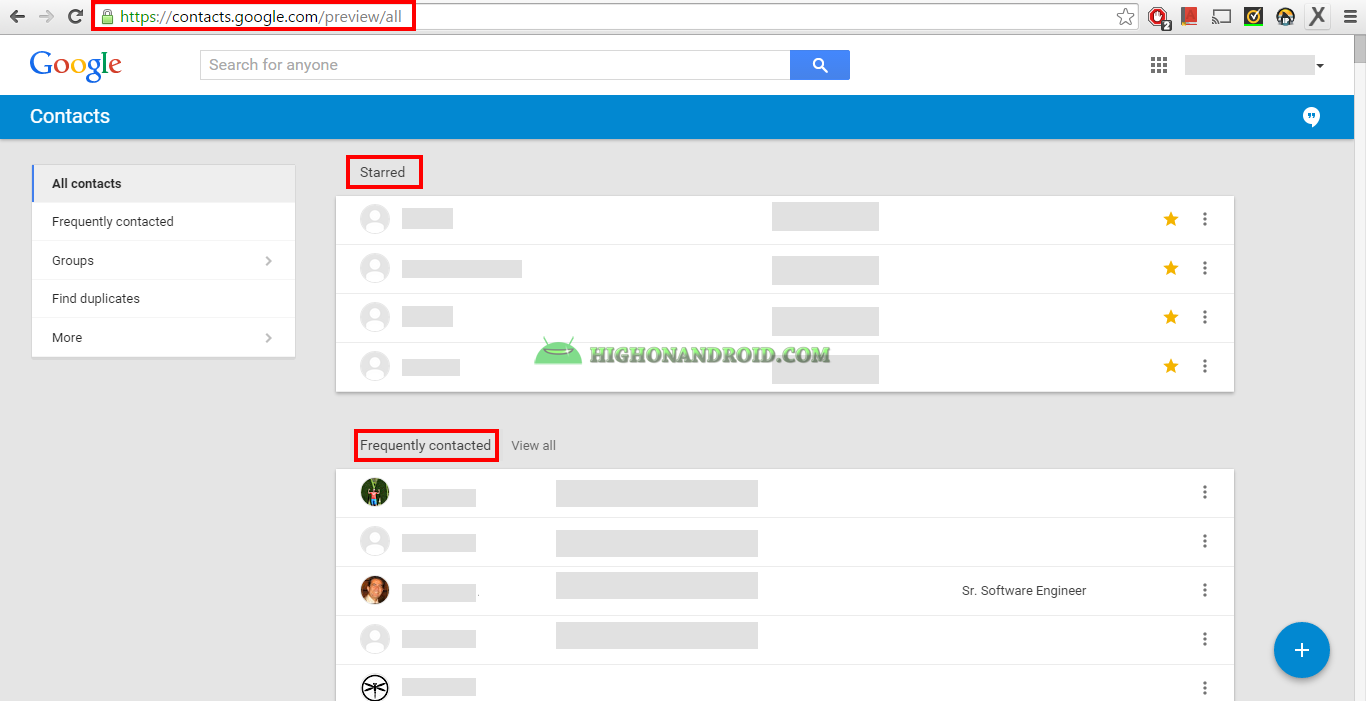
As you can see in the new preview, we have “Starred” contacts, which are the ones we starred inside the phone’s Contacts app.
We also see “Frequently contacted“, which by the way is only the contacts we added through email, not from your phone.
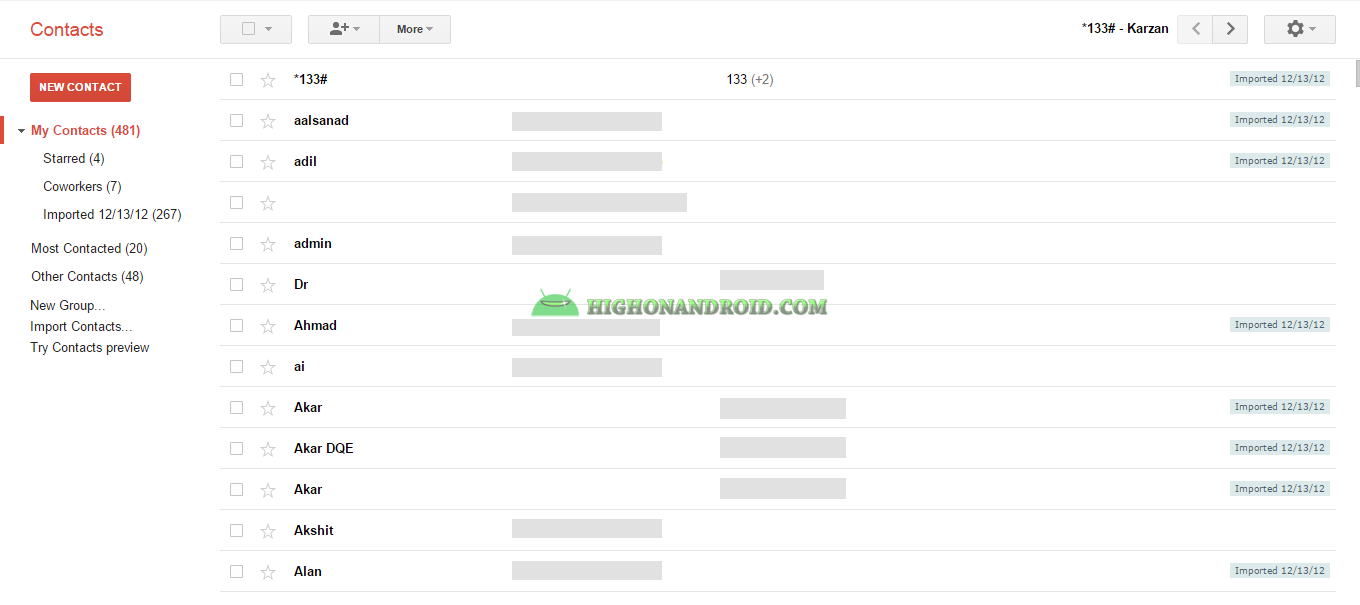
And finally if we Scroll down , we’ll see “All Contacts“, this is where we can see all contacts.
If you have duplicate contacts (as I do) then at the first time opening Google contacts, it will ask you if you want to merge the duplicates.
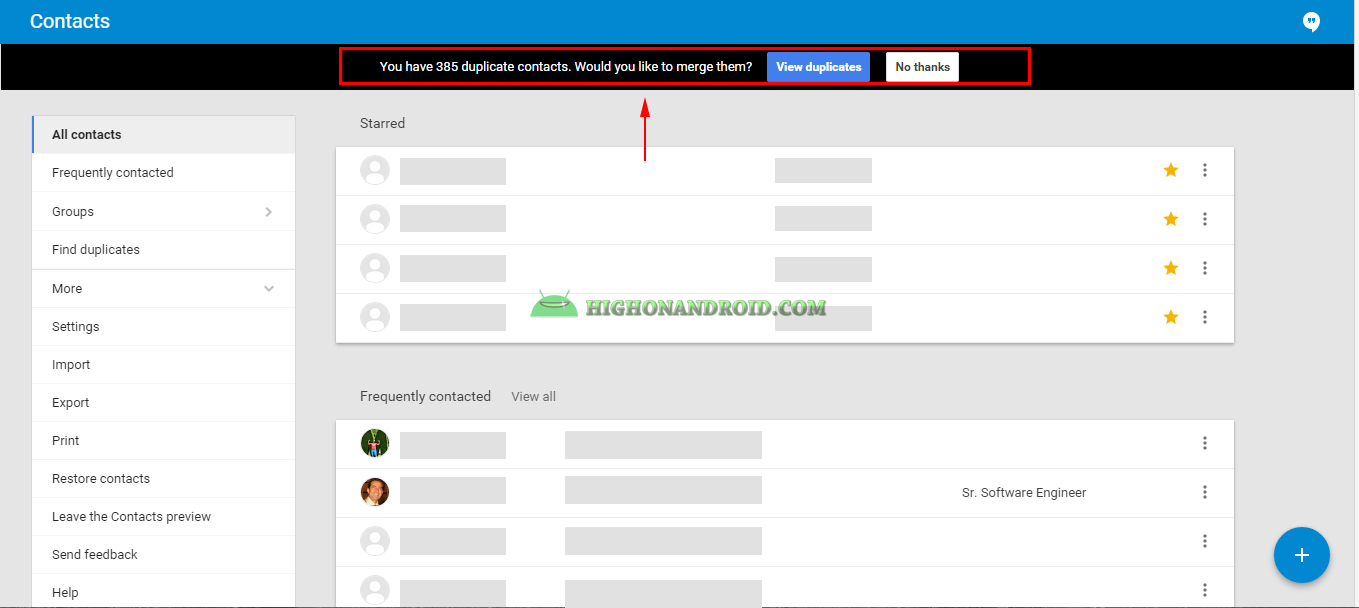
Click on ”View Duplicates” if you want to merge them and below screen will show up.
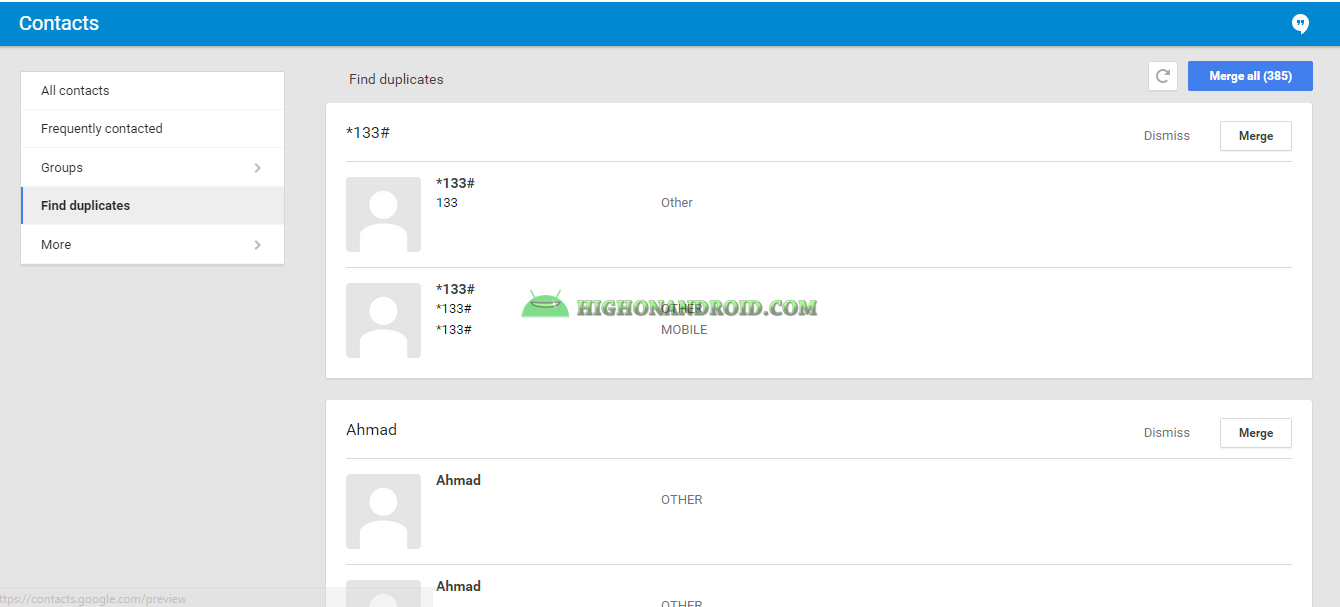
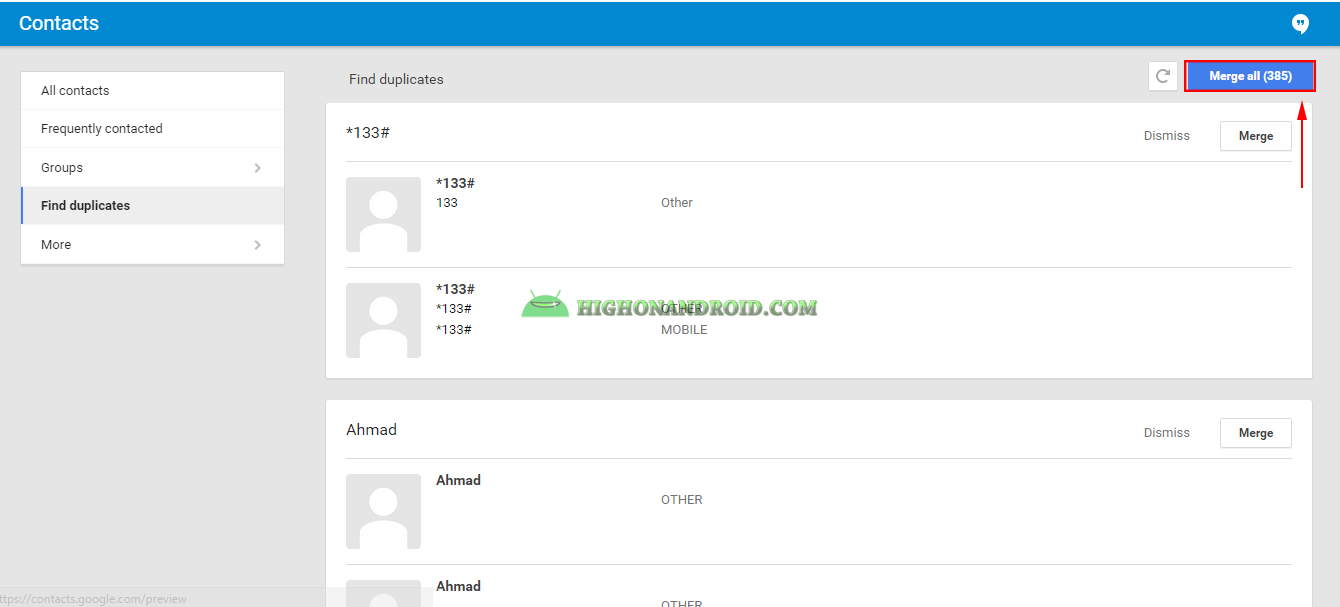
As you can see, it found 385 duplicate contacts, we can merge them one by one OR we can merge all of them by clicking on the blue button “Merge All (# of duplicate contacts)”.
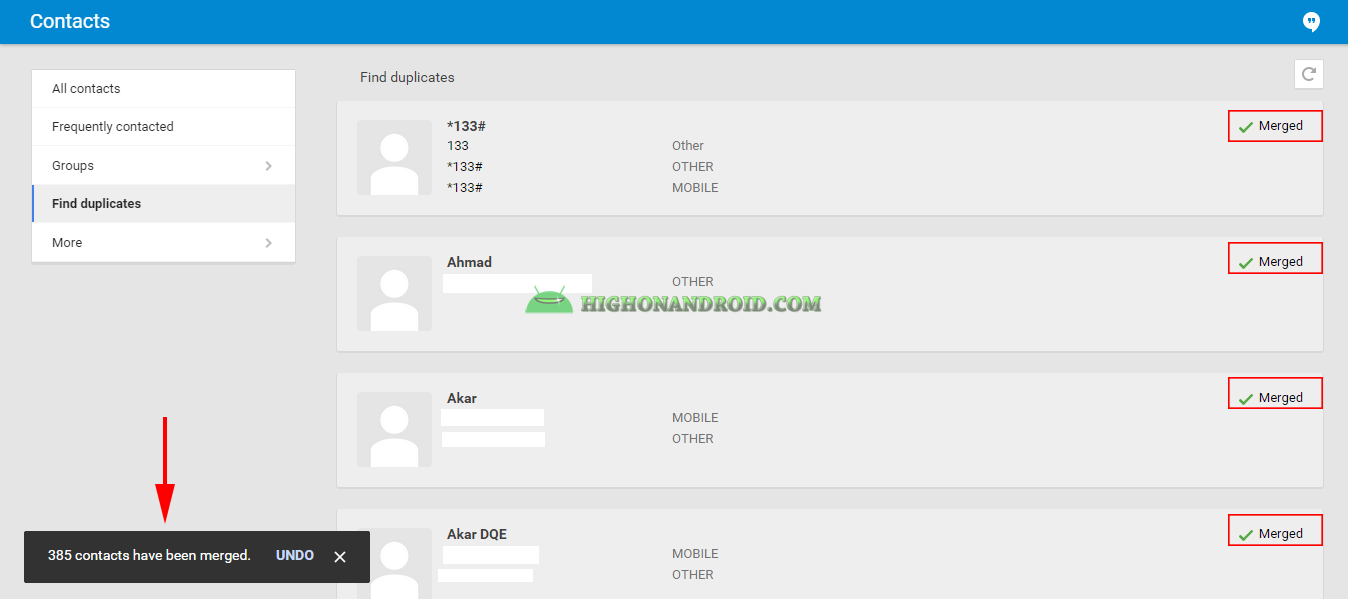
When merging is done, you’ll see the below screen with all duplicated contacts merged into single contacts list.
More:
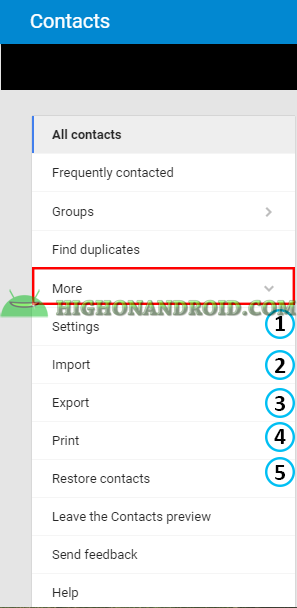
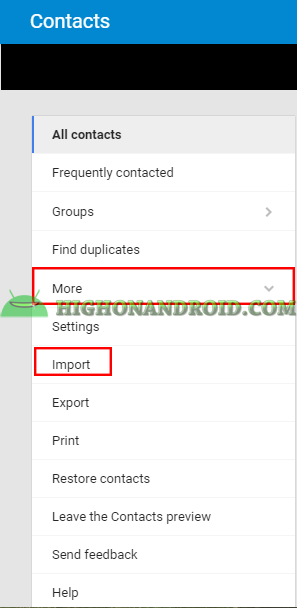
The “More” section of Google Contacts contains these parts.
1. Settings:
This is where you can change the default language for Google Products and you can also change your country code.

2. Import
This part is used for importing .vcf files from PC which can be used for restoring (I’ll explain more at ”Restore” section in the below).
3. Export
This part lets you export your contacts to your PC so that you can keep it for later use or in case something goes wrong, you will always have a backup copy. (We highly recommend you to actually e-mail yourself a copy of your backup file so you will always have it handy in your e-mail box.)
Steps:
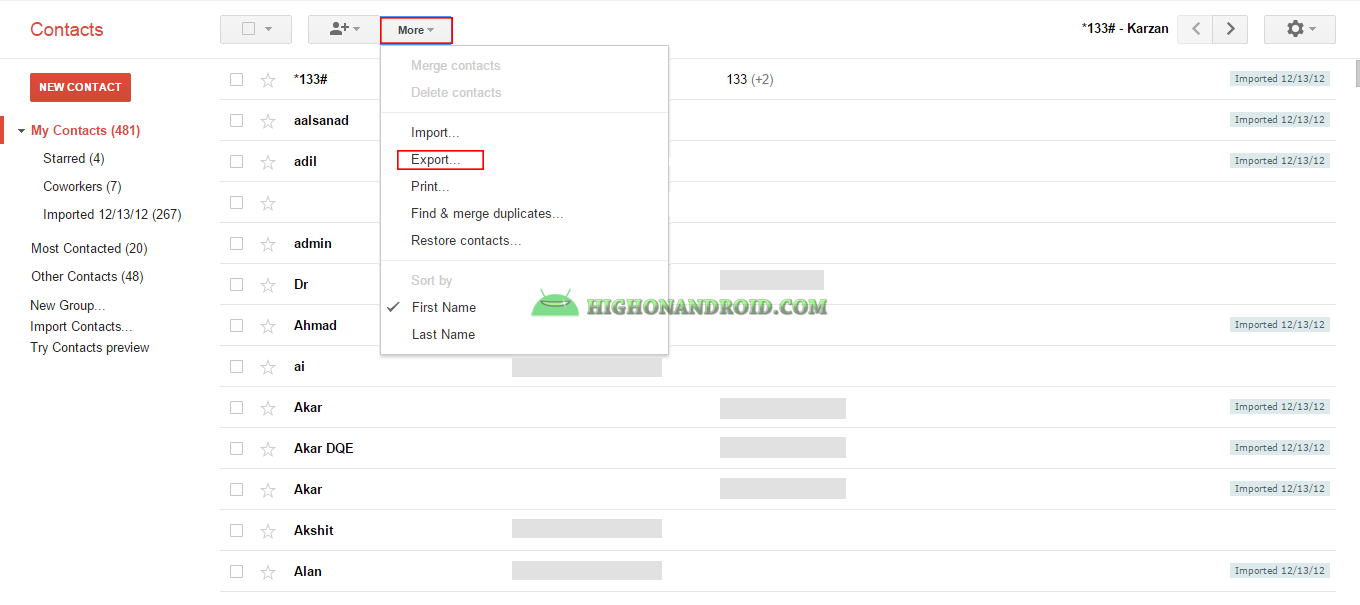
Click on “More” button and choose “Export”.
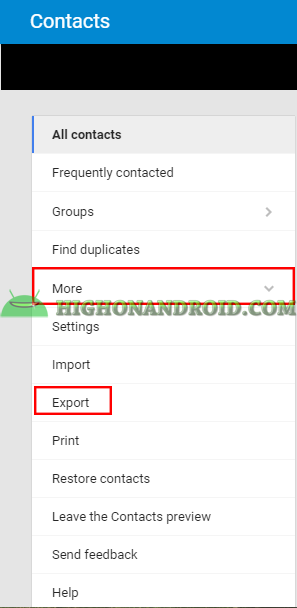
The below screen will show up (at the time of this article, Google Contacts is in preview mode which does NOT support importing and exporting contacts unless going back to OLD Google Contacts, but as time goes, this may change and you may directly be able to import/export contacts without the need to go back to OLD Google Contacts).
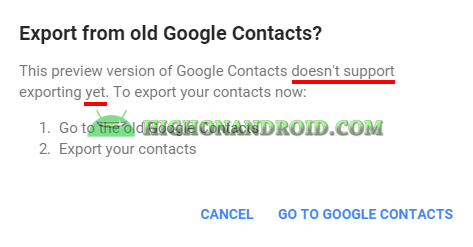
To export, click on “GO TO GOOGLE CONTACTS” button.
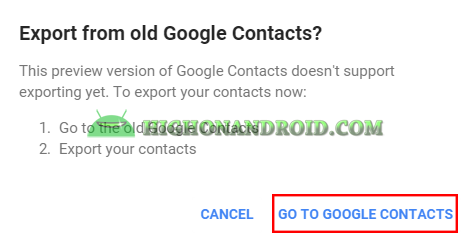
Then, we’re redirected to the OLD Google Contacts which should look like this:
Click on “More” Button then “Export” Button.
The following screen will show up:
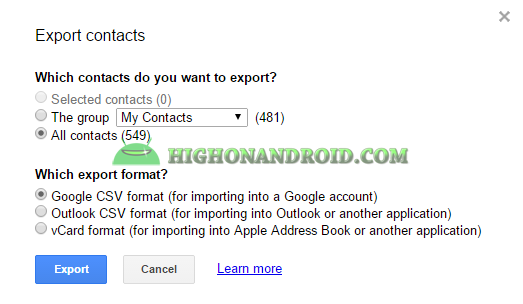
As you can see we have THREE options for export.
1. Google CSV format (if you intend to import the exported contacts to Google account in future).
2. Outlook CSV (for importing into Outlook).
3. vCARD format or (.vcf) (Choose this one if you want to import these exported contacts to your phone in future).
I’ll choose vCard and click on “EXPORT” button.

“Contacts.vcf”‘ file will be downloaded to our PC. Keep it in a safe place for future use.
4. Print (for printing the contacts names and information).
5. Restore contacts
This one is important and lets you restore the previously imported contacts in past 30 days. This is not a direct restore of full deleted contact numbers, but it’s still efficient and good to use if anything wrong happens to your contacts.
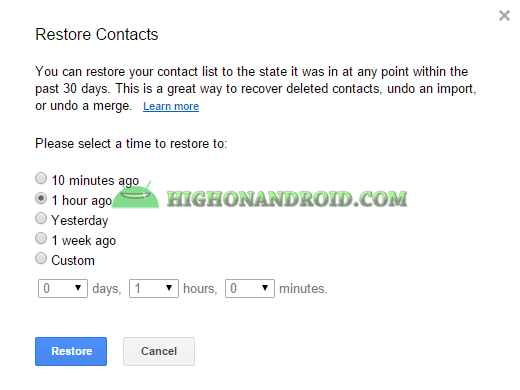
You can change the time or set a custom day, hour, and minutes for the deleted contacts to be restored. After that, click on Restore button.
Method 3 Backup/Restore Contacts Using 3rd-Party apps
This method depends on using 3rd-party apps for exporting contacts and then sending it to various services like Google Drive or via bluetooth to your computer.
BACKUP:
Steps:
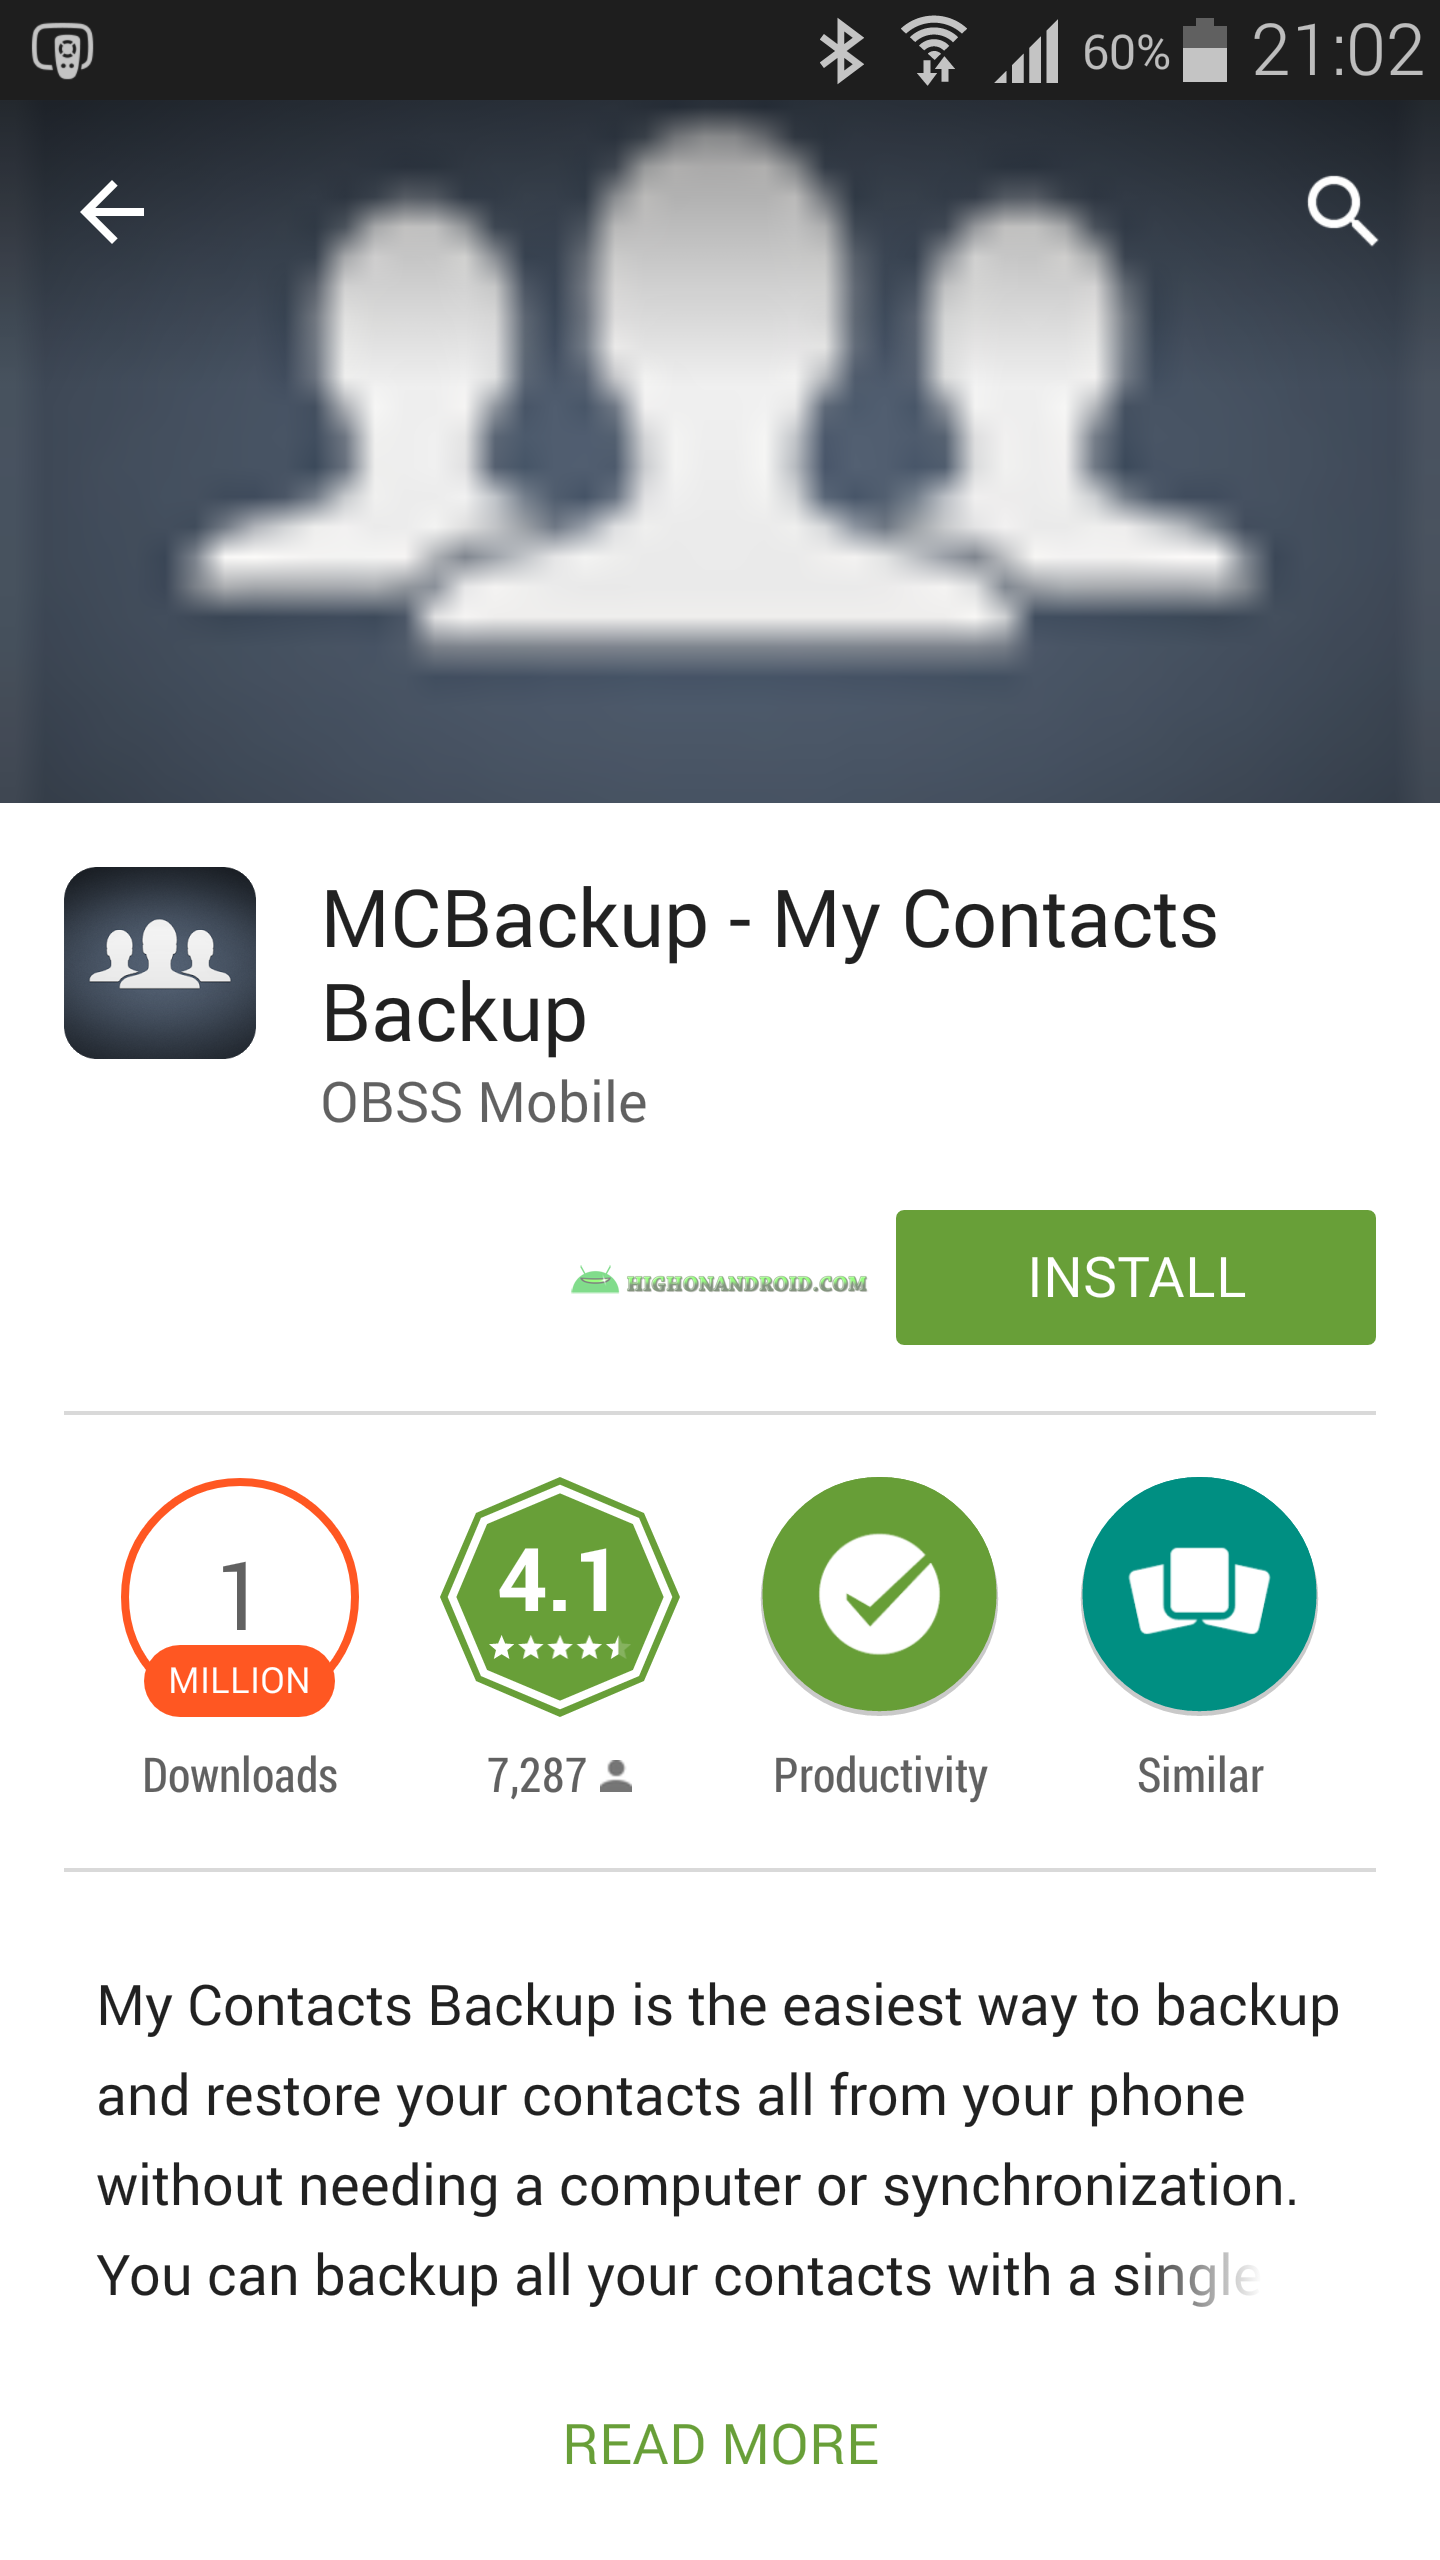
1. Download MC Backup App from Google PlayStore (link).
2. Open the app. This is the main screen of the app.
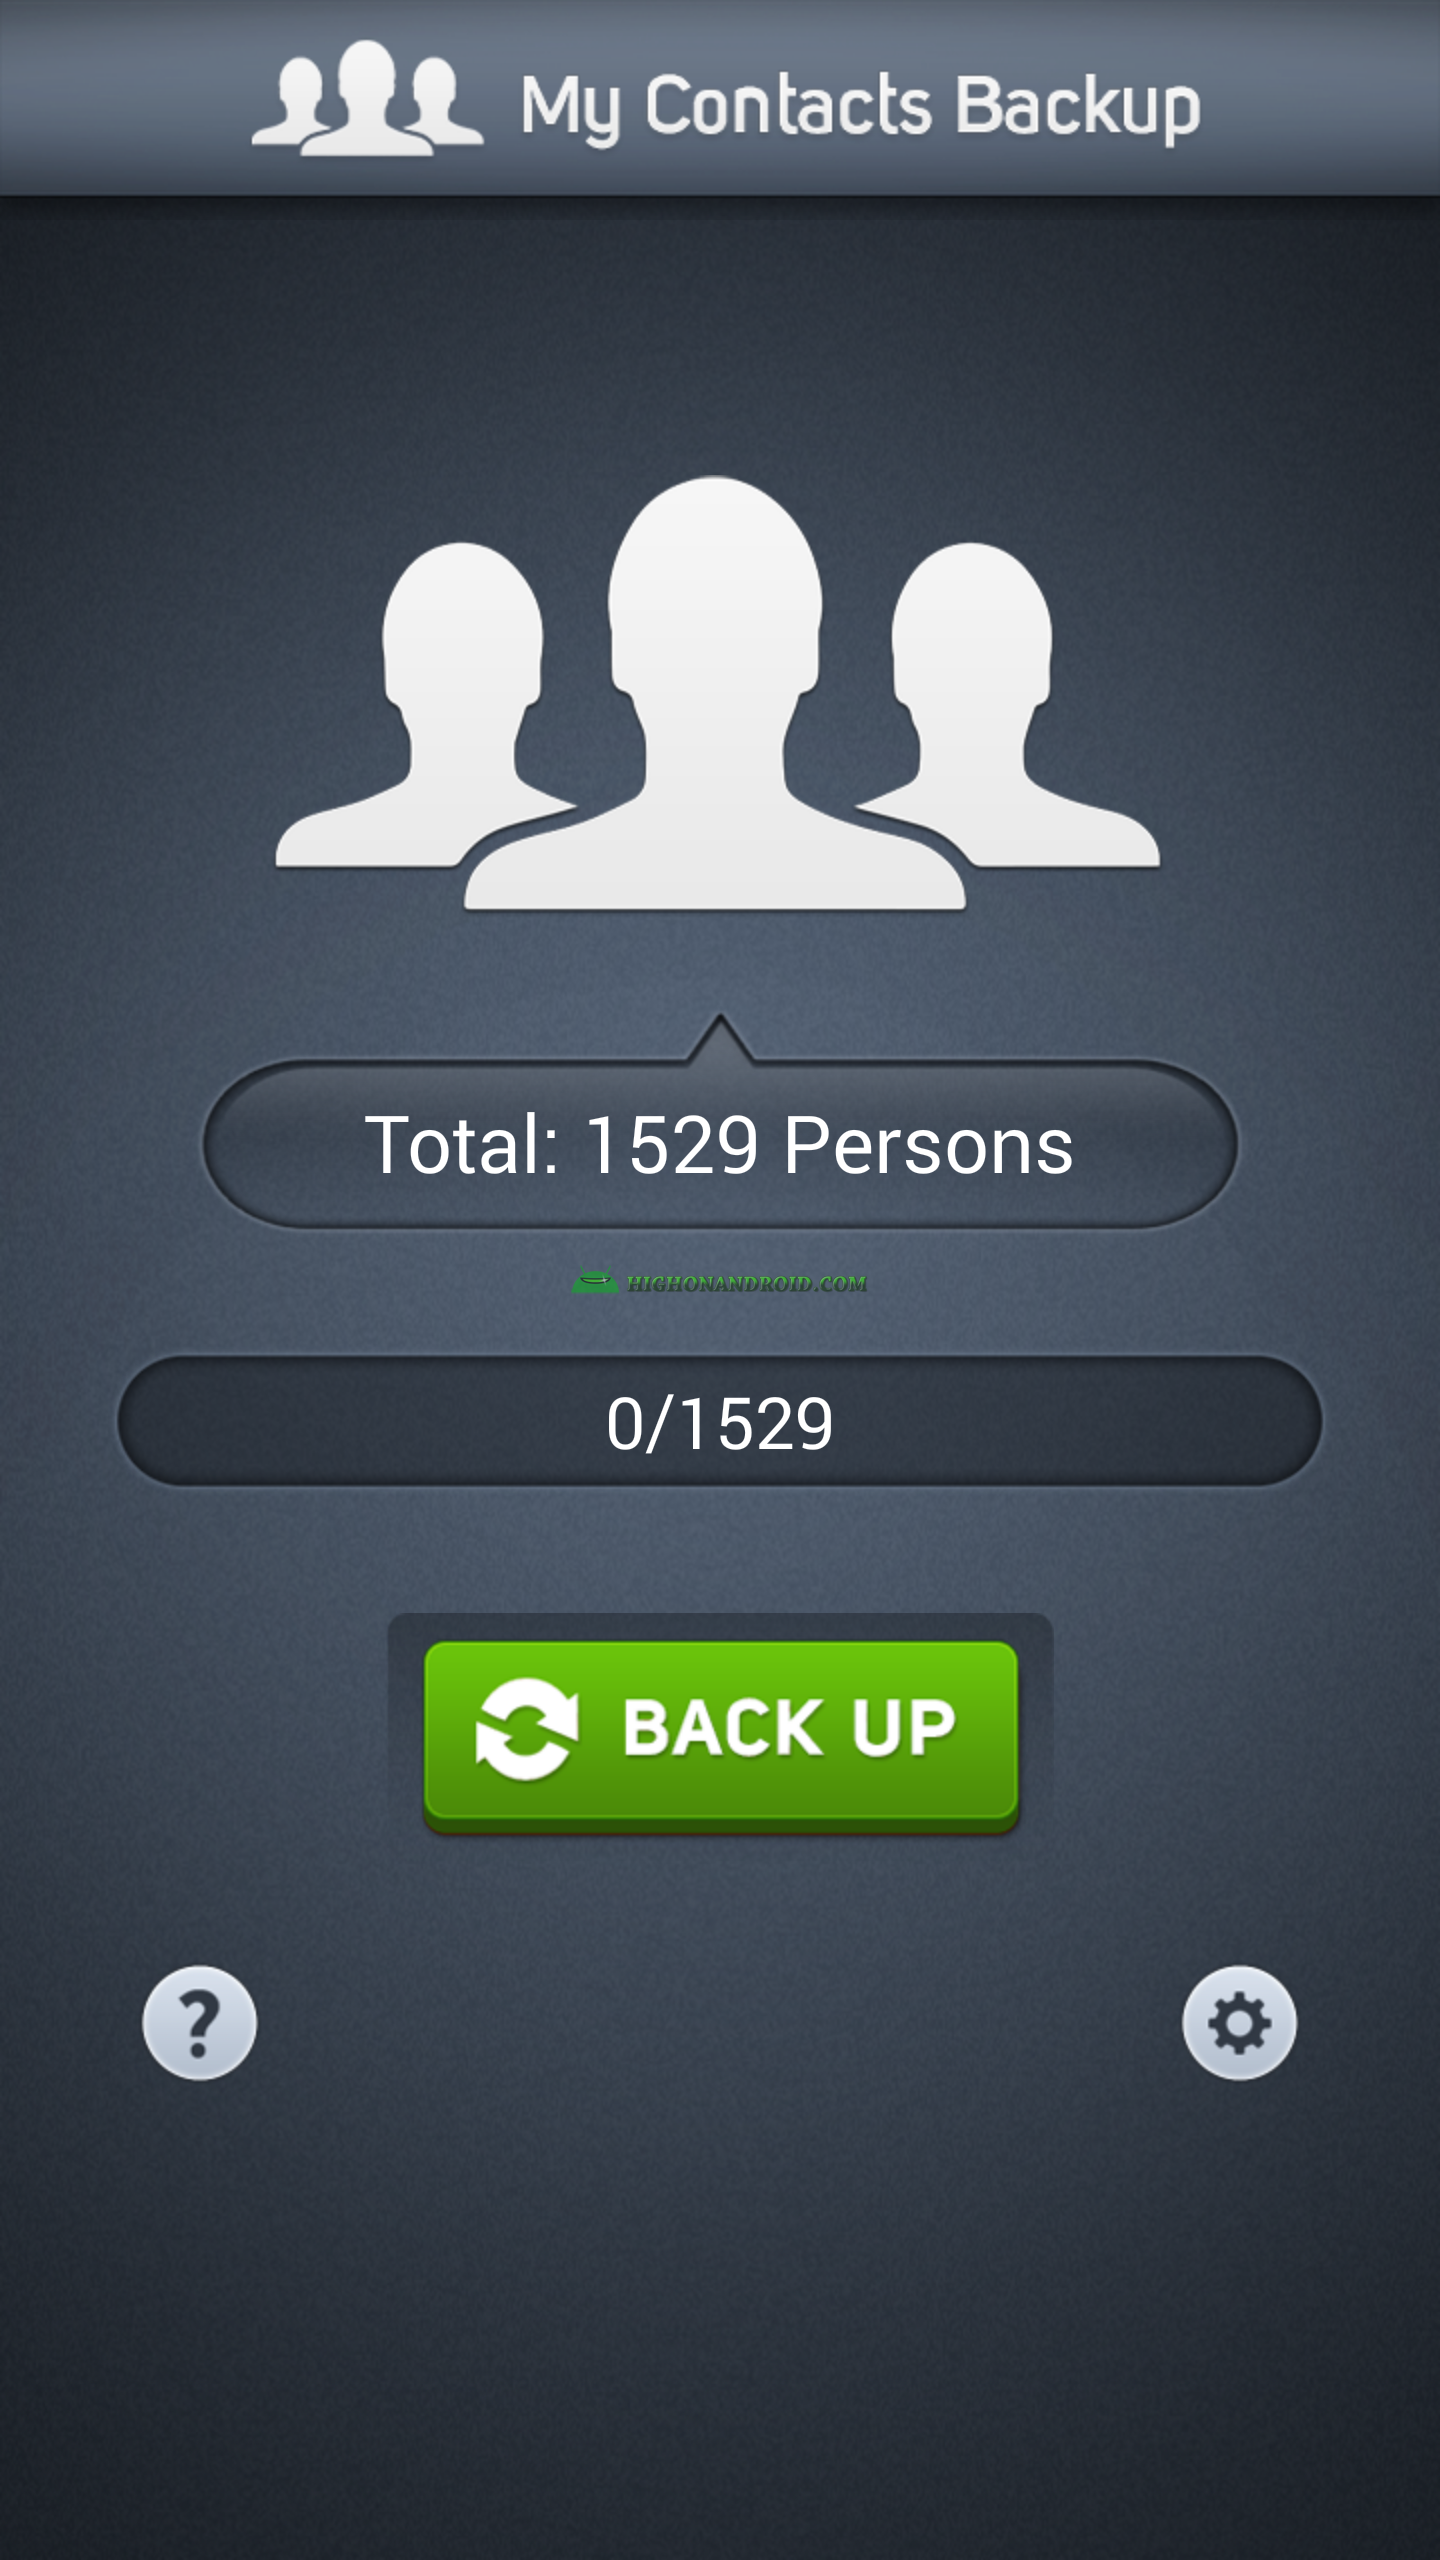
3. The app analyzes number of our contacts and then we tap on “BACK UP” button to start backing up contacts.
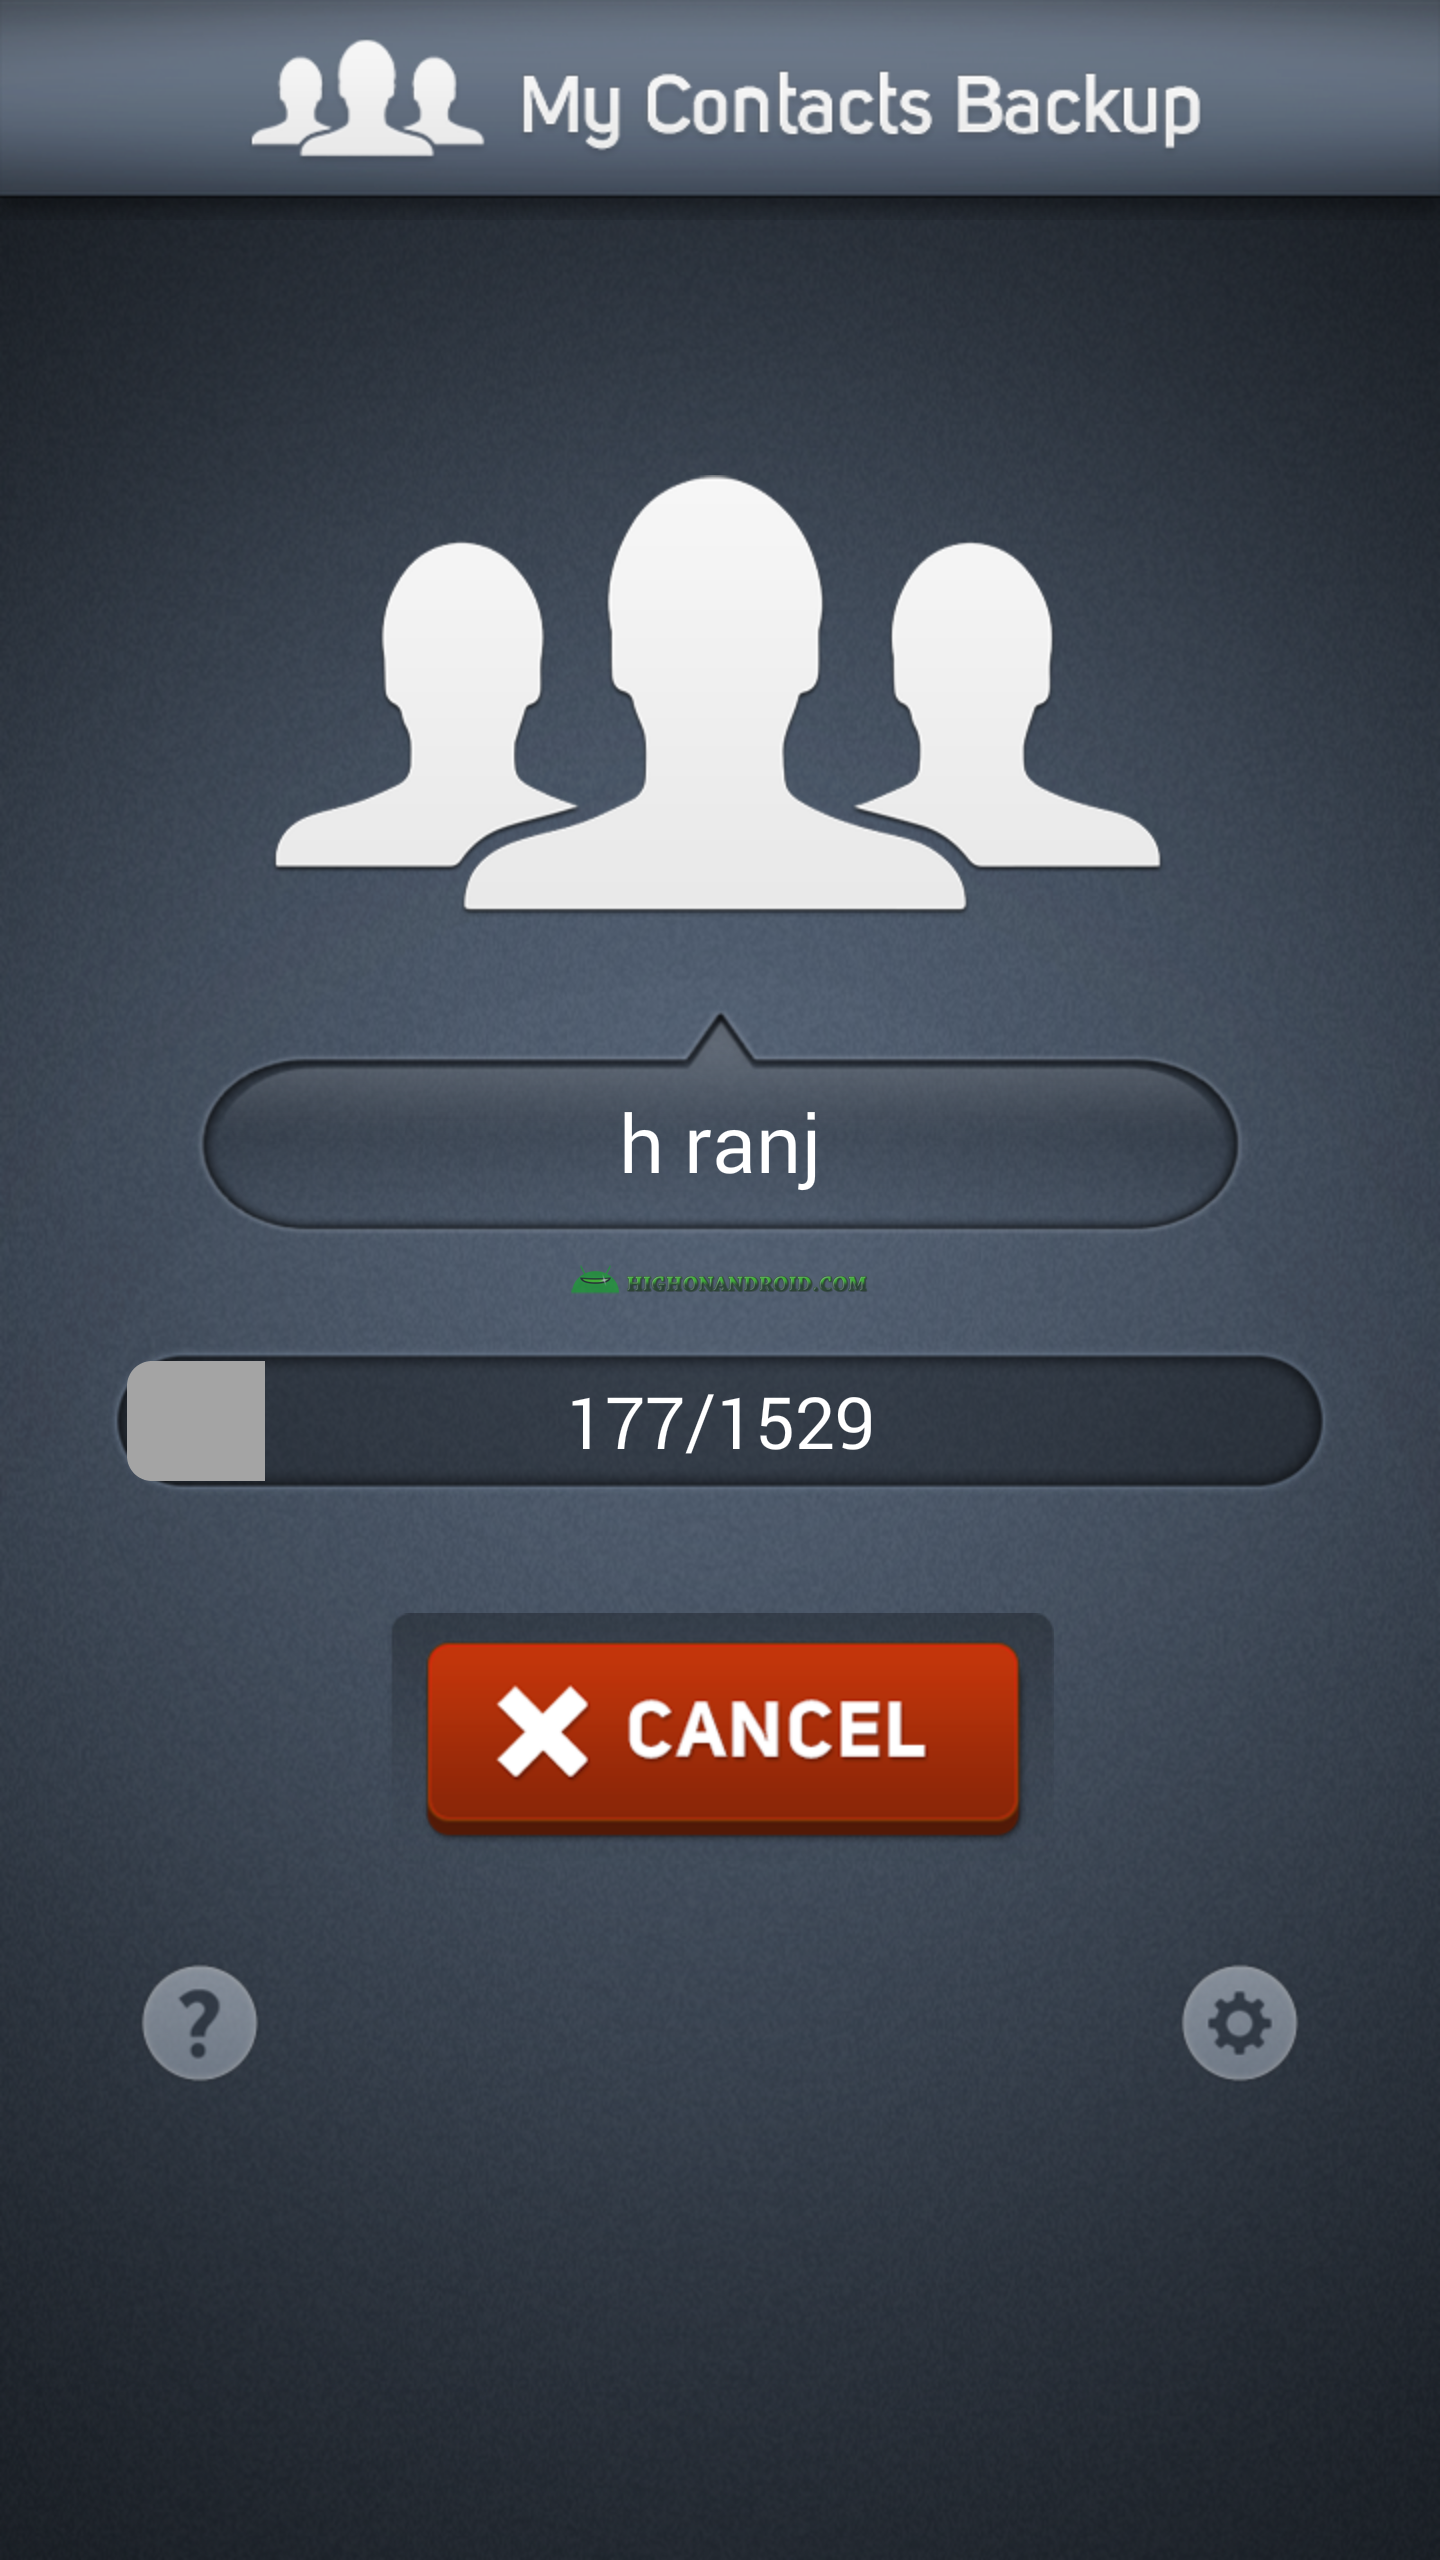
4. The process will start.
5. When the process finishes, the button will change to “SEND”.
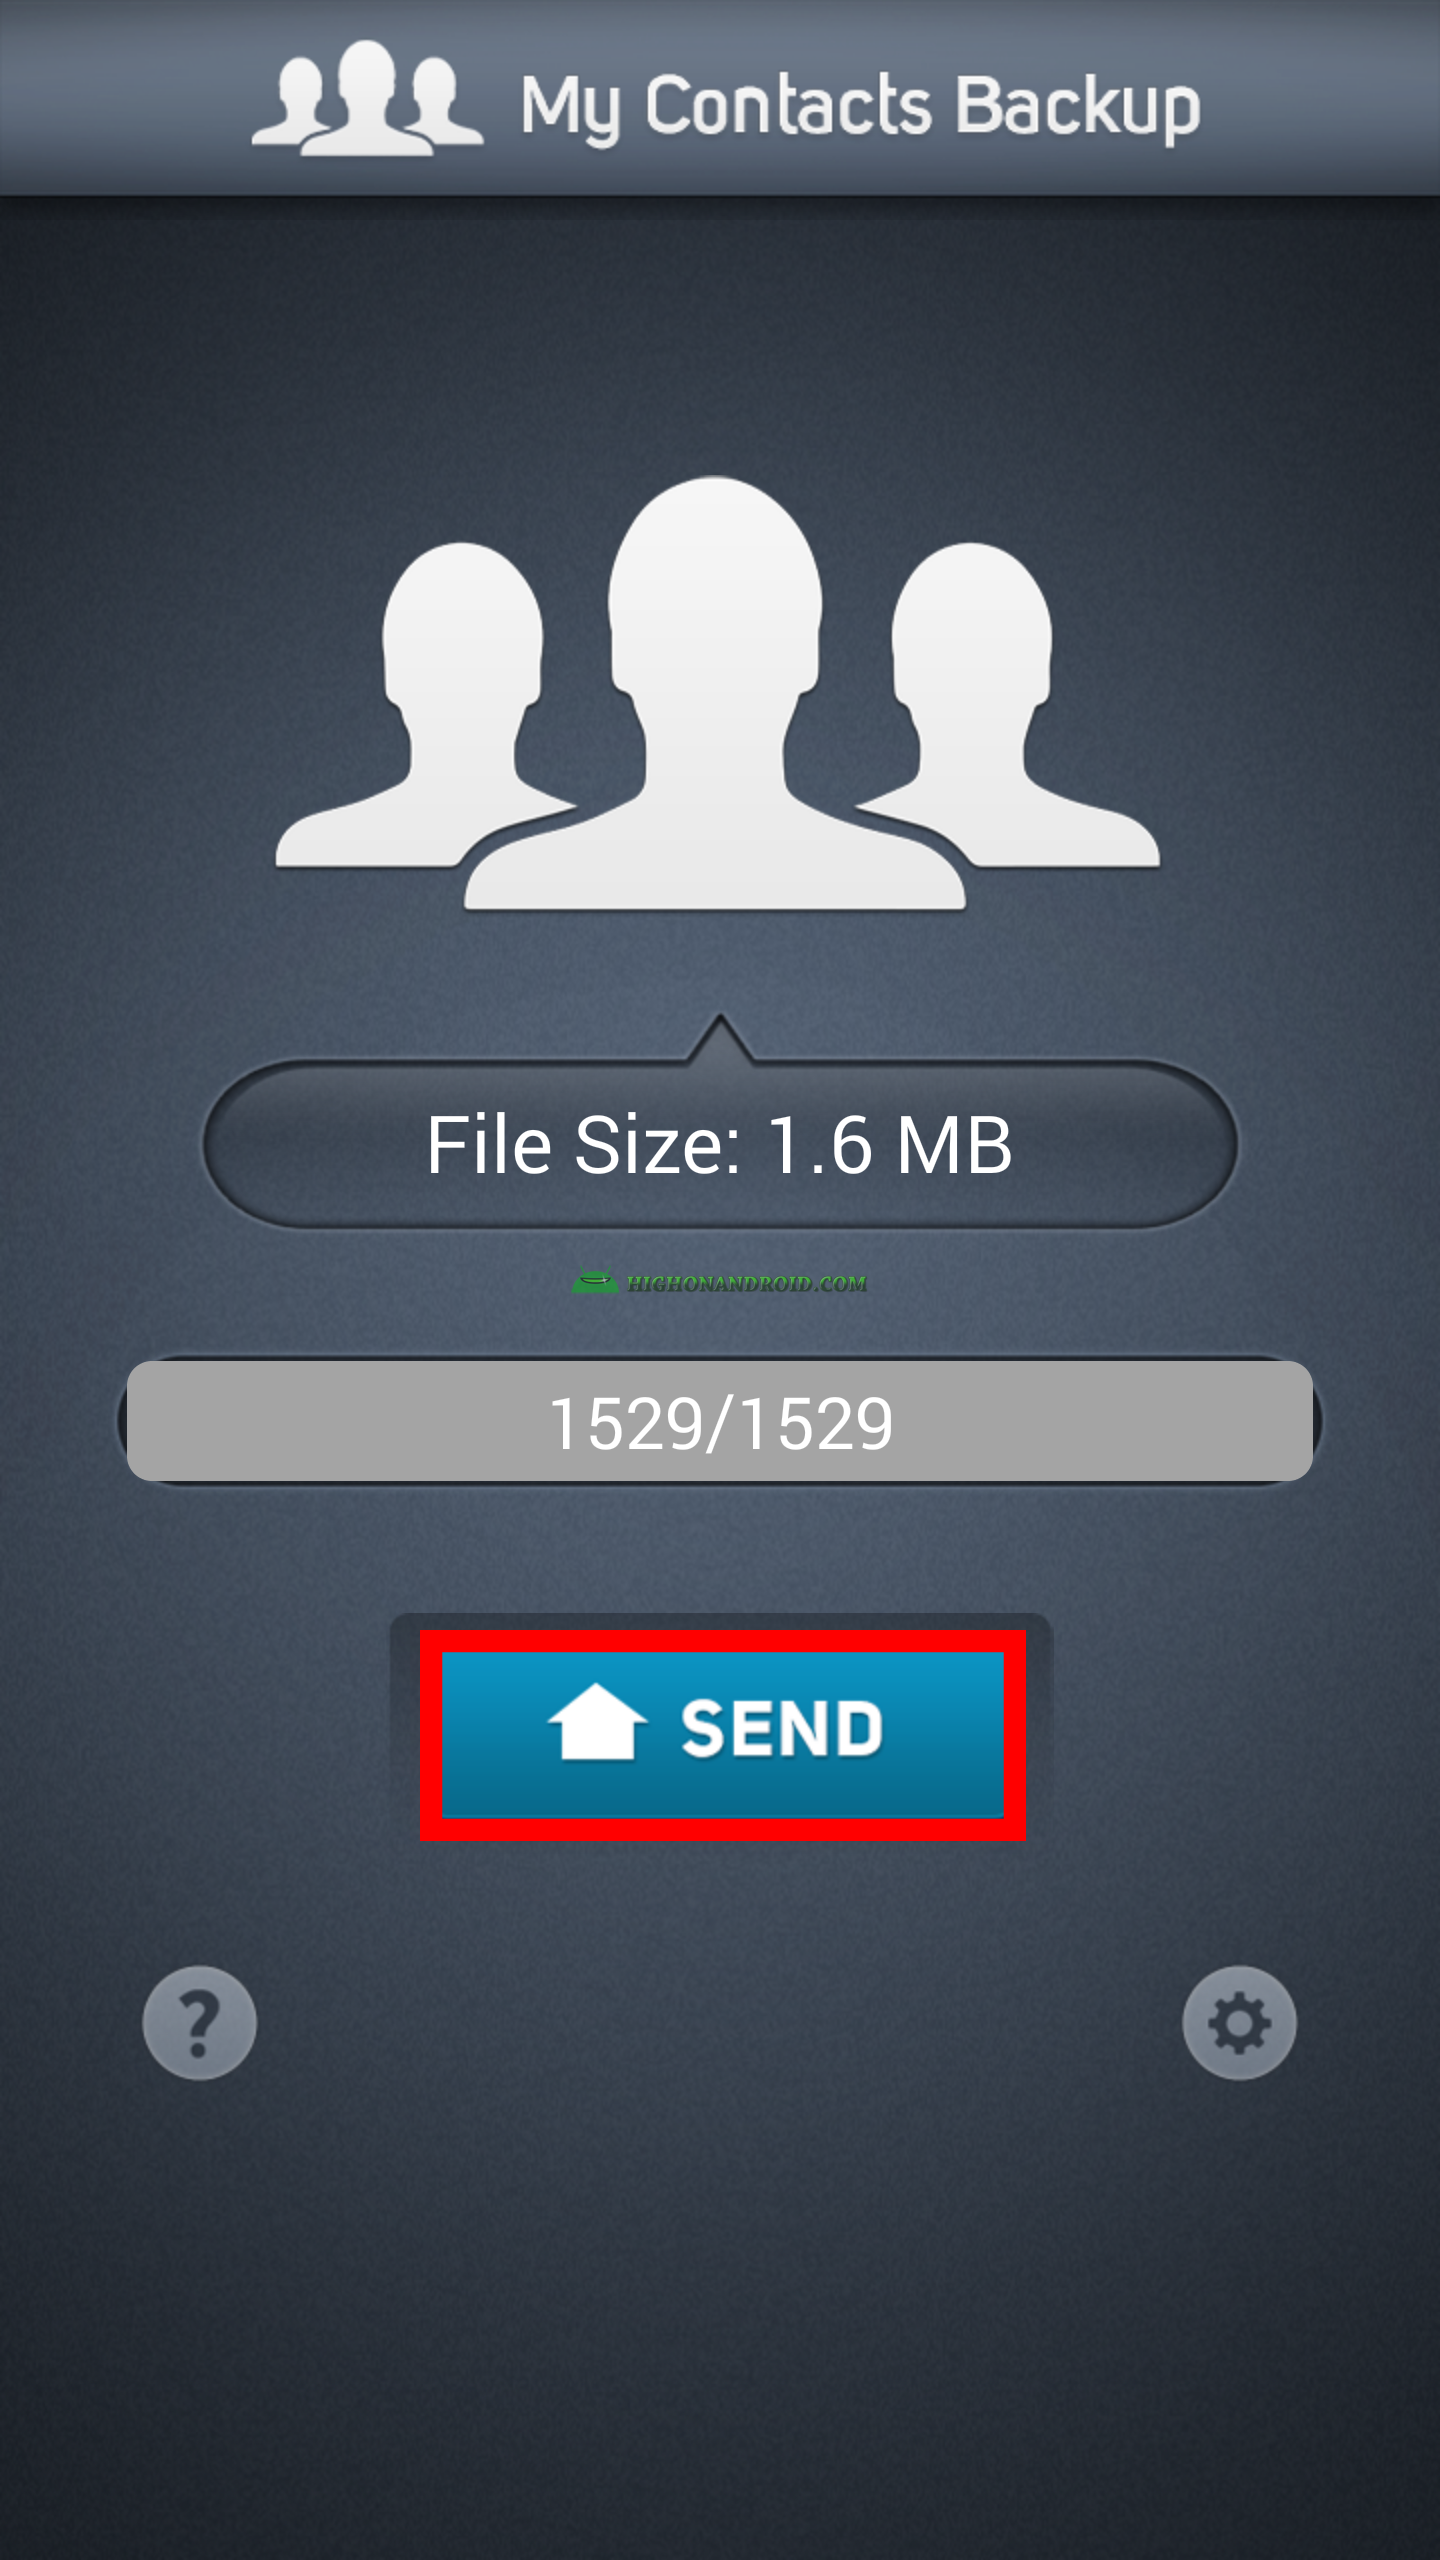
6. By tapping on “SEND” button, the following window will pop up showing us different ways of sending the contacts backup file.

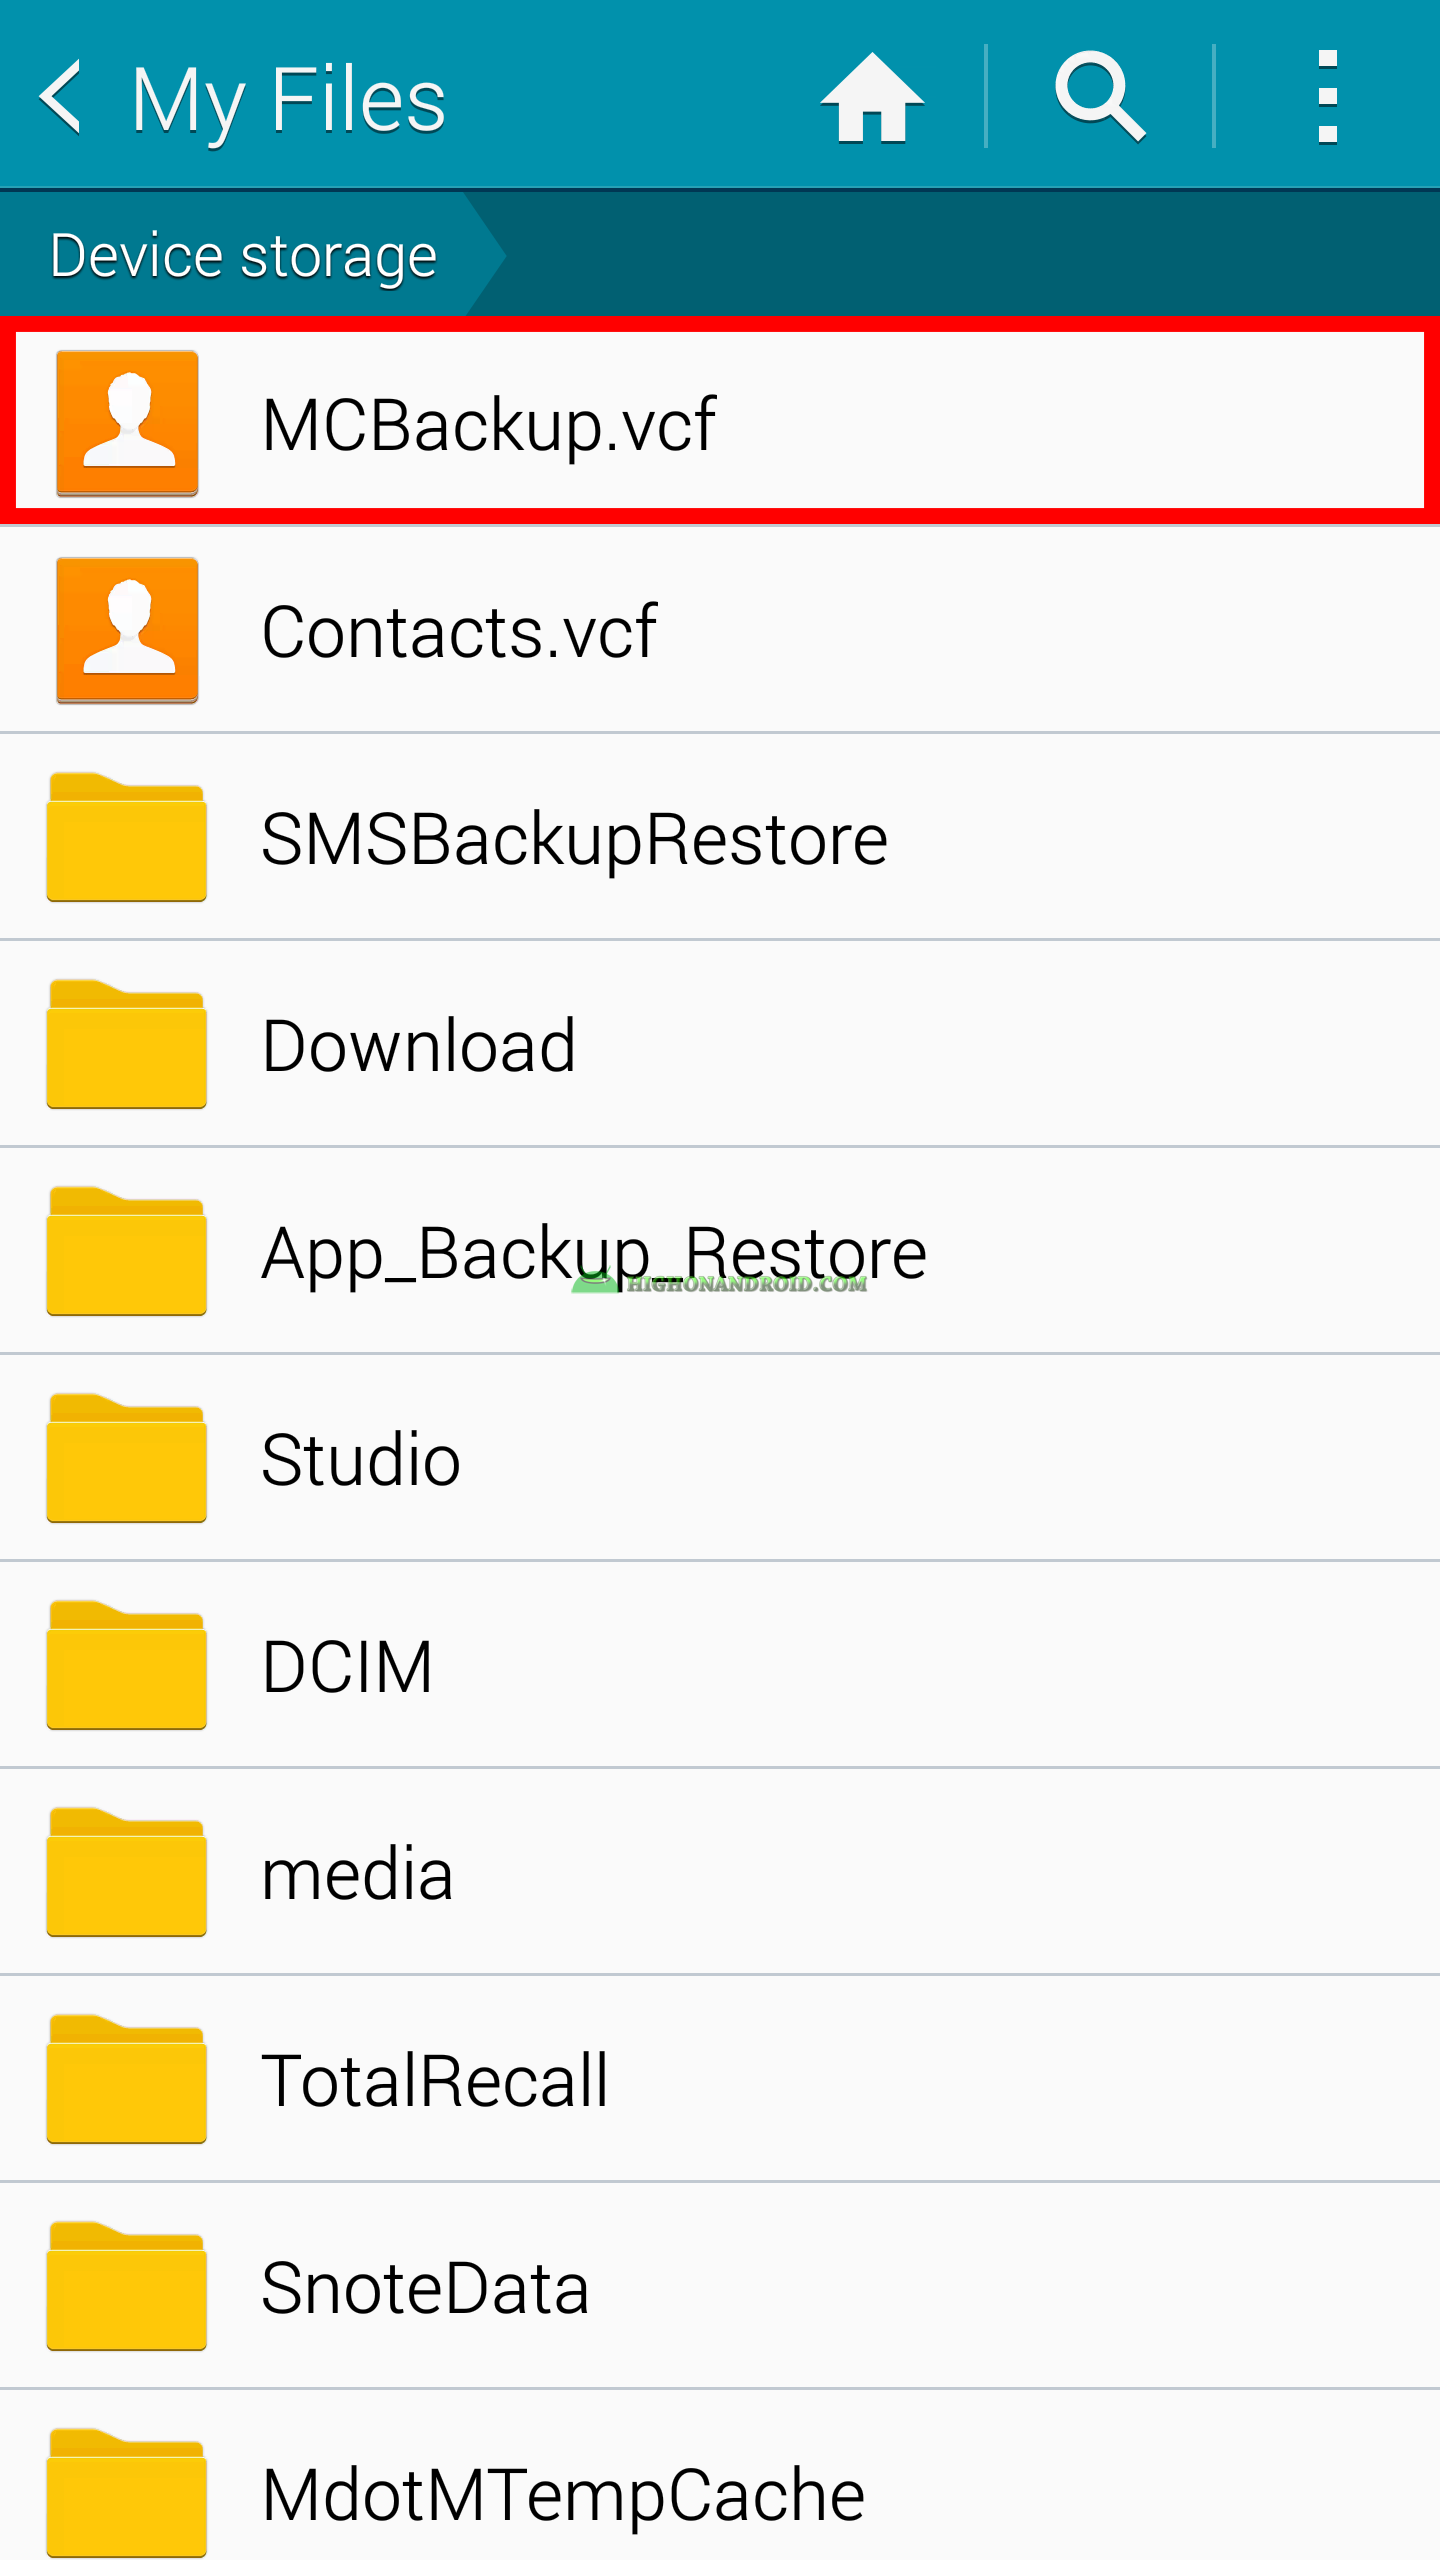
7. We can send the contacts as in the above window, or we can copy it manually to our computer. A file by the name of ”MyBackup.vcf” will be created in the root of your internal SD card.
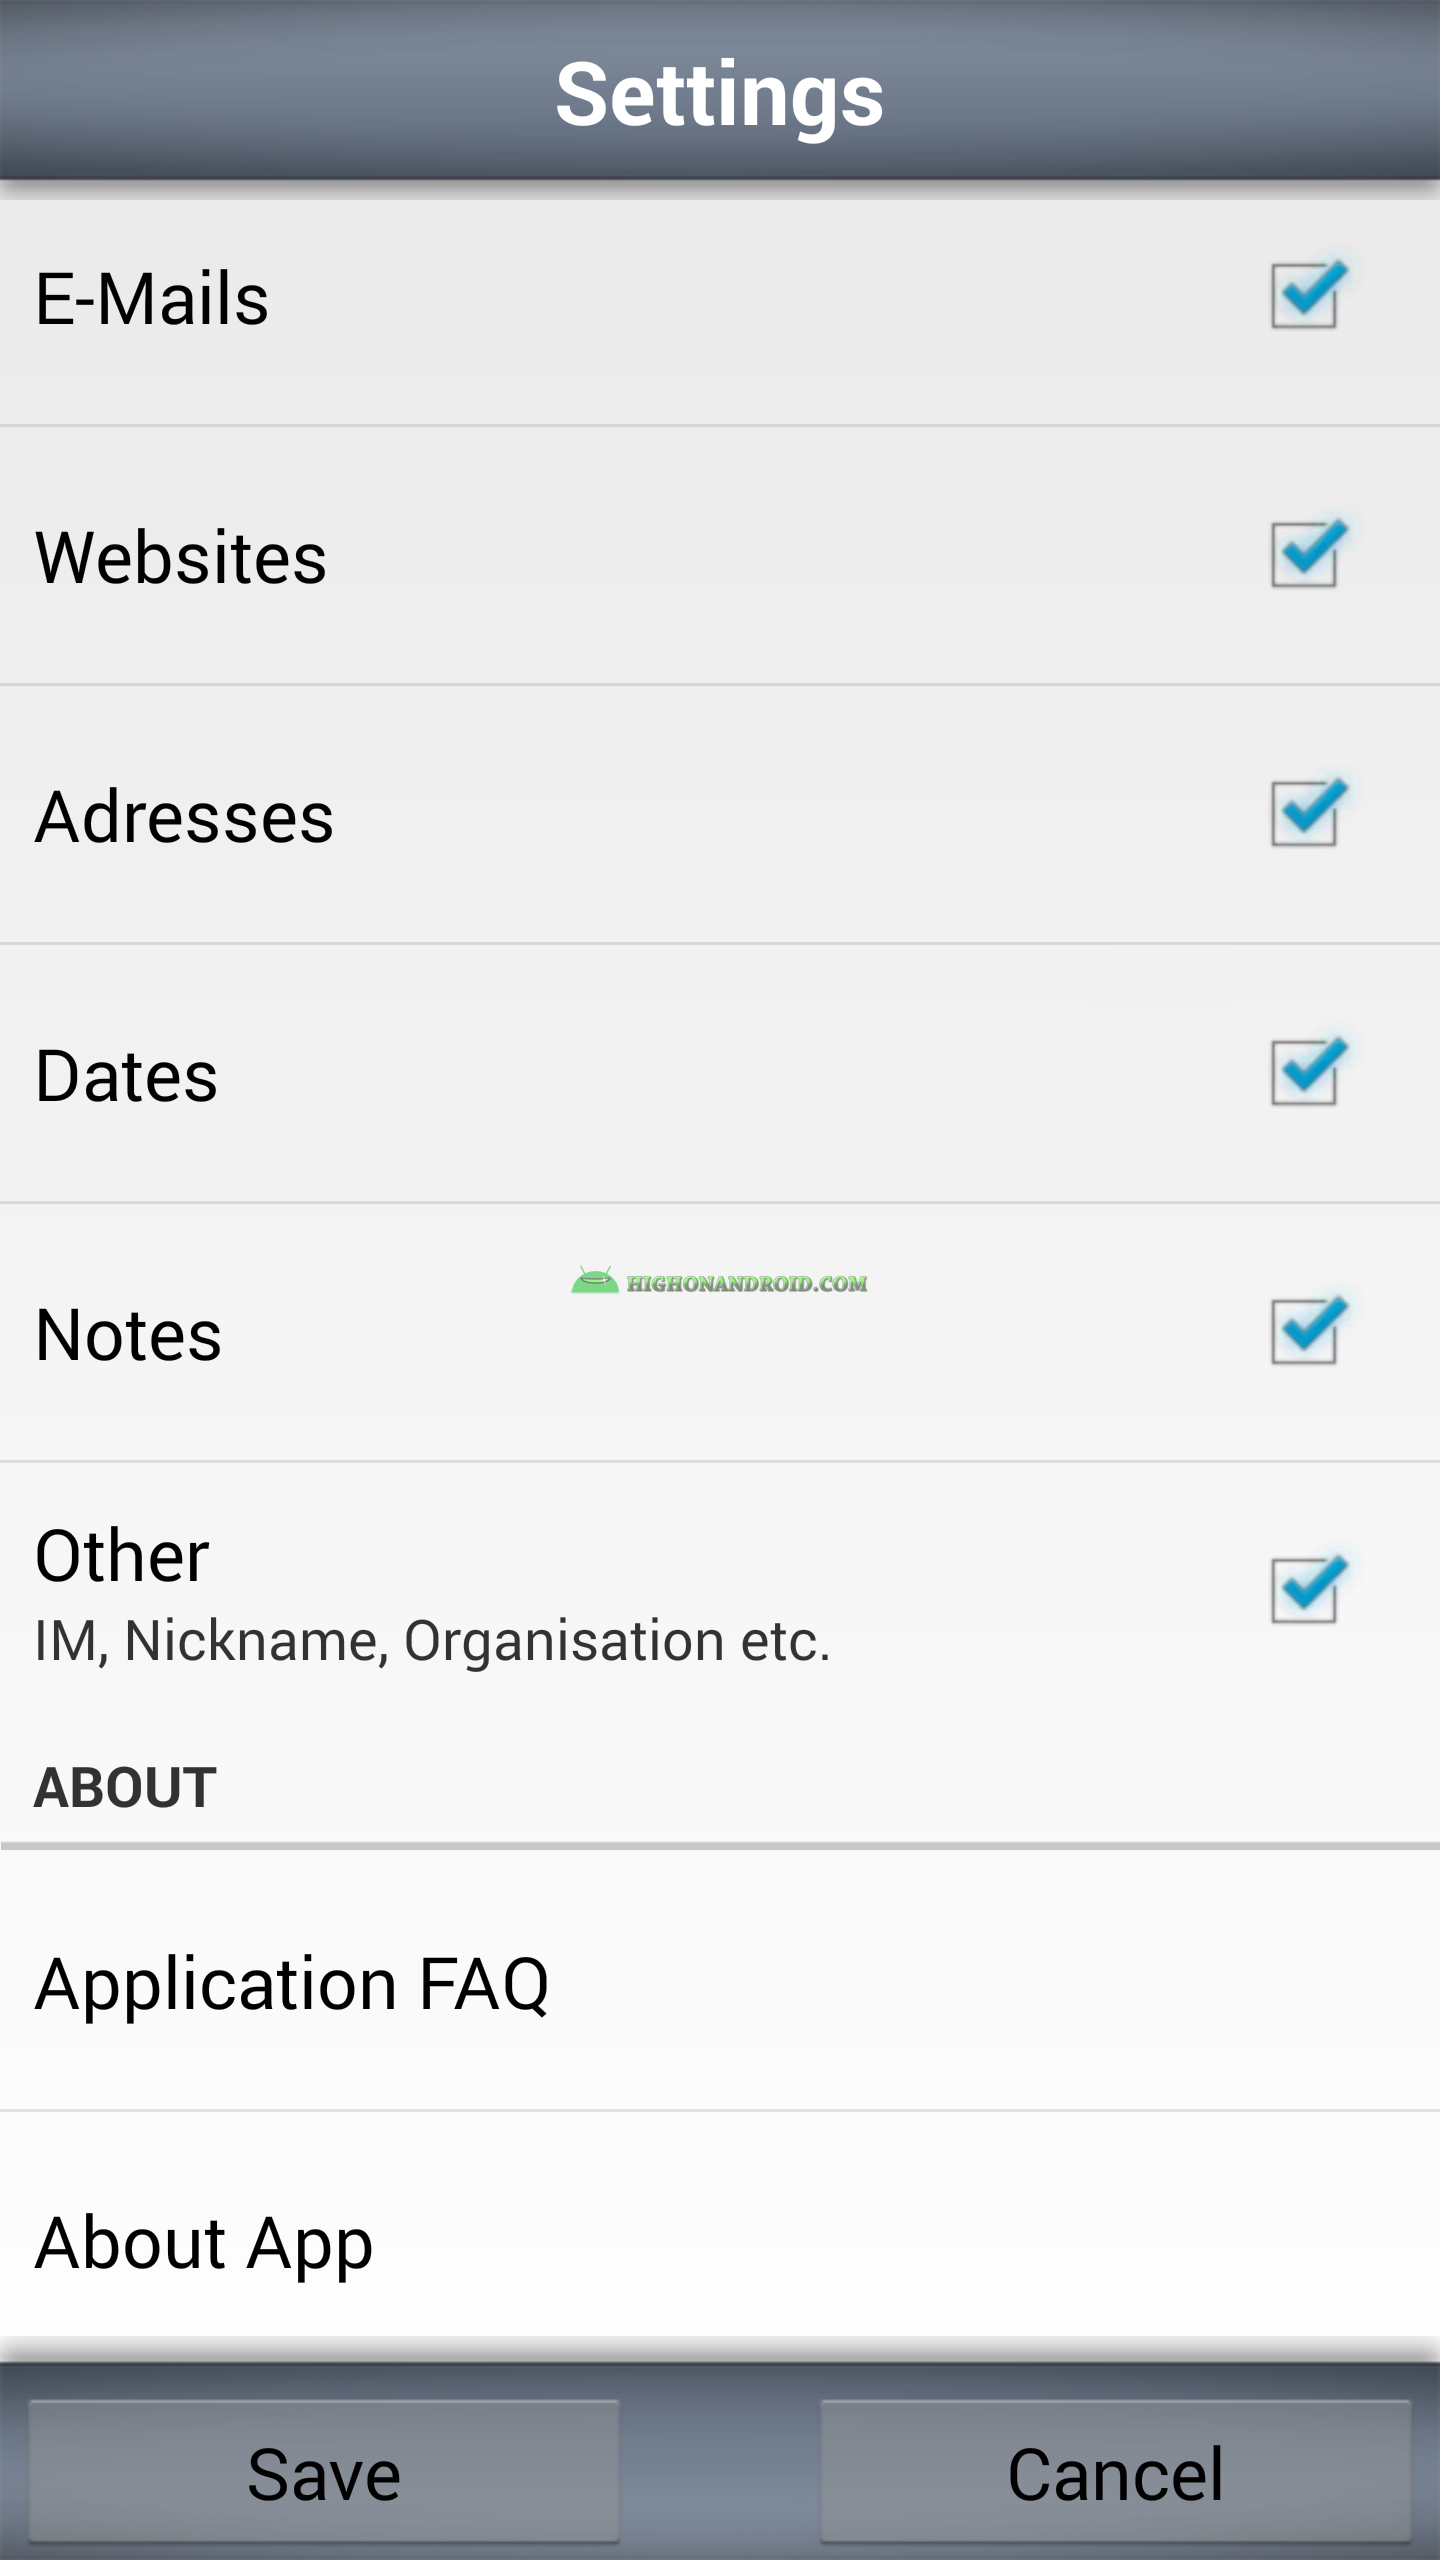
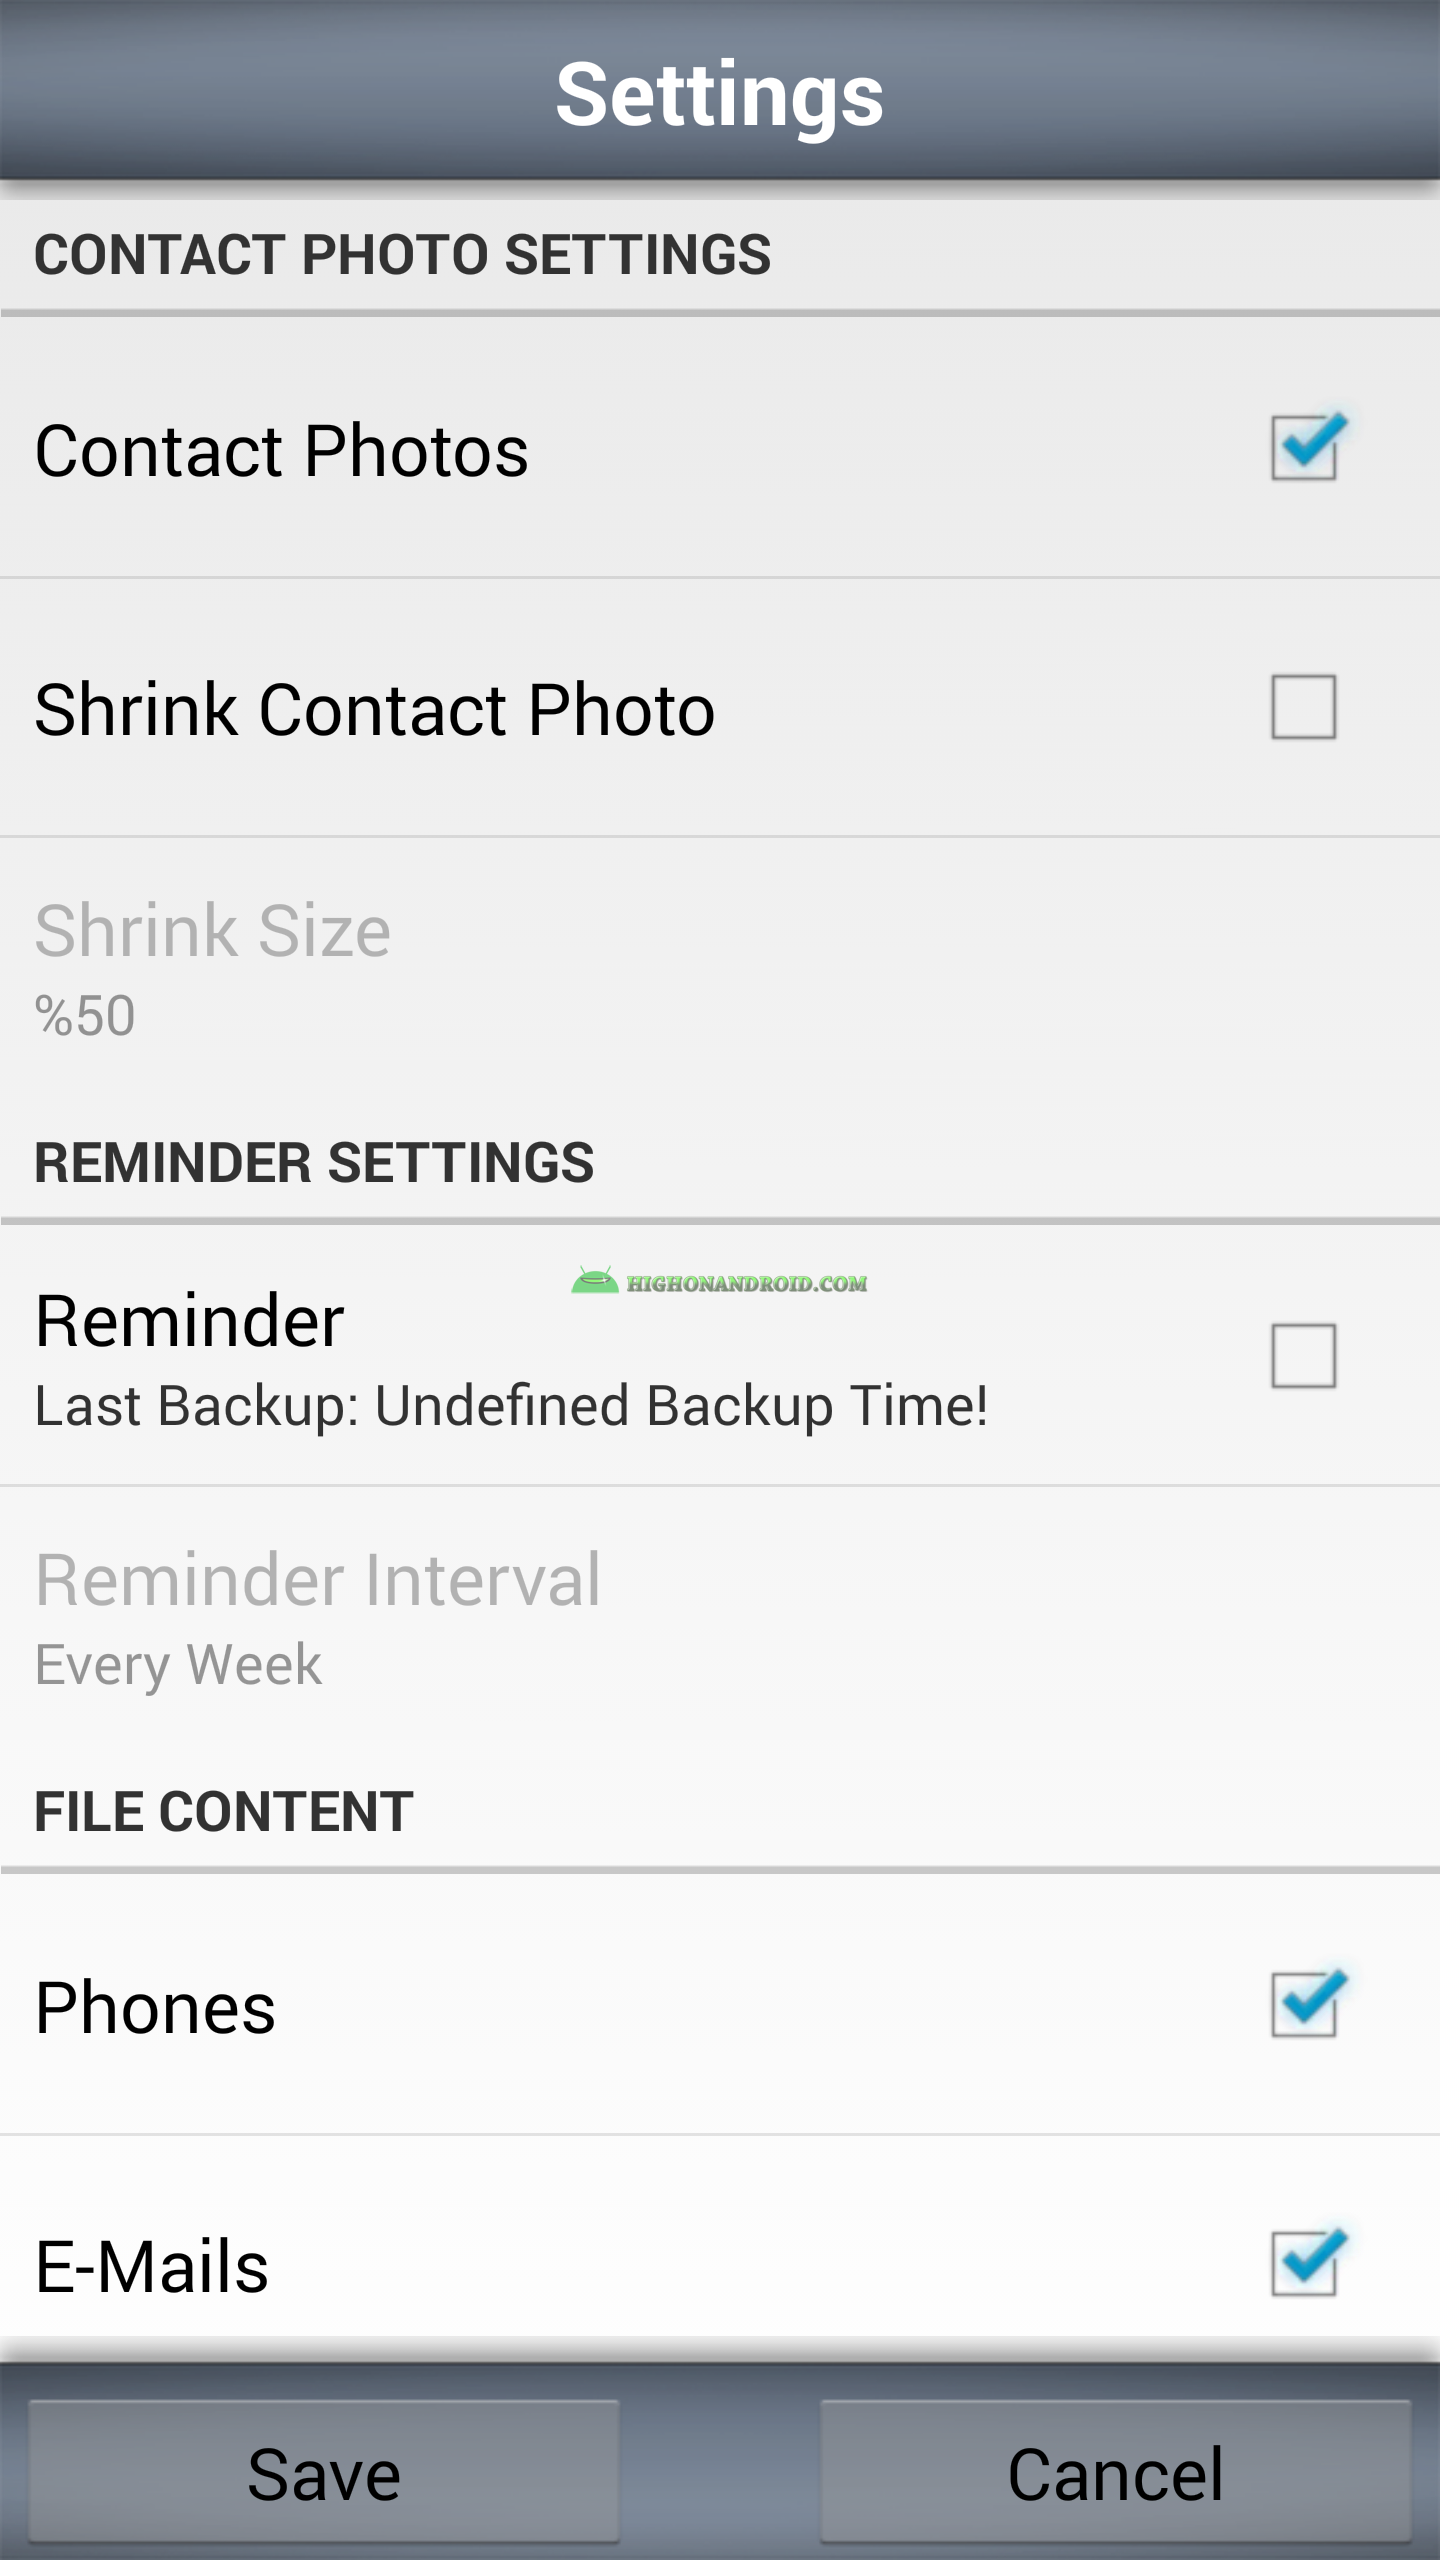
8. In settings of “My Contacts Backup”, you can define the items of the Contacts to be exported/backed up.
RESTORE:
Restoring contacts after doing one of the above methods of backing up is really simple.
Method 1:
Copy the (.vcf) file that we backed it up(using one of the above methods), and copy it to your phone. Then tap on it to restore the contacts.
Method 2:
Go to Settings->Account and do the exact steps of Method 2 and that should sync our contacts to our phone within minutes.
Method 3:
Go to GMail.com and sign in.
Then go the following link ( https://www.google.com/contacts ).
Tap on “More” and then “Import”.
It will redirect you to the Old Google Contacts page (at the time of writing this article).
Do the same steps and choose More->Import.
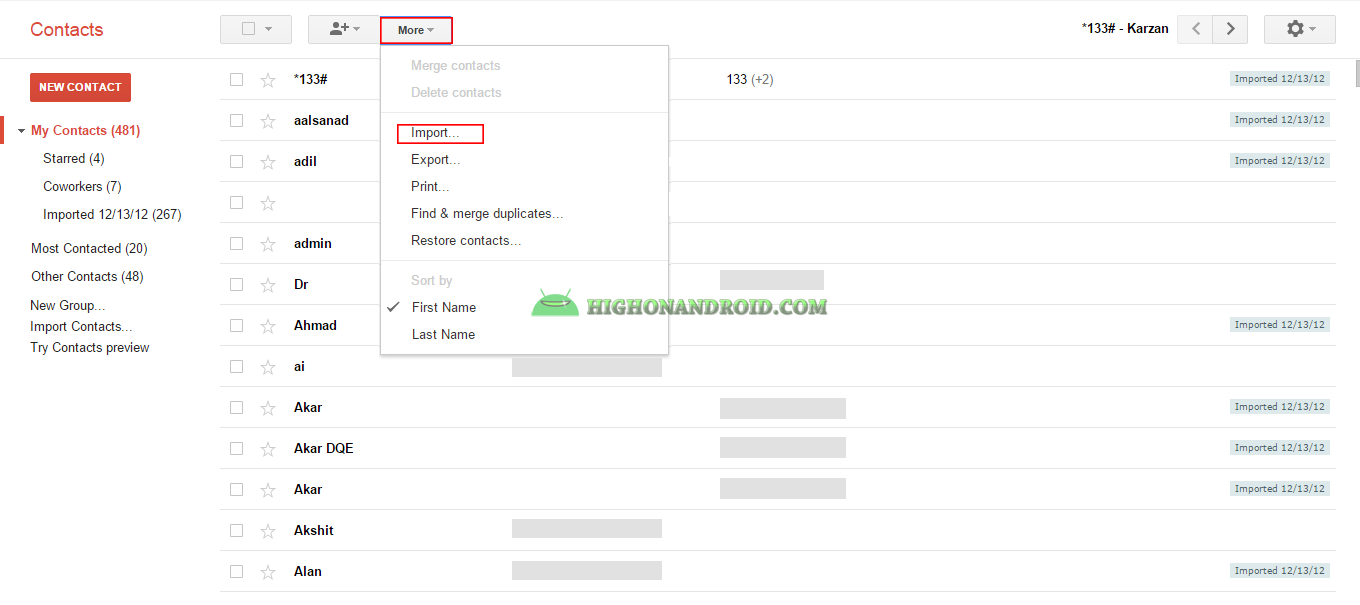
The following screen will show up.
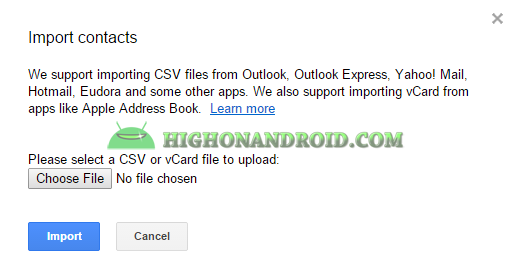
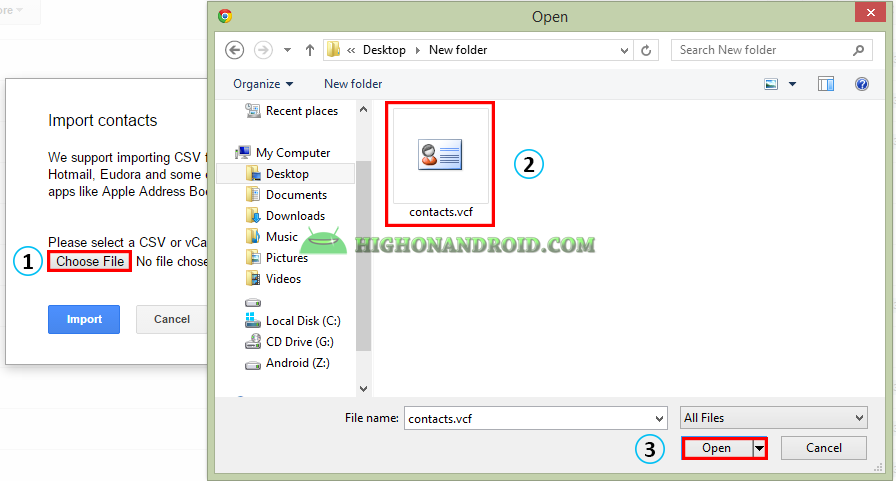
Click on ”Choose File”, then find the location of ”Contacts.vcf” that you backed it up using the above backup methods, Then click on the “Import” button.
Lastly, go to Settings->Accounts and follow the exact same steps of Method 2 of Backup. Your contacts should appear within minutes.
Have a question?
Please post all your questions at the new Android Rehab Center at HighOnAndroid Forum, thank you for understanding!Join the HighOnAndroid VIP Fans List for free help from Max and discounts on Android accessories.